The key decision I made mid-March was to commit to pursuing ventilation monitoring as my primary product development focus.
Prior to that decision, I hoped to use my writing plan to drive a breadth-first survey of the opportunities for each of my product ideas before deciding which had the best business potential to focus on first. Two factors changed my mind:
As noted last month, I m finding the writing process much slower and harder than I expected the survey across all the ideas may not complete until mid-year or later!
I ve realised that having begun building co2mon.nz last year, to stop work on the project at this point would leave me feeling that I had not done justice to developing the product and testing the market - seeing it to a conclusion is important to me.
This decision is an explicit choice to prioritize seeing a project through to a conclusion (successful, or otherwise) regardless of whether or not it has the highest potential of the various ideas I could invest time into. I m comfortable making that trade-off in this instance, but I am going to bound my time investment to two months. I ll evaluate at the end of May whether I m seeing sufficient traction and potential to justify continuing further with the idea.
I had only one fully uninterrupted work week in March due to a combination of days out due to school trips, two LandSAR call outs and various farm maintenance tasks. April will be similarly disrupted given school holidays and a planned family trip to Brisbane. Sharpening my focus feels particularly necessary given this reality to ensure I m not spread overly thin.
Consulting - 4/10
Goal: Execute a series of successful consulting engagements, building a reputation for myself and leaving happy customers willing to provide testimonials that support a pipeline of future opportunities.
Consulting hours were down from February, hitting only 31% of target this month as the client didn t make use of all the hours I had allocated for them. I didn t invest any time in advertising my services or developing new clients or projects over the month, which will now become a priority for April.
Product Development - 4/10
Goal: Grow my product development skill set by taking several ideas to MVP stage with customer feedback received, and launch at least one product which generates revenue and has growth potential.
With the new focus entirely on co2mon.nz, I spent a lot of time re-working and developing my thinking around how I want to take this forward, specifically trying to analyse where I saw an opportunity in the market. After attending a workshop on finding product market fit using quantifiable metrics at the Southern SaaS conference this month, I ve realised that much of the time I spent on this analysis is too insular and focused on my own observations - I need to get out and talk to a lot more people and get more feedback on their needs and understanding of the space instead. Seems obvious in retrospect!
I also spent a few days beginning to build another batch of prototype CO2 monitors so I have some units to use for experimentation and testing with potential customers as I get out and have those conversations. I can probably build one or two more batches of prototype monitors before needing to look at PCB assembly in earnest.
Professional Network Development - 8/10
Goal: To build a professional relationship with at least 30 new people this year.
This goal continues to be my highlight with 8 new contacts added this month and catch-ups with 4 existing people I had not spoken to for a while. I joined the KiwiSaaS central community and attended the SouthernSaas conference this month as well, which has been time well spent given the workshop learnings discussed above.
Writing - 3/10
Goal: To publish a high-quality piece of writing on this site at least once a week.
I published a single post, the first half of my updated ventilation monitoring business plan. I continue to find the writing process much harder and slower than I hoped or expected and remain well below my target publishing rate, but one post is better than zero!
I tested working with an editor I contracted via UpWork who provided some very useful feedback on the structure of my writing which helped to unblock some of my progress. I plan to continue doing this for at least a few more posts.
Community - 5/10
Goal: To support the growth of my local technical community by volunteering my experience and knowledge with others through activities such as mentoring, conference talks and similar.
I completed my review assignments for the SREcon23 APAC program committee. The conference looks to have a very exciting line up of talks scheduled, unfortunately the 2 talks I proposed didn t make the cut with my fellow PC members.
(TL;DR: I ve been trying out btrfs in some places instead of ext4, I ve hit absolutely zero issues and there are a few features that make me plan to use it more.)
Despite (or perhaps because of) working on storage products for a reasonable chunk of my career I have tended towards a conservative approach to my filesystems. By the time I came to Linux ext2 was well established, the move to ext3 was a logical one (the joys of added journalling for faster recovery after unclean shutdowns) and for a long time my default stack has been MD raid with LVM2 on top and then ext4 as the filesystem.
I ve dabbled with other filesystems; I ran XFS for a while on my VDR machine, and also when I had a large tradspool with INN, but never really had a hard requirement for it. I ve ended up adminning a machine that had JFS in the past, largely for historical reasons, but don t really remember any issues (vague recollections of NFS problems but that might just have been NFS being NFS).
However. ZFS has gathered itself a significant fan base and that makes me wonder about what it can offer and whether I want that. Firstly, let s be clear that I m never going to run a primary filesystem that isn t part of the mainline kernel. So ZFS itself is out, because I run Linux. So what do I want that I can t get with ext4? Firstly, I d like data checksumming. As storage gets larger there s a bigger chance of silent data corruption and while I have backups of the important stuff that doesn t help if you don t know you need to use them. Secondly, these days I have machines running containers, VMs, or with lots of source checkouts with a reasonable amount of overlap in their data. Disk space has got cheaper, but I d still like to be able to do some sort of deduplication of common blocks.
So, I ve been trying out btrfs. When I installed my desktop I went with btrfs for / and /home (I kept /boot as ext4). The thought process was that this was a local machine (so easy access if it all went wrong) and I take regular backups (so if it all went wrong I could recover). That was a year and a half ago and it s been pretty dull; I mostly forget I m running btrfs instead of ext4. This is on a machine that tracks Debian testing, so currently on kernel 6.1 but originally installed with 5.10. So it seems modern btrfs is reasonably stable for a machine that isn t driven especially hard. Good start.
The fact I forget what filesystem I m running points to the fact that I m not actually doing anything special here. I get the advantage of data checksumming, but not much else. 2 things spring to mind. Firstly, I don t do snapshots. Given I run testing it might be wiser if I did take a snapshot before every apt-get upgrade, and I have a friend who does just that, but even when I ve run unstable I ve never had a machine get itself into a state that I couldn t recover so I haven t spent time investigating. I note Ubuntu has apt-btrfs-snapshot but it doesn t seem to have any updates for years.
The other thing I didn t do when I installed my desktop is take advantage of subvolumes. I m still trying to get my head around exactly what I want them for, but they provide a partial replacement for LVM when it comes to carving up disk space. Instead of the separate / and /home LVs I created I could have created a single LV that would have a single btrfs filesystem on it. / and /home would then be separate subvolumes, allowing me to snapshot each individually. Quotas can also be applied separately so there s still the potential to prevent one subvolume taking all available space.
Encouraged by the lack of hassle with my desktop I decided to try moving my sbuild machine over to use btrfs for its build chroots. For Reasons this is a VM kindly hosted by a friend, rather than something local. To be honest these days I would probably go for local hosting, but it works and there s no strong reason to move. The point is it s remote, and so if migrating went wrong and I had to ask for assistance I d be bothering someone who s doing me a favour as it is.
The build VM is, of course, running LVM, and there was luckily some free space available. I m reasonably sure the underlying storage involves spinning rust, so I did a laborious set of pvmove commands to make sure all the available space was at the start of the PV, and created a new btrfs volume there. I was advised that while btrfs-convert would do the job it was better to create a fresh filesystem where possible. This time I did create an initial root subvolume.
Configuring up sbuild was then much simpler than I d expected. My setup originally started out as a set of tarballs for the chroots that would get untarred + used for the builds, which is pretty slow. Once overlayfs was mature enough I switched to that. I d had a conversation with Enrico about his nspawn/btrfs setup, but it turned out Russ Allbery had written an excellent set of instructions on sbuild with btrfs. I tweaked my existing setup based on his details, and I was in business. Each chroot is a separate subvolume - I don t actually end up having to mount them individually, but it means that only the chroot in use gets snapshotted. For example during a build the following can be observed:
# btrfs subvolume list /
ID 257 gen 111534 top level 5 path root
ID 271 gen 111525 top level 257 path srv/chroot/unstable-amd64-sbuild
ID 275 gen 27873 top level 257 path srv/chroot/bullseye-amd64-sbuild
ID 276 gen 27873 top level 257 path srv/chroot/buster-amd64-sbuild
ID 343 gen 111533 top level 257 path srv/chroot/snapshots/unstable-amd64-sbuild-328059a0-e74b-4d9f-be70-24b59ccba121
I was a little confused about whether I d got something wrong because the snapshot top level is listed as 257 rather than 271, but digging further with btrfs subvolume show on the 2 mounted directories correctly showed the snapshot had a parent equal to the chroot, not /.
As a final step I ran jdupes via jdupes -1Br / to deduplicate things across the filesystem. It didn t end up providing a significant saving unfortunately - I guess there s a reasonable amount of change between Debian releases - but I think tried it on my desktop, which tends to have a large number of similar source trees checked out. There I managed to save about 5% on /home, which didn t seem too shabby.
The sbuild setup has been in place for a couple of months now, and I ve run quite a few builds on it while preparing for the freeze. So I m fairly confident in the stability of the setup and my next move is to transition my local house server over to btrfs for its containers (which all run under systemd-nspawn). Those are generally running a Debian stable base so there should be a decent amount of commonality for deduping.
I m not saying I m yet at the point where I ll default to btrfs on new installs, but I m definitely looking at it for situations where I think I can get benefits from deduplication, or being able to divide up disk space without hard partitioning space.
(And, just to answer the worry I had when I started, I ve got nowhere near ENOSPC problems, but I believe they re handled much more gracefully these days. And my experience of ZFS when it got above 90% utilization was far from ideal too.)
I ve used hardware-backed OpenPGP keys since 2006 when I imported newly generated rsa1024 subkeys to a FSFE Fellowship card. This worked well for several years, and I recall buying more ZeitControl cards for multi-machine usage and backup purposes. As a side note, I recall being unsatisfied with the weak 1024-bit RSA subkeys at the time my primary key was a somewhat stronger 1280-bit RSA key created back in 2002 but OpenPGP cards at the time didn t support more than 1024 bit RSA, and were (and still often are) also limited to power-of-two RSA key sizes which I dislike.
I had my master key on disk with a strong password for a while, mostly to refresh expiration time of the subkeys and to sign other s OpenPGP keys. At some point I stopped carrying around encrypted copies of my master key. That was my main setup when I migrated to a new stronger RSA 3744 bit key with rsa2048 subkeys on a YubiKey NEO back in 2014. At that point, signing other s OpenPGP keys was a rare enough occurrence that I settled with bringing out my offline machine to perform this operation, transferring the public key to sign on USB sticks. In 2019 I re-evaluated my OpenPGP setup and ended up creating a offline Ed25519 key with subkeys on a FST-01G running Gnuk. My approach for signing other s OpenPGP keys were still to bring out my offline machine and sign things using the master secret using USB sticks for storage and transport. Which meant I almost never did that, because it took too much effort. So my 2019-era Ed25519 key still only has a handful of signatures on it, since I had essentially stopped signing other s keys which is the traditional way of getting signatures in return.
None of this caused any critical problem for me because I continued to use my old 2014-era RSA3744 key in parallel with my new 2019-era Ed25519 key, since too many systems didn t handle Ed25519. However, during 2022 this changed, and the only remaining environment that I still used my RSA3744 key for was in Debian and they require OpenPGP signatures on the new key to allow it to replace an older key. I was in denial about this sub-optimal solution during 2022 and endured its practical consequences, having to use the YubiKey NEO (which I had replaced with a permanently inserted YubiKey Nano at some point) for Debian-related purposes alone.
In December 2022 I bought a new laptop and setup a FST-01SZ with my Ed25519 key, and while I have taken a vacation from Debian, I continue to extend the expiration period on the old RSA3744-key in case I will ever have to use it again, so the overall OpenPGP setup was still sub-optimal. Having two valid OpenPGP keys at the same time causes people to use both for email encryption (leading me to have to use both devices), and the WKD Key Discovery protocol doesn t like two valid keys either. At FOSDEM 23 I ran into Andre Heinecke at GnuPG and I couldn t help complain about how complex and unsatisfying all OpenPGP-related matters were, and he mildly ignored my rant and asked why I didn t put the master key on another smartcard. The comment sunk in when I came home, and recently I connected all the dots and this post is a summary of what I did to move my offline OpenPGP master key to a Nitrokey Start.
First a word about device choice, I still prefer to use hardware devices that are as compatible with free software as possible, but the FST-01G or FST-01SZ are no longer easily available for purchase. I got a comment about Nitrokey start in my last post, and had two of them available to experiment with. There are things to dislike with the Nitrokey Start compared to the YubiKey (e.g., relative insecure chip architecture, the bulkier form factor and lack of FIDO/U2F/OATH support) but as far as I know there is no more widely available owner-controlled device that is manufactured for an intended purpose of implementing an OpenPGP card. Thus it hits the sweet spot for me.
Nitrokey Start
The first step is to run latest firmware on the Nitrokey Start for bug-fixes and important OpenSSH 9.0 compatibility and there are reproducible-built firmware published that you can install using pynitrokey. I run Trisquel 11 aramo on my laptop, which does not include the Python Pip package (likely because it promotes installing non-free software) so that was a slight complication. Building the firmware locally may have worked, and I would like to do that eventually to confirm the published firmware, however to save time I settled with installing the Ubuntu 22.04 packages on my machine:
$ sha256sum python3-pip*
ded6b3867a4a4cbaff0940cab366975d6aeecc76b9f2d2efa3deceb062668b1c  python3-pip_22.0.2+dfsg-1ubuntu0.2_all.deb
e1561575130c41dc3309023a345de337e84b4b04c21c74db57f599e267114325  python3-pip-whl_22.0.2+dfsg-1ubuntu0.2_all.deb
$ doas dpkg -i python3-pip*
...
$ doas apt install -f
...
$
Installing pynitrokey downloaded a bunch of dependencies, and it would be nice to audit the license and security vulnerabilities for each of them. (Verbose output below slightly redacted.)
jas@kaka:~$ pip3 install --user pynitrokey
Collecting pynitrokey
  Downloading pynitrokey-0.4.34-py3-none-any.whl (572 kB)
Collecting frozendict~=2.3.4
  Downloading frozendict-2.3.5-cp310-cp310-manylinux_2_17_x86_64.manylinux2014_x86_64.whl (113 kB)
Requirement already satisfied: click<9,>=8.0.0 in /usr/lib/python3/dist-packages (from pynitrokey) (8.0.3)
Collecting ecdsa
  Downloading ecdsa-0.18.0-py2.py3-none-any.whl (142 kB)
Collecting python-dateutil~=2.7.0
  Downloading python_dateutil-2.7.5-py2.py3-none-any.whl (225 kB)
Collecting fido2<2,>=1.1.0
  Downloading fido2-1.1.0-py3-none-any.whl (201 kB)
Collecting tlv8
  Downloading tlv8-0.10.0.tar.gz (16 kB)
  Preparing metadata (setup.py) ... done
Requirement already satisfied: certifi>=14.5.14 in /usr/lib/python3/dist-packages (from pynitrokey) (2020.6.20)
Requirement already satisfied: pyusb in /usr/lib/python3/dist-packages (from pynitrokey) (1.2.1.post1)
Collecting urllib3~=1.26.7
  Downloading urllib3-1.26.15-py2.py3-none-any.whl (140 kB)
Collecting spsdk<1.8.0,>=1.7.0
  Downloading spsdk-1.7.1-py3-none-any.whl (684 kB)
Collecting typing_extensions~=4.3.0
  Downloading typing_extensions-4.3.0-py3-none-any.whl (25 kB)
Requirement already satisfied: cryptography<37,>=3.4.4 in /usr/lib/python3/dist-packages (from pynitrokey) (3.4.8)
Collecting intelhex
  Downloading intelhex-2.3.0-py2.py3-none-any.whl (50 kB)
Collecting nkdfu
  Downloading nkdfu-0.2-py3-none-any.whl (16 kB)
Requirement already satisfied: requests in /usr/lib/python3/dist-packages (from pynitrokey) (2.25.1)
Collecting tqdm
  Downloading tqdm-4.65.0-py3-none-any.whl (77 kB)
Collecting nrfutil<7,>=6.1.4
  Downloading nrfutil-6.1.7.tar.gz (845 kB)
  Preparing metadata (setup.py) ... done
Requirement already satisfied: cffi in /usr/lib/python3/dist-packages (from pynitrokey) (1.15.0)
Collecting crcmod
  Downloading crcmod-1.7.tar.gz (89 kB)
  Preparing metadata (setup.py) ... done
Collecting libusb1==1.9.3
  Downloading libusb1-1.9.3-py3-none-any.whl (60 kB)
Collecting pc_ble_driver_py>=0.16.4
  Downloading pc_ble_driver_py-0.17.0-cp310-cp310-manylinux_2_17_x86_64.manylinux2014_x86_64.whl (2.9 MB)
Collecting piccata
  Downloading piccata-2.0.3-py3-none-any.whl (21 kB)
Collecting protobuf<4.0.0,>=3.17.3
  Downloading protobuf-3.20.3-cp310-cp310-manylinux_2_12_x86_64.manylinux2010_x86_64.whl (1.1 MB)
Collecting pyserial
  Downloading pyserial-3.5-py2.py3-none-any.whl (90 kB)
Collecting pyspinel>=1.0.0a3
  Downloading pyspinel-1.0.3.tar.gz (58 kB)
  Preparing metadata (setup.py) ... done
Requirement already satisfied: pyyaml in /usr/lib/python3/dist-packages (from nrfutil<7,>=6.1.4->pynitrokey) (5.4.1)
Requirement already satisfied: six>=1.5 in /usr/lib/python3/dist-packages (from python-dateutil~=2.7.0->pynitrokey) (1.16.0)
Collecting pylink-square<0.11.9,>=0.8.2
  Downloading pylink_square-0.11.1-py2.py3-none-any.whl (78 kB)
Collecting jinja2<3.1,>=2.11
  Downloading Jinja2-3.0.3-py3-none-any.whl (133 kB)
Collecting bincopy<17.11,>=17.10.2
  Downloading bincopy-17.10.3-py3-none-any.whl (17 kB)
Collecting fastjsonschema>=2.15.1
  Downloading fastjsonschema-2.16.3-py3-none-any.whl (23 kB)
Collecting astunparse<2,>=1.6
  Downloading astunparse-1.6.3-py2.py3-none-any.whl (12 kB)
Collecting oscrypto~=1.2
  Downloading oscrypto-1.3.0-py2.py3-none-any.whl (194 kB)
Collecting deepmerge==0.3.0
  Downloading deepmerge-0.3.0-py2.py3-none-any.whl (7.6 kB)
Collecting pyocd<=0.31.0,>=0.28.3
  Downloading pyocd-0.31.0-py3-none-any.whl (12.5 MB)
Collecting click-option-group<0.6,>=0.3.0
  Downloading click_option_group-0.5.5-py3-none-any.whl (12 kB)
Collecting pycryptodome<4,>=3.9.3
  Downloading pycryptodome-3.17-cp35-abi3-manylinux_2_17_x86_64.manylinux2014_x86_64.whl (2.1 MB)
Collecting pyocd-pemicro<1.2.0,>=1.1.1
  Downloading pyocd_pemicro-1.1.5-py3-none-any.whl (9.0 kB)
Requirement already satisfied: colorama<1,>=0.4.4 in /usr/lib/python3/dist-packages (from spsdk<1.8.0,>=1.7.0->pynitrokey) (0.4.4)
Collecting commentjson<1,>=0.9
  Downloading commentjson-0.9.0.tar.gz (8.7 kB)
  Preparing metadata (setup.py) ... done
Requirement already satisfied: asn1crypto<2,>=1.2 in /usr/lib/python3/dist-packages (from spsdk<1.8.0,>=1.7.0->pynitrokey) (1.4.0)
Collecting pypemicro<0.2.0,>=0.1.9
  Downloading pypemicro-0.1.11-py3-none-any.whl (5.7 MB)
Collecting libusbsio>=2.1.11
  Downloading libusbsio-2.1.11-py3-none-any.whl (247 kB)
Collecting sly==0.4
  Downloading sly-0.4.tar.gz (60 kB)
  Preparing metadata (setup.py) ... done
Collecting ruamel.yaml<0.18.0,>=0.17
  Downloading ruamel.yaml-0.17.21-py3-none-any.whl (109 kB)
Collecting cmsis-pack-manager<0.3.0
  Downloading cmsis_pack_manager-0.2.10-py2.py3-none-manylinux1_x86_64.whl (25.1 MB)
Collecting click-command-tree==1.1.0
  Downloading click_command_tree-1.1.0-py3-none-any.whl (3.6 kB)
Requirement already satisfied: bitstring<3.2,>=3.1 in /usr/lib/python3/dist-packages (from spsdk<1.8.0,>=1.7.0->pynitrokey) (3.1.7)
Collecting hexdump~=3.3
  Downloading hexdump-3.3.zip (12 kB)
  Preparing metadata (setup.py) ... done
Collecting fire
  Downloading fire-0.5.0.tar.gz (88 kB)
  Preparing metadata (setup.py) ... done
Requirement already satisfied: wheel<1.0,>=0.23.0 in /usr/lib/python3/dist-packages (from astunparse<2,>=1.6->spsdk<1.8.0,>=1.7.0->pynitrokey) (0.37.1)
Collecting humanfriendly
  Downloading humanfriendly-10.0-py2.py3-none-any.whl (86 kB)
Collecting argparse-addons>=0.4.0
  Downloading argparse_addons-0.12.0-py3-none-any.whl (3.3 kB)
Collecting pyelftools
  Downloading pyelftools-0.29-py2.py3-none-any.whl (174 kB)
Collecting milksnake>=0.1.2
  Downloading milksnake-0.1.5-py2.py3-none-any.whl (9.6 kB)
Requirement already satisfied: appdirs>=1.4 in /usr/lib/python3/dist-packages (from cmsis-pack-manager<0.3.0->spsdk<1.8.0,>=1.7.0->pynitrokey) (1.4.4)
Collecting lark-parser<0.8.0,>=0.7.1
  Downloading lark-parser-0.7.8.tar.gz (276 kB)
  Preparing metadata (setup.py) ... done
Requirement already satisfied: MarkupSafe>=2.0 in /usr/lib/python3/dist-packages (from jinja2<3.1,>=2.11->spsdk<1.8.0,>=1.7.0->pynitrokey) (2.0.1)
Collecting asn1crypto<2,>=1.2
  Downloading asn1crypto-1.5.1-py2.py3-none-any.whl (105 kB)
Collecting wrapt
  Downloading wrapt-1.15.0-cp310-cp310-manylinux_2_5_x86_64.manylinux1_x86_64.manylinux_2_17_x86_64.manylinux2014_x86_64.whl (78 kB)
Collecting future
  Downloading future-0.18.3.tar.gz (840 kB)
  Preparing metadata (setup.py) ... done
Collecting psutil>=5.2.2
  Downloading psutil-5.9.4-cp36-abi3-manylinux_2_12_x86_64.manylinux2010_x86_64.manylinux_2_17_x86_64.manylinux2014_x86_64.whl (280 kB)
Collecting capstone<5.0,>=4.0
  Downloading capstone-4.0.2-py2.py3-none-manylinux1_x86_64.whl (2.1 MB)
Collecting naturalsort<2.0,>=1.5
  Downloading naturalsort-1.5.1.tar.gz (7.4 kB)
  Preparing metadata (setup.py) ... done
Collecting prettytable<3.0,>=2.0
  Downloading prettytable-2.5.0-py3-none-any.whl (24 kB)
Collecting intervaltree<4.0,>=3.0.2
  Downloading intervaltree-3.1.0.tar.gz (32 kB)
  Preparing metadata (setup.py) ... done
Collecting ruamel.yaml.clib>=0.2.6
  Downloading ruamel.yaml.clib-0.2.7-cp310-cp310-manylinux_2_17_x86_64.manylinux2014_x86_64.manylinux_2_24_x86_64.whl (485 kB)
Collecting termcolor
  Downloading termcolor-2.2.0-py3-none-any.whl (6.6 kB)
Collecting sortedcontainers<3.0,>=2.0
  Downloading sortedcontainers-2.4.0-py2.py3-none-any.whl (29 kB)
Requirement already satisfied: wcwidth in /usr/lib/python3/dist-packages (from prettytable<3.0,>=2.0->pyocd<=0.31.0,>=0.28.3->spsdk<1.8.0,>=1.7.0->pynitrokey) (0.2.5)
Building wheels for collected packages: nrfutil, crcmod, sly, tlv8, commentjson, hexdump, pyspinel, fire, intervaltree, lark-parser, naturalsort, future
  Building wheel for nrfutil (setup.py) ... done
  Created wheel for nrfutil: filename=nrfutil-6.1.7-py3-none-any.whl size=898520 sha256=de6f8803f51d6c26d24dc7df6292064a468ff3f389d73370433fde5582b84a10
  Stored in directory: /home/jas/.cache/pip/wheels/39/2b/9b/98ab2dd716da746290e6728bdb557b14c1c9a54cb9ed86e13b
  Building wheel for crcmod (setup.py) ... done
  Created wheel for crcmod: filename=crcmod-1.7-cp310-cp310-linux_x86_64.whl size=31422 sha256=5149ac56fcbfa0606760eef5220fcedc66be560adf68cf38c604af3ad0e4a8b0
  Stored in directory: /home/jas/.cache/pip/wheels/85/4c/07/72215c529bd59d67e3dac29711d7aba1b692f543c808ba9e86
  Building wheel for sly (setup.py) ... done
  Created wheel for sly: filename=sly-0.4-py3-none-any.whl size=27352 sha256=f614e413918de45c73d1e9a8dca61ca07dc760d9740553400efc234c891f7fde
  Stored in directory: /home/jas/.cache/pip/wheels/a2/23/4a/6a84282a0d2c29f003012dc565b3126e427972e8b8157ea51f
  Building wheel for tlv8 (setup.py) ... done
  Created wheel for tlv8: filename=tlv8-0.10.0-py3-none-any.whl size=11266 sha256=3ec8b3c45977a3addbc66b7b99e1d81b146607c3a269502b9b5651900a0e2d08
  Stored in directory: /home/jas/.cache/pip/wheels/e9/35/86/66a473cc2abb0c7f21ed39c30a3b2219b16bd2cdb4b33cfc2c
  Building wheel for commentjson (setup.py) ... done
  Created wheel for commentjson: filename=commentjson-0.9.0-py3-none-any.whl size=12092 sha256=28b6413132d6d7798a18cf8c76885dc69f676ea763ffcb08775a3c2c43444f4a
  Stored in directory: /home/jas/.cache/pip/wheels/7d/90/23/6358a234ca5b4ec0866d447079b97fedf9883387d1d7d074e5
  Building wheel for hexdump (setup.py) ... done
  Created wheel for hexdump: filename=hexdump-3.3-py3-none-any.whl size=8913 sha256=79dfadd42edbc9acaeac1987464f2df4053784fff18b96408c1309b74fd09f50
  Stored in directory: /home/jas/.cache/pip/wheels/26/28/f7/f47d7ecd9ae44c4457e72c8bb617ef18ab332ee2b2a1047e87
  Building wheel for pyspinel (setup.py) ... done
  Created wheel for pyspinel: filename=pyspinel-1.0.3-py3-none-any.whl size=65033 sha256=01dc27f81f28b4830a0cf2336dc737ef309a1287fcf33f57a8a4c5bed3b5f0a6
  Stored in directory: /home/jas/.cache/pip/wheels/95/ec/4b/6e3e2ee18e7292d26a65659f75d07411a6e69158bb05507590
  Building wheel for fire (setup.py) ... done
  Created wheel for fire: filename=fire-0.5.0-py2.py3-none-any.whl size=116951 sha256=3d288585478c91a6914629eb739ea789828eb2d0267febc7c5390cb24ba153e8
  Stored in directory: /home/jas/.cache/pip/wheels/90/d4/f7/9404e5db0116bd4d43e5666eaa3e70ab53723e1e3ea40c9a95
  Building wheel for intervaltree (setup.py) ... done
  Created wheel for intervaltree: filename=intervaltree-3.1.0-py2.py3-none-any.whl size=26119 sha256=5ff1def22ba883af25c90d90ef7c6518496fcd47dd2cbc53a57ec04cd60dc21d
  Stored in directory: /home/jas/.cache/pip/wheels/fa/80/8c/43488a924a046b733b64de3fac99252674c892a4c3801c0a61
  Building wheel for lark-parser (setup.py) ... done
  Created wheel for lark-parser: filename=lark_parser-0.7.8-py2.py3-none-any.whl size=62527 sha256=3d2ec1d0f926fc2688d40777f7ef93c9986f874169132b1af590b6afc038f4be
  Stored in directory: /home/jas/.cache/pip/wheels/29/30/94/33e8b58318aa05cb1842b365843036e0280af5983abb966b83
  Building wheel for naturalsort (setup.py) ... done
  Created wheel for naturalsort: filename=naturalsort-1.5.1-py3-none-any.whl size=7526 sha256=bdecac4a49f2416924548cae6c124c85d5333e9e61c563232678ed182969d453
  Stored in directory: /home/jas/.cache/pip/wheels/a6/8e/c9/98cfa614fff2979b457fa2d9ad45ec85fa417e7e3e2e43be51
  Building wheel for future (setup.py) ... done
  Created wheel for future: filename=future-0.18.3-py3-none-any.whl size=492037 sha256=57a01e68feca2b5563f5f624141267f399082d2f05f55886f71b5d6e6cf2b02c
  Stored in directory: /home/jas/.cache/pip/wheels/5e/a9/47/f118e66afd12240e4662752cc22cefae5d97275623aa8ef57d
Successfully built nrfutil crcmod sly tlv8 commentjson hexdump pyspinel fire intervaltree lark-parser naturalsort future
Installing collected packages: tlv8, sortedcontainers, sly, pyserial, pyelftools, piccata, naturalsort, libusb1, lark-parser, intelhex, hexdump, fastjsonschema, crcmod, asn1crypto, wrapt, urllib3, typing_extensions, tqdm, termcolor, ruamel.yaml.clib, python-dateutil, pyspinel, pypemicro, pycryptodome, psutil, protobuf, prettytable, oscrypto, milksnake, libusbsio, jinja2, intervaltree, humanfriendly, future, frozendict, fido2, ecdsa, deepmerge, commentjson, click-option-group, click-command-tree, capstone, astunparse, argparse-addons, ruamel.yaml, pyocd-pemicro, pylink-square, pc_ble_driver_py, fire, cmsis-pack-manager, bincopy, pyocd, nrfutil, nkdfu, spsdk, pynitrokey
  WARNING: The script nitropy is installed in '/home/jas/.local/bin' which is not on PATH.
  Consider adding this directory to PATH or, if you prefer to suppress this warning, use --no-warn-script-location.
Successfully installed argparse-addons-0.12.0 asn1crypto-1.5.1 astunparse-1.6.3 bincopy-17.10.3 capstone-4.0.2 click-command-tree-1.1.0 click-option-group-0.5.5 cmsis-pack-manager-0.2.10 commentjson-0.9.0 crcmod-1.7 deepmerge-0.3.0 ecdsa-0.18.0 fastjsonschema-2.16.3 fido2-1.1.0 fire-0.5.0 frozendict-2.3.5 future-0.18.3 hexdump-3.3 humanfriendly-10.0 intelhex-2.3.0 intervaltree-3.1.0 jinja2-3.0.3 lark-parser-0.7.8 libusb1-1.9.3 libusbsio-2.1.11 milksnake-0.1.5 naturalsort-1.5.1 nkdfu-0.2 nrfutil-6.1.7 oscrypto-1.3.0 pc_ble_driver_py-0.17.0 piccata-2.0.3 prettytable-2.5.0 protobuf-3.20.3 psutil-5.9.4 pycryptodome-3.17 pyelftools-0.29 pylink-square-0.11.1 pynitrokey-0.4.34 pyocd-0.31.0 pyocd-pemicro-1.1.5 pypemicro-0.1.11 pyserial-3.5 pyspinel-1.0.3 python-dateutil-2.7.5 ruamel.yaml-0.17.21 ruamel.yaml.clib-0.2.7 sly-0.4 sortedcontainers-2.4.0 spsdk-1.7.1 termcolor-2.2.0 tlv8-0.10.0 tqdm-4.65.0 typing_extensions-4.3.0 urllib3-1.26.15 wrapt-1.15.0
jas@kaka:~$
Then upgrading the device worked remarkable well, although I wish that the tool would have printed URLs and checksums for the firmware files to allow easy confirmation.
jas@kaka:~$ PATH=$PATH:/home/jas/.local/bin
jas@kaka:~$ nitropy start list
Command line tool to interact with Nitrokey devices 0.4.34
:: 'Nitrokey Start' keys:
FSIJ-1.2.15-5D271572: Nitrokey Nitrokey Start (RTM.12.1-RC2-modified)
jas@kaka:~$ nitropy start update
Command line tool to interact with Nitrokey devices 0.4.34
Nitrokey Start firmware update tool
Platform: Linux-5.15.0-67-generic-x86_64-with-glibc2.35
System: Linux, is_linux: True
Python: 3.10.6
Saving run log to: /tmp/nitropy.log.gc5753a8
Admin PIN:
Firmware data to be used:
- FirmwareType.REGNUAL: 4408, hash: ...b'72a30389' valid (from ...built/RTM.13/regnual.bin)
- FirmwareType.GNUK: 129024, hash: ...b'25a4289b' valid (from ...prebuilt/RTM.13/gnuk.bin)
Currently connected device strings:
Device:
    Vendor: Nitrokey
   Product: Nitrokey Start
    Serial: FSIJ-1.2.15-5D271572
  Revision: RTM.12.1-RC2-modified
    Config: *:*:8e82
       Sys: 3.0
     Board: NITROKEY-START-G
initial device strings: [ 'name': '', 'Vendor': 'Nitrokey', 'Product': 'Nitrokey Start', 'Serial': 'FSIJ-1.2.15-5D271572', 'Revision': 'RTM.12.1-RC2-modified', 'Config': '*:*:8e82', 'Sys': '3.0', 'Board': 'NITROKEY-START-G' ]
Please note:
- Latest firmware available is:
  RTM.13 (published: 2022-12-08T10:59:11Z)
- provided firmware: None
- all data will be removed from the device!
- do not interrupt update process - the device may not run properly!
- the process should not take more than 1 minute
Do you want to continue? [yes/no]: yes
...
Starting bootloader upload procedure
Device: Nitrokey Start FSIJ-1.2.15-5D271572
Connected to the device
Running update!
Do NOT remove the device from the USB slot, until further notice
Downloading flash upgrade program...
Executing flash upgrade...
Waiting for device to appear:
  Wait 20 seconds.....
Downloading the program
Protecting device
Finish flashing
Resetting device
Update procedure finished. Device could be removed from USB slot.
Currently connected device strings (after upgrade):
Device:
    Vendor: Nitrokey
   Product: Nitrokey Start
    Serial: FSIJ-1.2.19-5D271572
  Revision: RTM.13
    Config: *:*:8e82
       Sys: 3.0
     Board: NITROKEY-START-G
device can now be safely removed from the USB slot
final device strings: [ 'name': '', 'Vendor': 'Nitrokey', 'Product': 'Nitrokey Start', 'Serial': 'FSIJ-1.2.19-5D271572', 'Revision': 'RTM.13', 'Config': '*:*:8e82', 'Sys': '3.0', 'Board': 'NITROKEY-START-G' ]
finishing session 2023-03-16 21:49:07.371291
Log saved to: /tmp/nitropy.log.gc5753a8
jas@kaka:~$
jas@kaka:~$ nitropy start list
Command line tool to interact with Nitrokey devices 0.4.34
:: 'Nitrokey Start' keys:
FSIJ-1.2.19-5D271572: Nitrokey Nitrokey Start (RTM.13)
jas@kaka:~$
Before importing the master key to this device, it should be configured. Note the commands in the beginning to make sure scdaemon/pcscd is not running because they may have cached state from earlier cards. Change PIN code as you like after this, my experience with Gnuk was that the Admin PIN had to be changed first, then you import the key, and then you change the PIN.
jas@kaka:~$ gpg-connect-agent "SCD KILLSCD" "SCD BYE" /bye
OK
ERR 67125247 Slut p  fil <GPG Agent>
jas@kaka:~$ ps auxww grep -e pcsc -e scd
jas        11651  0.0  0.0   3468  1672 pts/0    R+   21:54   0:00 grep --color=auto -e pcsc -e scd
jas@kaka:~$ gpg --card-edit
Reader ...........: 20A0:4211:FSIJ-1.2.19-5D271572:0
Application ID ...: D276000124010200FFFE5D2715720000
Application type .: OpenPGP
Version ..........: 2.0
Manufacturer .....: unmanaged S/N range
Serial number ....: 5D271572
Name of cardholder: [not set]
Language prefs ...: [not set]
Salutation .......:
URL of public key : [not set]
Login data .......: [not set]
Signature PIN ....: forced
Key attributes ...: rsa2048 rsa2048 rsa2048
Max. PIN lengths .: 127 127 127
PIN retry counter : 3 3 3
Signature counter : 0
KDF setting ......: off
Signature key ....: [none]
Encryption key....: [none]
Authentication key: [none]
General key info..: [none]
gpg/card> admin
Admin commands are allowed
gpg/card> kdf-setup
gpg/card> passwd
gpg: OpenPGP card no. D276000124010200FFFE5D2715720000 detected
1 - change PIN
2 - unblock PIN
3 - change Admin PIN
4 - set the Reset Code
Q - quit
Your selection? 3
PIN changed.
1 - change PIN
2 - unblock PIN
3 - change Admin PIN
4 - set the Reset Code
Q - quit
Your selection? q
gpg/card> name
Cardholder's surname: Josefsson
Cardholder's given name: Simon
gpg/card> lang
Language preferences: sv
gpg/card> sex
Salutation (M = Mr., F = Ms., or space): m
gpg/card> login
Login data (account name): jas
gpg/card> url
URL to retrieve public key: https://josefsson.org/key-20190320.txt
gpg/card> forcesig
gpg/card> key-attr
Changing card key attribute for: Signature key
Please select what kind of key you want:
   (1) RSA
   (2) ECC
Your selection? 2
Please select which elliptic curve you want:
   (1) Curve 25519
   (4) NIST P-384
Your selection? 1
The card will now be re-configured to generate a key of type: ed25519
Note: There is no guarantee that the card supports the requested size.
      If the key generation does not succeed, please check the
      documentation of your card to see what sizes are allowed.
Changing card key attribute for: Encryption key
Please select what kind of key you want:
   (1) RSA
   (2) ECC
Your selection? 2
Please select which elliptic curve you want:
   (1) Curve 25519
   (4) NIST P-384
Your selection? 1
The card will now be re-configured to generate a key of type: cv25519
Changing card key attribute for: Authentication key
Please select what kind of key you want:
   (1) RSA
   (2) ECC
Your selection? 2
Please select which elliptic curve you want:
   (1) Curve 25519
   (4) NIST P-384
Your selection? 1
The card will now be re-configured to generate a key of type: ed25519
gpg/card>
jas@kaka:~$ gpg --card-edit
Reader ...........: 20A0:4211:FSIJ-1.2.19-5D271572:0
Application ID ...: D276000124010200FFFE5D2715720000
Application type .: OpenPGP
Version ..........: 2.0
Manufacturer .....: unmanaged S/N range
Serial number ....: 5D271572
Name of cardholder: Simon Josefsson
Language prefs ...: sv
Salutation .......: Mr.
URL of public key : https://josefsson.org/key-20190320.txt
Login data .......: jas
Signature PIN ....: not forced
Key attributes ...: ed25519 cv25519 ed25519
Max. PIN lengths .: 127 127 127
PIN retry counter : 3 3 3
Signature counter : 0
KDF setting ......: on
Signature key ....: [none]
Encryption key....: [none]
Authentication key: [none]
General key info..: [none]
jas@kaka:~$
Once setup, bring out your offline machine and boot it and mount your USB stick with the offline key. The paths below will be different, and this is using a somewhat unorthodox approach of working with fresh GnuPG configuration paths that I chose for the USB stick.
jas@kaka:/media/jas/2c699cbd-b77e-4434-a0d6-0c4965864296$ cp -a gnupghome-backup-masterkey gnupghome-import-nitrokey-5D271572
jas@kaka:/media/jas/2c699cbd-b77e-4434-a0d6-0c4965864296$ gpg --homedir $PWD/gnupghome-import-nitrokey-5D271572 --edit-key B1D2BD1375BECB784CF4F8C4D73CF638C53C06BE
gpg (GnuPG) 2.2.27; Copyright (C) 2021 Free Software Foundation, Inc.
This is free software: you are free to change and redistribute it.
There is NO WARRANTY, to the extent permitted by law.
Secret key is available.
sec  ed25519/D73CF638C53C06BE
     created: 2019-03-20  expired: 2019-10-22  usage: SC
     trust: ultimate      validity: expired
[ expired] (1). Simon Josefsson <simon@josefsson.org>
gpg> keytocard
Really move the primary key? (y/N) y
Please select where to store the key:
   (1) Signature key
   (3) Authentication key
Your selection? 1
sec  ed25519/D73CF638C53C06BE
     created: 2019-03-20  expired: 2019-10-22  usage: SC
     trust: ultimate      validity: expired
[ expired] (1). Simon Josefsson <simon@josefsson.org>
gpg>
Save changes? (y/N) y
jas@kaka:/media/jas/2c699cbd-b77e-4434-a0d6-0c4965864296$
At this point it is useful to confirm that the Nitrokey has the master key available and that is possible to sign statements with it, back on your regular machine:
jas@kaka:~$ gpg --card-status
Reader ...........: 20A0:4211:FSIJ-1.2.19-5D271572:0
Application ID ...: D276000124010200FFFE5D2715720000
Application type .: OpenPGP
Version ..........: 2.0
Manufacturer .....: unmanaged S/N range
Serial number ....: 5D271572
Name of cardholder: Simon Josefsson
Language prefs ...: sv
Salutation .......: Mr.
URL of public key : https://josefsson.org/key-20190320.txt
Login data .......: jas
Signature PIN ....: not forced
Key attributes ...: ed25519 cv25519 ed25519
Max. PIN lengths .: 127 127 127
PIN retry counter : 3 3 3
Signature counter : 1
KDF setting ......: on
Signature key ....: B1D2 BD13 75BE CB78 4CF4  F8C4 D73C F638 C53C 06BE
      created ....: 2019-03-20 23:37:24
Encryption key....: [none]
Authentication key: [none]
General key info..: pub  ed25519/D73CF638C53C06BE 2019-03-20 Simon Josefsson <simon@josefsson.org>
sec>  ed25519/D73CF638C53C06BE  created: 2019-03-20  expires: 2023-09-19
                                card-no: FFFE 5D271572
ssb>  ed25519/80260EE8A9B92B2B  created: 2019-03-20  expires: 2023-09-19
                                card-no: FFFE 42315277
ssb>  ed25519/51722B08FE4745A2  created: 2019-03-20  expires: 2023-09-19
                                card-no: FFFE 42315277
ssb>  cv25519/02923D7EE76EBD60  created: 2019-03-20  expires: 2023-09-19
                                card-no: FFFE 42315277
jas@kaka:~$ echo foo gpg -a --sign gpg --verify
gpg: Signature made Thu Mar 16 22:11:02 2023 CET
gpg:                using EDDSA key B1D2BD1375BECB784CF4F8C4D73CF638C53C06BE
gpg: Good signature from "Simon Josefsson <simon@josefsson.org>" [ultimate]
jas@kaka:~$
Finally to retrieve and sign a key, for example Andre Heinecke s that I could confirm the OpenPGP key identifier from his business card.
jas@kaka:~$ gpg --locate-external-keys aheinecke@gnupg.com
gpg: key 1FDF723CF462B6B1: public key "Andre Heinecke <aheinecke@gnupg.com>" imported
gpg: Total number processed: 1
gpg:               imported: 1
gpg: marginals needed: 3  completes needed: 1  trust model: pgp
gpg: depth: 0  valid:   2  signed:   7  trust: 0-, 0q, 0n, 0m, 0f, 2u
gpg: depth: 1  valid:   7  signed:  64  trust: 7-, 0q, 0n, 0m, 0f, 0u
gpg: next trustdb check due at 2023-05-26
pub   rsa3072 2015-12-08 [SC] [expires: 2025-12-05]
      94A5C9A03C2FE5CA3B095D8E1FDF723CF462B6B1
uid           [ unknown] Andre Heinecke <aheinecke@gnupg.com>
sub   ed25519 2017-02-13 [S]
sub   ed25519 2017-02-13 [A]
sub   rsa3072 2015-12-08 [E] [expires: 2025-12-05]
sub   rsa3072 2015-12-08 [A] [expires: 2025-12-05]
jas@kaka:~$ gpg --edit-key "94A5C9A03C2FE5CA3B095D8E1FDF723CF462B6B1"
gpg (GnuPG) 2.2.27; Copyright (C) 2021 Free Software Foundation, Inc.
This is free software: you are free to change and redistribute it.
There is NO WARRANTY, to the extent permitted by law.
pub  rsa3072/1FDF723CF462B6B1
     created: 2015-12-08  expires: 2025-12-05  usage: SC
     trust: unknown       validity: unknown
sub  ed25519/2978E9D40CBABA5C
     created: 2017-02-13  expires: never       usage: S
sub  ed25519/DC74D901C8E2DD47
     created: 2017-02-13  expires: never       usage: A
The following key was revoked on 2017-02-23 by RSA key 1FDF723CF462B6B1 Andre Heinecke <aheinecke@gnupg.com>
sub  cv25519/1FFE3151683260AB
     created: 2017-02-13  revoked: 2017-02-23  usage: E
sub  rsa3072/8CC999BDAA45C71F
     created: 2015-12-08  expires: 2025-12-05  usage: E
sub  rsa3072/6304A4B539CE444A
     created: 2015-12-08  expires: 2025-12-05  usage: A
[ unknown] (1). Andre Heinecke <aheinecke@gnupg.com>
gpg> sign
pub  rsa3072/1FDF723CF462B6B1
     created: 2015-12-08  expires: 2025-12-05  usage: SC
     trust: unknown       validity: unknown
 Primary key fingerprint: 94A5 C9A0 3C2F E5CA 3B09  5D8E 1FDF 723C F462 B6B1
     Andre Heinecke <aheinecke@gnupg.com>
This key is due to expire on 2025-12-05.
Are you sure that you want to sign this key with your
key "Simon Josefsson <simon@josefsson.org>" (D73CF638C53C06BE)
Really sign? (y/N) y
gpg> quit
Save changes? (y/N) y
jas@kaka:~$
This is on my day-to-day machine, using the NitroKey Start with the offline key. No need to boot the old offline machine just to sign keys or extend expiry anymore! At FOSDEM 23 I managed to get at least one DD signature on my new key, and the Debian keyring maintainers accepted my Ed25519 key. Hopefully I can now finally let my 2014-era RSA3744 key expire in 2023-09-19 and not extend it any further. This should finish my transition to a simpler OpenPGP key setup, yay!
Too many years ago, I started (but did not finish) a series
of blog posts on the topic of Imaging Optical Media. I was writing it as I
was figuring out the process to use whilst importing my own piles of home-made
CD-Rs and DVD-Rs to a more suitable storage.
Back in 2018 Antoine Beaupr blogged about being inspired by
my article series to sort out his optical media collection, and wrote up his
notes so far.
This inspired me (in 2018!) to change the approach for writing up what I'd
been doing. Instead of a series of blog posts, I've dumped all the material I
have written in one place: imaging discs. I've also reduced the
scope somewhat, deciding that "Organising the extracted files" is a large
enough (and orthogonal) topic to deserve its own page (if I ever write anything
about it).
The "new" material is really two unfinished blog posts: ?figuring out disc
contents and ?Retrying damaged/degraded
discs. I post them now in the hope that they are
useful despite being unfinished.
After my last
post,
B lint (who prompted it with his last
post)
suggested I should do a hybrid test of his tests and my extremes. He
suggested I should build the Linux kernel using my Raspberry Pi 4 (8GB
model), but using the Firebuild build
accelerator.
Before going any further: I must make clear that while Firebuild is
freely redistributable, it is not made available under a free
license. It
is free for personal use or commercial trial, but otherwise requires
licensing.
B lint managed to build a Linux kernel in just over 8 seconds. So,
how did my test go? My previous experiment, using -j 4, built Linux
in ~100 minutes; this was about a year ago, and I m now building linux
6.1, so I timed this again. To get a baseline, I built my kernel from
a just-unpacked tree, just as usual:
# cd /usr/src/linux-source-6.1
# make clean
# make defconfig
# time make -j4
(...)
real    117m30.588s
user    392m41.434s
sys     52m2.556s
Of course, having all of the object files built makes the rebuild
process quite faster (this is still done without firebuild). I
understand calling make defconfig without cleaning does not change
much, but I saw it often referenced in firebuild s docs, so I m
leaving it:
# time make -j 4
(...)
real    0m43.822s
user    1m36.577s
sys     0m40.805s
Then, I did a first run using firebuild. Firebuild is a caching
build optimizer, so the first run will naturally be somewhat slower
(but if you often rebuild your kernel, it should be seen as an
investment). Now, in the Raspberry Pi, that uses a slow SD card
interface for its storage It is a heavy investment. The first time
I built with firebuild, it meant almost a 100% build time hit:
# cd /usr/src/linux-source-6.1
# make clean
# make defconfig
# time firebuild make -j 4
(...)
real    212m58.647s
user    391m49.080s
sys     81m10.758s
Not only that; I am using a fairly decent and big 32GB card, but this
is quite a big price to pay in such a limited system!
# du -sh .cache/firebuild/
4.2G    .cache/firebuild/
I did a build without cleaning the build directory, using firebuild,
and it does help although not by so much as in higher performance
systems:
# cd /usr/src/linux-source-6.1
# make clean
# make defconfig
# time firebuild make -j 4
(...)
real    68m6.621s
user    98m32.514s
sys     31m41.643s
So, it built in roughly 65% of the time it would take to build
regularly. And what about rebuilding without cleaning?
# make defconfig
# time firebuild make -j 4
(...)
real    1m11.872s
user    2m5.807s
sys     1m46.178s
In this case, using firebuild worked roughly 30% slower than not
using it. I guess the high number of file ops inside
.cache/firebuild are to blame, as in the case of the media I m
using, those are quite expensive; make went its way basically
checking date stamps between *.c and *.o (yes, very roughly), and
while running under firebuild, I suppose each of these meant an extra
lookup inside the cache.
So Experiment requested, experiment performed!
After reading B lint s blog post about Firebuild (a compile cache) [1] I decided to give it a go. It s non-free, the project web site [2] says that it s free for non-commercial use or commercial trials.
My first attempt at building a Debian package failed due to man-recode using a seccomp() sandbox, I filed Debian bug #1032619 [3] about this (thanks for the quick response B lint). The solution for me was to edit /etc/firebuild.conf and add man-recode to the dont_intercept list. The new version that s just been uploaded to Debian fixes it by disabling seccomp() and will presumably allow slightly better performance.
Here are the results of building the refpolicy package with Firebuild, a regular build, the first build with Firebuild (30% slower) and a rebuild with Firebuild that reduced the time by almost 42%.
real    1m32.026s
user    4m20.200s
sys     2m33.324s
real    2m4.111s
user    6m31.769s
sys     3m53.681s
real    0m53.632s
user    1m41.334s
sys     3m36.227s
Next I did a test of building a Linux 6.1.10 kernel with make bzImage -j18 , here are the results from a normal build, first build with firebuild, and second build. The real time is worse with firebuild for this on my machine. I think that the relative speeds of my CPU (reasonably fast 18 core) and storage (two of the slower NVMe devices in a BTRFS RAID-1) is the cause of the first build being relatively so much slower for make bzImage than for building the refpolicy, as the kernel build process involves a lot more data. For the final build I moved ~/.cache/firebuild to a tmpfs (I have 128G of RAM and not much running on my machine at the time of the tests), even then building with firebuild was slightly slower in real time but took significantly less CPU time (user+real being 20mins instead of 36m). I also ran several tests with the kernel source tree on a tmpfs but for unknown reasons those tests each took about 6 minutes. Does firebuild or the Linux kernel build process dislike tmpfs for some reason?
real    2m43.020s
user    31m30.551s
sys     5m15.279s
real    8m49.675s
user    64m11.258s
sys     19m39.016s
real    3m6.858s
user    7m47.556s
sys     9m22.513s
real    2m51.910s
user    10m53.870s
sys     9m21.307s
One thing I noticed from the kernel build tests is that the total CPU time taken by the firebuild process (as reported by ps) was more than 2/3 of the run time and top usually reported it as taking around 75% of a CPU core. It seems to me that the firebuild process itself is a bottleneck on build speed. Building refpolicy without firebuild has an average of 4.5 cores in use while building the kernel haas 13.5. Unless they make a multi-threaded version of firebuild it seems that it won t give the performance one would hope for from a CPU with 18+ cores. I presume that if I had been running with hyper-threading enabled then firebuild would have been even worse for kernel builds as it would sometimes get on the second thread of a core. It looks like firebuild would perform better on AMD CPUs as they tend to have fewer CPU cores with greater average performance per core so a single CPU core for firebuild will be less limited. I presume that the firebuild developers will make it perform better with large numbers of cores in future, the latest Intel laptop CPUs have 16+ cores and servers with 2*40core CPUs are common.
The performance improvement for refpolicy is significant as a portion of build time, but insignificant in terms of real time. A full build of refpolicy doesn t take enough time to get a Coke and reducing it doesn t offer a huge benefit, if Firebuild was available in past years when refpolicy took 20 minutes to build (when DDR2 was the best RAM available) then it would be a different story.
There is some potential to optimise the build of refpolicy for the non-firebuild case. Getting it to average more than 4.5 cores in use when there s 18 available should be possible, there are a number of shell for loops in the main Makefile and maybe some of them can be replaced by make constructs to allow running in parallel. If it used 7 cores on average then it would be faster in a regular build than it currently is with firebuild and a hot cache. Any advice from make experts would be appreciated.
The Framework is a 13.5" laptop body with swappable parts, which
makes it somewhat future-proof and certainly easily repairable,
scoring an "exceedingly rare" 10/10 score from ifixit.com.
There are two generations of the laptop's main board (both compatible
with the same body): the Intel 11th and 12th gen chipsets.
I have received my Framework, 12th generation "DIY", device in late
September 2022 and will update this page as I go along in the process
of ordering, burning-in, setting up and using the device over the
years.
Overall, the Framework is a good laptop. I like the keyboard, the
touch pad, the expansion cards. Clearly there's been some good work
done on industrial design, and it's the most repairable laptop I've
had in years. Time will tell, but it looks sturdy enough to survive me
many years as well.
This is also one of the most powerful devices I ever lay my hands
on. I have managed, remotely, more powerful servers, but this is the
fastest computer I have ever owned, and it fits in this tiny case. It
is an amazing machine.
On the downside, there's a bit of proprietary firmware required (WiFi,
Bluetooth, some graphics) and the Framework ships with a proprietary
BIOS, with currently no Coreboot support. Expect to need the
latest kernel, firmware, and hacking around a bunch of things to get
resolution and keybindings working right.
Like others, I have first found significant power management issues,
but many issues can actually be solved with some configuration. Some
of the expansion ports (HDMI, DP, MicroSD, and SSD) use power when
idle, so don't expect week-long suspend, or "full day" battery while
those are plugged in.
Finally, the expansion ports are nice, but there's only four of
them. If you plan to have a two-monitor setup, you're likely going to
need a dock.
Read on for the detailed review. For context, I'm moving from the
Purism Librem 13v4 because it
basically exploded on me. I
had, in the meantime, reverted back to an old ThinkPad X220, so I
sometimes compare the Framework with that venerable laptop as well.
This blog post has been maturing for months now. It started in
September 2022 and I declared it completed in March 2023. It's the
longest single article on this entire website, currently clocking at
about 13,000 words. It will take an average reader a full hour to go
through this thing, so I don't expect anyone to actually do
that. This introduction should be good enough for most people, read
the first section if you intend to actually buy a Framework. Jump
around the table of contents as you see fit for after you did buy the
laptop, as it might include some crucial hints on how to make it work
best for you, especially on (Debian) Linux.
Advice for buyers
Those are things I wish I would have known before buying:
consider buying 4 USB-C expansion cards, or at least a mix of 4
USB-A or USB-C cards, as they use less power than other cards and
you do want to fill those expansion slots otherwise they snag
around and feel insecure
you will likely need a dock or at least a USB hub if you want a
two-monitor setup, otherwise you'll run out of ports
you have to do some serious tuning to get proper (10h+ idle, 10
days suspend) power savings
in particular, beware that the HDMI, DisplayPort and
particularly the SSD and MicroSD cards take a significant amount
power, even when sleeping, up to 2-6W for the latter two
beware that the MicroSD card is what it says: Micro, normal SD
cards won't fit, and while there might be full sized one
eventually, it's currently only at the prototyping stage
Current status
I have the framework! It's setup with a fresh new Debian bookworm
installation. I've ran through a large number of tests and burn in.
I have decided to use the Framework as my daily driver, and had to buy
a USB-C dock to get my two monitors
connected, which was own adventure.
Update: Framework just (2023-03-23) just announced a whole bunch of
new stuff:
The recording is available in this video and it's not your
typical keynote. It starts ~25 minutes late, audio is crap, lightning
and camera are crap, clapping seems to be from whatever staff they
managed to get together in a room, decor is bizarre, colors are
shit. It's amazing.
Specifications
Those are the specifications of the 12th gen, in general terms. Your
build will of course vary according to your needs.
CPU: i5-1240P, i7-1260P, or i7-1280P (Up to 4.4-4.8 GHz, 4+8
cores), Iris Xe graphics
4 x USB-C user-selectable expansion ports, including
USB-C
USB-A
HDMI
DP
Ethernet
MicroSD
250-1000GB SSD
3.5mm combo headphone jack
Kill switches for microphone and camera
Battery: 55Wh
Camera: 1080p 60fps
Biometrics: Fingerprint Reader
Backlit keyboard
Power Adapter: 60W USB-C (or bring your own)
ships with a screwdriver/spludger
1 year warranty
base price: 1000$CAD, but doesn't give you much, typical builds
around 1500-2000$CAD
Actual build
This is the actual build I ordered. Amounts in CAD. (1CAD =
~0.75EUR/USD.)
Base configuration
CPU: Intel Core i5-1240P (AKA Alder Lake P 8 4.4GHz
P-threads, 8 3.2GHz E-threads, 16 total, 28-64W), 1079$
Memory: 16GB (1 x 16GB) DDR4-3200, 104$
Customization
Keyboard: US English, included
Expansion Cards
2 USB-C $24
3 USB-A $36
2 HDMI $50
1 DP $50
1 MicroSD $25
1 Storage 1TB $199
Sub-total: 384$
Accessories
Power Adapter - US/Canada $64.00
Total
Before tax: 1606$
After tax and duties: 1847$
Free shipping
Quick evaluation
This is basically the TL;DR: here, just focusing on broad pros/cons of
the laptop.
Pros
easily repairable (complete with QR codes pointing to repair
guides!), the 11th gen received a 10/10 score from
ifixit.com, which they call "exceedingly rare", the 12th gen
has a similar hardware design and would probably rate similarly
replaceable motherboard!!! can be reused as a NUC-like device, with a
3d-printed case, 12th gen board can be bought standalone and
retrofitted into an 11th gen case
not a passing fad: they made a first laptop with the 11th gen Intel
chipset in 2021, and a second motherboard with the 12th Intel
chipset in 2022
four modular USB-C ports which can fit HDMI, USB-C (pass-through,
can provide power on both sides), USB-A, DisplayPort, MicroSD,
external storage (250GB, 1TB), active modding community
nice power led indicating power level (charging, charged, etc) when
plugged
they used to have some difficulty keeping up with the orders: first
two batches shipped, third batch sold out, fourth batch should have
shipped in October 2021. they generally seem to keep up with
shipping. update (august 2022): they rolled out a second line of
laptops (12th gen), first batch shipped, second batch shipped
late, September 2022 batch was generally on time, see this
spreadsheet for a crowdsourced effort to track those
supply chain issues seem to be under control as of early 2023. I
got the Ethernet expansion card shipped within a week.
compared to my previous laptop (Purism Librem
13v4), it feels strangely
bulkier and heavier; it's actually lighter than the purism (1.3kg
vs 1.4kg) and thinner (15.85mm vs 18mm) but the design of the
Purism laptop (tapered edges) makes it feel thinner
no space for a 2.5" drive
rather bright LED around power button, but can be dimmed in the
BIOS (not low enough to my taste) I got used to it
fan quiet when idle, but can be noisy when running, for example if
you max a CPU for a while
battery described as "mediocre" by Ars Technica (above), confirmed
poor in my tests (see below)
no RJ-45 port, and attempts at designing ones are failing
because the modular plugs are too thin to fit (according to Linux
After Dark), so unlikely to have one in the future
Update: they cracked that nut and ship an 2.5 gbps Ethernet
expansion card with a realtek chipset, without any
firmware blob
a bit pricey for the performance, especially when compared to the
competition (e.g. Dell XPS, Apple M1)
12th gen Intel has glitchy graphics, seems like Intel hasn't fully
landed proper Linux support for that chipset yet
Initial hardware setup
A breeze.
Accessing the board
The internals are accessed through five TorX screws, but there's a nice
screwdriver/spudger that works well enough. The screws actually hold in
place so you can't even lose them.
The first setup is a bit counter-intuitive coming from the Librem
laptop, as I expected the back cover to lift and give me access to the
internals. But instead the screws is release the keyboard and touch
pad assembly, so you actually need to flip the laptop back upright and
lift the assembly off to get access to the internals. Kind of
scary.
I also actually unplugged a connector in lifting the assembly because
I lifted it towards the monitor, while you actually need to lift it
to the right. Thankfully, the connector didn't break, it just
snapped off and I could plug it back in, no harm done.
Once there, everything is well indicated, with QR codes all over the
place supposedly leading to online instructions.
Bad QR codes
Unfortunately, the QR codes I tested (in the expansion card slot, the
memory slot and CPU slots) did not actually work so I wonder how
useful those actually are.
After all, they need to point to something and that means a URL, a
running website that will answer those requests forever. I bet those
will break sooner than later and in fact, as far as I can tell, they
just don't work at all. I prefer the approach taken by the MNT reform
here which designed (with the 100 rabbits folks) an actual paper
handbook (PDF).
The first QR code that's immediately visible from the back of the
laptop, in an expansion cord slot, is a 404. It seems to be some
serial number URL, but I can't actually tell because, well, the page
is a 404.
I was expecting that bar code to lead me to an introduction page,
something like "how to setup your Framework laptop". Support actually
confirmed that it should point a quickstart guide. But in a
bizarre twist, they somehow sent me the URL with the plus (+) signs
escaped, like this:
(They have also "let the team know about this for feedback and help
resolve the problem with the link" which is a support code word for
"ha-ha! nope! not my problem right now!" Trust me, I know, my own
code word is "can you please make a ticket?")
Seating disks and memory
The "DIY" kit doesn't actually have that much of a setup. If you
bought RAM, it's shipped outside the laptop in a little plastic case,
so you just seat it in as usual.
Then you insert your NVMe drive, and, if that's your fancy, you also
install your own mPCI WiFi card. If you ordered one (which was my
case), it's pre-installed.
Closing the laptop is also kind of amazing, because the keyboard
assembly snaps into place with magnets. I have actually used the
laptop with the keyboard unscrewed as I was putting the drives in and
out, and it actually works fine (and will probably void your warranty,
so don't do that). (But you can.) (But don't, really.)
Hardware review
Keyboard and touch pad
The keyboard feels nice, for a laptop. I'm used to mechanical keyboard
and I'm rather violent with those poor things. Yet the key travel is
nice and it's clickety enough that I don't feel too disoriented.
At first, I felt the keyboard as being more laggy than my normal
workstation setup, but it turned out this was a graphics driver
issues. After enabling a composition manager, everything feels snappy.
The touch pad feels good. The double-finger scroll works well enough,
and I don't have to wonder too much where the middle button is, it
just works.
Taps don't work, out of the box: that needs to be enabled in Xorg,
with something like this:
But be aware that once you enable that tapping, you'll need to deal
with palm detection... So I have not actually enabled this in the end.
Power button
The power button is a little dangerous. It's quite easy to hit, as
it's right next to one expansion card where you are likely to plug in
a cable power. And because the expansion cards are kind of hard to
remove, you might squeeze the laptop (and the power key) when trying
to remove the expansion card next to the power button.
So obviously, don't do that. But that's not very helpful.
An alternative is to make the power button do something else. With
systemd-managed systems, it's actually quite easy. Add a
HandlePowerKey stanza to (say)
/etc/systemd/logind.conf.d/power-suspends.conf:
And the power button will suspend! Long-press to power off doesn't
actually work as the laptop immediately suspends...
Note that there's probably half a dozen other ways of doing this,
see this, this, or that.
Special keybindings
There is a series of "hidden" (as in: not labeled on the key)
keybindings related to the fn keybinding that I actually
find quite useful.
Key
Equivalent
Effect
Command
p
Pause
lock screen
xset s activate
b
Break
?
?
k
ScrLk
switch keyboard layout
N/A
It looks like those are defined in the microcontroller so it
would be possible to add some. For example, the SysRq key
is almost bound to fns in there.
Note that most other shortcuts like this are clearly documented
(volume, brightness, etc). One key that's less obvious is
F12 that only has the Framework logo on it. That actually
calls the keysym XF86AudioMedia which, interestingly, does
absolutely nothing here. By default, on Windows, it opens your
browser to the Framework website and, on Linux, your "default
media player".
The keyboard backlight can be cycled with fn-space. The
dimmer version is dim enough, and the keybinding is easy to find in
the dark.
A skinny elephant would be performed with altPrtScr (above F11) KEY, so for
example altfnF11b
should do a hard reset. This comment suggests you need to hold
the fnonly if "function lock" is on, but that's
actually the opposite of my experience.
Out of the box, some of the fn keys don't work. Mute,
volume up/down, brightness, monitor changes, and the airplane mode key
all do basically nothing. They don't send proper keysyms to Xorg at
all.
This is a known problem and it's related to the fact that the
laptop has light sensors to adjust the brightness
automatically. Somehow some of those keys (e.g. the brightness
controls) are supposed to show up as a different input device, but
don't seem to work correctly. It seems like the solution is for the
Framework team to write a driver specifically for this, but so far no
progress since July 2022.
In the meantime, the fancy functionality can be supposedly disabled with:
echo 'blacklist hid_sensor_hub' sudo tee /etc/modprobe.d/framework-als-blacklist.conf
Kill switches
The Framework has two "kill switches": one for the camera and the
other for the microphone. The camera one actually disconnects the USB
device when turned off, and the mic one seems to cut the circuit. It
doesn't show up as muted, it just stops feeding the sound.
Both kill switches are around the main camera, on top of the monitor,
and quite discreet. Then turn "red" when enabled (i.e. "red" means
"turned off").
Monitor
The monitor looks pretty good to my untrained eyes. I have yet to do
photography work on it, but some photos I looked at look sharp and the
colors are bright and lively. The blacks are dark and the screen is
bright.
I have yet to use it in full sunlight.
The dimmed light is very dim, which I like.
Screen backlight
I bind brightness keys to xbacklight in i3, but out of the box I get
this error:
sep 29 22:09:14 angela i3[5661]: No outputs have backlight property
It just requires this blob in /etc/X11/xorg.conf.d/backlight.conf:
This way I can control the actual backlight power with the brightness
keys, and they do significantly reduce power usage.
Multiple monitor support
I have been able to hook up my two old monitors to the HDMI and
DisplayPort expansion cards on the laptop. The lid closes without
suspending the machine, and everything works great.
I actually run out of ports, even with a 4-port USB-A hub, which gives
me a total of 7 ports:
power (USB-C)
monitor 1 (DisplayPort)
monitor 2 (HDMI)
USB-A hub, which adds:
keyboard (USB-A)
mouse (USB-A)
Yubikey
external sound card
Now the latter, I might be able to get rid of if I switch to a
combo-jack headset, which I do have (and still need to test).
But still, this is a problem. I'll probably need a powered USB-C dock
and better monitors, possibly with some Thunderbolt chaining, to
save yet more ports.
But that means more money into this setup, argh. And figuring out my
monitor situation is the kind of thing I'm not that big
of a fan of. And neither is shopping for USB-C (or is it Thunderbolt?)
hubs.
My normal autorandr setup doesn't work: I have tried saving a
profile and it doesn't get autodetected, so I also first need to do:
autorandr -l framework-external-dual-lg-acer
The magic:
autorandr -l horizontal
... also works well.
The worst problem with those monitors right now is that they have a
radically smaller resolution than the main screen on the laptop, which
means I need to reset the font scaling to normal every time I switch
back and forth between those monitors and the laptop, which means I
actually need to do this:
Expansion ports
I ordered a total of 10 expansion ports.
I did manage to initialize the 1TB drive as an encrypted storage,
mostly to keep photos as this is something that takes a massive amount
of space (500GB and counting) and that I (unfortunately) don't work on
very often (but still carry around).
The expansion ports are fancy and nice, but not actually that
convenient. They're a bit hard to take out: you really need to crimp
your fingernails on there and pull hard to take them out. There's a
little button next to them to release, I think, but at first it feels
a little scary to pull those pucks out of there. You get used to it
though, and it's one of those things you can do without looking
eventually.
There's only four expansion ports. Once you have two monitors, the
drive, and power plugged in, bam, you're out of ports; there's nowhere
to plug my Yubikey. So if this is going to be my daily driver, with a
dual monitor setup, I will need a dock, which means more crap firmware
and uncertainty, which isn't great. There are actually plans to make a
dual-USB card, but that is blocked on designing an actual
board for this.
I can't wait to see more expansion ports produced. There's a ethernet
expansion card which quickly went out of stock basically the day
it was announced, but was eventually restocked.
I would like to see a proper SD-card reader. There's a MicroSD card
reader, but that obviously doesn't work for normal SD cards, which
would be more broadly compatible anyways (because you can have a
MicroSD to SD card adapter, but I have never heard of the
reverse). Someone actually found a SD card reader that fits and
then someone else managed to cram it in a 3D printed case, which
is kind of amazing.
Still, I really like that idea that I can carry all those little
adapters in a pouch when I travel and can basically do anything I
want. It does mean I need to shuffle through them to find the right
one which is a little annoying. I have an elastic band to keep them
lined up so that all the ports show the same side, to make it easier
to find the right one. But that quickly gets undone and instead I have
a pouch full of expansion cards.
Another awesome thing with the expansion cards is that they don't just
work on the laptop: anything that takes USB-C can take those cards,
which means you can use it to connect an SD card to your phone, for
backups, for example. Heck, you could even connect an external display
to your phone that way, assuming that's supported by your phone of
course (and it probably isn't).
The expansion ports do take up some power, even when idle. See the
power management section below, and particularly the power usage
tests for details.
USB-C charging
One thing that is really a game changer for me is USB-C charging. It's
hard to overstate how convenient this is. I often have a USB-C cable
lying around to charge my phone, and I can just grab that thing and
pop it in my laptop. And while it will obviously not charge as fast as
the provided charger, it will stop draining the battery at least.
(As I wrote this, I had the laptop plugged in the Samsung charger that
came with a phone, and it was telling me it would take 6 hours to
charge the remaining 15%. With the provided charger, that flew down to
15 minutes. Similarly, I can power the laptop from the power grommet
on my desk, reducing clutter as I have that single wire out there
instead of the bulky power adapter.)
I also really like the idea that I can charge my laptop with a power
bank or, heck, with my phone, if push comes to shove. (And
vice-versa!)
This is awesome. And it works from any of the expansion ports, of
course. There's a little led next to the expansion ports as well,
which indicate the charge status:
red/amber: charging
white: charged
off: unplugged
I couldn't find documentation about this, but the forum
answered.
This is something of a recurring theme with the Framework. While it
has a good knowledge base and repair/setup guides (and the
forum is awesome) but it doesn't have a good "owner manual" that
shows you the different parts of the laptop and what they do. Again,
something the MNT reform did well.
Another thing that people are asking about is an external sleep
indicator: because the power LED is on the main keyboard assembly,
you don't actually see whether the device is active or not when the
lid is closed.
Finally, I wondered what happens when you plug in multiple power
sources and it turns out the charge controller is actually pretty
smart: it will pick the best power source and use it. The only
downside is it can't use multiple power sources, but that seems like
a bit much to ask.
Multimedia and other devices
Those things also work:
webcam: splendid, best webcam I've ever had (but my standards are
really low)
onboard mic: works well, good gain (maybe a bit much)
onboard speakers: sound okay, a little metal-ish, loud enough to be
annoying, see this thread for benchmarks, apparently pretty
good speakers
Combo jack mic tests
The Framework laptop ships with a combo jack on the left side, which
allows you to plug in a CTIA (source) headset. In human
terms, it's a device that has both a stereo output and a mono input,
typically a headset or ear buds with a microphone somewhere.
It works, which is better than the Purism (which only had audio
out), but is on par for the course for that kind of onboard
hardware. Because of electrical interference, such sound cards very
often get lots of noise from the board.
With a Jabra Evolve 40, the built-in USB sound card generates
basically zero noise on silence (invisible down to -60dB in Audacity)
while plugging it in directly generates a solid -30dB hiss. There is
a noise-reduction system in that sound card, but the difference is
still quite striking.
On a comparable setup (curie, a 2017 Intel NUC), there is
also a his with the Jabra headset, but it's quieter, more in the order
of -40/-50 dB, a noticeable difference. Interestingly, testing with my
Mee Audio Pro M6 earbuds leads to a little more hiss on curie, more on
the -35/-40 dB range, close to the Framework.
Also note that another sound card, the Antlion USB adapter that comes
with the ModMic 4, also gives me pretty close to silence on a quiet
recording, picking up less than -50dB of background noise. It's
actually probably picking up the fans in the office, which do make
audible noises.
In other words, the hiss of the sound card built in the Framework
laptop is so loud that it makes more noise than the quiet fans in the
office. Or, another way to put it is that two USB sound cards (the
Jabra and the Antlion) are able to pick up ambient noise in my office
but not the Framework laptop.
See also my audio page.
Performance tests
Compiling Linux 5.19.11
On a single core, compiling the Debian version of the Linux kernel
takes around 100 minutes:
I had to plug the normal power supply after a few minutes because
battery would actually run out using my desk's power grommet (34
watts).
During compilation, fans were spinning really hard, quite noisy, but
not painfully so.
The laptop was sucking 55 watts of power, steadily:
  Time    User  Nice   Sys  Idle    IO  Run Ctxt/s  IRQ/s Fork Exec Exit  Watts
-------- ----- ----- ----- ----- ----- ---- ------ ------ ---- ---- ---- ------
 Average  87.9   0.0  10.7   1.4   0.1 17.8 6583.6 5054.3 233.0 223.9 233.1  55.96
 GeoMean  87.9   0.0  10.6   1.2   0.0 17.6 6427.8 5048.1 227.6 218.7 227.7  55.96
  StdDev   1.4   0.0   1.2   0.6   0.2  3.0 1436.8  255.5 50.0 47.5 49.7   0.20
-------- ----- ----- ----- ----- ----- ---- ------ ------ ---- ---- ---- ------
 Minimum  85.0   0.0   7.8   0.5   0.0 13.0 3594.0 4638.0 117.0 111.0 120.0  55.52
 Maximum  90.8   0.0  12.9   3.5   0.8 38.0 10174.0 5901.0 374.0 362.0 375.0  56.41
-------- ----- ----- ----- ----- ----- ---- ------ ------ ---- ---- ---- ------
Summary:
CPU:  55.96 Watts on average with standard deviation 0.20
Note: power read from RAPL domains: package-0, uncore, package-0, core, psys.
These readings do not cover all the hardware in this device.
memtest86+
I ran Memtest86+ v6.00b3. It shows something like this:
Software setup
Once I had everything in the hardware setup, I figured, voil , I'm
done, I'm just going to boot this beautiful machine and I can get back
to work.
I don't understand why I am so na ve some times. It's mind boggling.
Obviously, it didn't happen that way at all, and I spent the best of
the three following days tinkering with the laptop.
Secure boot and EFI
First, I couldn't boot off of the NVMe drive I transferred from the
previous laptop (the Purism) and the
BIOS was not very helpful: it was just complaining about not finding
any boot device, without dropping me in the real BIOS.
At first, I thought it was a problem with my NVMe drive, because it's
not listed in the compatible SSD drives from upstream. But I
figured out how to enter BIOS (press F2 manically, of
course), which showed the NVMe drive was actually detected. It just
didn't boot, because it was an old (2010!!) Debian install without
EFI.
So from there, I disabled secure boot, and booted a grml image to
try to recover. And by "boot" I mean, I managed to get to the grml
boot loader which promptly failed to load its own root file system
somehow. I still have to investigate exactly what happened there, but
it failed some time after the initrd load with:
Unable to find medium containing a live file system
This, it turns out, was fixed in Debian lately, so a daily GRML
build will not have this problems. The upcoming 2022 release
(likely 2022.10 or 2022.11) will also get the fix.
I did manage to boot the development version of the Debian
installer which was a surprisingly good experience: it mounted the
encrypted drives and did everything pretty smoothly. It even offered
me to reinstall the boot loader, but that ultimately (and correctly, as
it turns out) failed because I didn't have a /boot/efi partition.
At this point, I realized there was no easy way out of this, and I
just proceeded to completely reinstall Debian. I had a spare NVMe
drive lying around (backups FTW!) so I just swapped that in, rebooted
in the Debian installer, and did a clean install. I wanted to switch
to bookworm anyways, so I guess that's done too.
Storage limitations
Another thing that happened during setup is that I tried to copy over
the internal 2.5" SSD drive from the Purism to the Framework 1TB
expansion card. There's no 2.5" slot in the new laptop, so that's
pretty much the only option for storage expansion.
I was tired and did something wrong. I ended up wiping the partition
table on the original 2.5" drive.
Oops.
It might be recoverable, but just restoring the partition table
didn't work either, so I'm not sure how I recover the data
there. Normally, everything on my laptops and workstations is designed
to be disposable, so that wasn't that big of a problem. I did manage
to recover most of the data thanks to git-annexreinit, but
that was a little hairy.
Bootstrapping Puppet
Once I had some networking, I had to install all the packages I
needed. The time I spent setting up my workstations with Puppet has
finally paid off. What I actually did was to restore two critical
directories:
/etc/ssh
/var/lib/puppet
So that I would keep the previous machine's identity. That way I could
contact the Puppet server and install whatever was missing. I used my
Puppet optimization
trick to do a batch
install and then I had a good base setup, although not exactly as it
was before. 1700 packages were installed manually on angela before
the reinstall, and not in Puppet.
I did not inspect each one individually, but I did go through /etc
and copied over more SSH keys, for backups and SMTP over SSH.
LVFS support
It looks like there's support for the (de-facto) standard LVFS
firmware update system. At least I was able to update the UEFI
firmware with a simple:
Those instructions come from the beta forum post. I performed the
BIOS update on 2023-01-16T16:00-0500.
Resolution tweaks
The Framework laptop resolution (2256px X 1504px) is big enough to
give you a pretty small font size, so welcome to the marvelous world
of "scaling".
The Debian wiki page has a few tricks for this.
Console
This will make the console and grub fonts more readable:
Xorg
Adding this to your .Xresources will make everything look much bigger:
! 1.5*96
Xft.dpi: 144
Apparently, some of this can also help:
! These might also be useful depending on your monitor and personal preference:
Xft.autohint: 0
Xft.lcdfilter:  lcddefault
Xft.hintstyle:  hintfull
Xft.hinting: 1
Xft.antialias: 1
Xft.rgba: rgb
It my experience it also makes things look a little fuzzier, which is
frustrating because you have this awesome monitor but everything looks
out of focus. Just bumping Xft.dpi by a 1.5 factor looks good to me.
The Debian Wiki has a page on HiDPI, but it's not as good as the
Arch Wiki, where the above blurb comes from. I am not using the
latter because I suspect it's causing some of the "fuzziness".
TODO: find the equivalent of this GNOME hack in i3? (gsettings set
org.gnome.mutter experimental-features
"['scale-monitor-framebuffer']"), taken from this Framework
guide
Issues
BIOS configuration
The Framework BIOS has some minor issues. One issue I personally
encountered is that I had disabled Quick boot and Quiet boot in
the BIOS to diagnose the above boot issues. This, in turn, triggers a
bug where the BIOS boot manager (F12) would just hang
completely. It would also fail to boot from an external USB drive.
The current fix (as of BIOS 3.03) is to re-enable both Quick
boot and Quiet boot. Presumably this is something that will get
fixed in a future BIOS update.
Note that the following keybindings are active in the BIOS POST
check:
Key
Meaning
F2
Enter BIOS setup menu
F12
Enter BIOS boot manager
Delete
Enter BIOS setup menu
WiFi compatibility issues
I couldn't make WiFi work at first. Obviously, the default Debian
installer doesn't ship with proprietary firmware (although that might
change soon) so the WiFi card didn't work out of the box. But even
after copying the firmware through a USB stick, I couldn't quite
manage to find the right combination of ip/iw/wpa-supplicant
(yes, after repeatedly copying a bunch more packages over to get
those bootstrapped). (Next time I should probably try something like
this post.)
Thankfully, I had a little USB-C dongle with a RJ-45 jack lying
around. That also required a firmware blob, but it was a single
package to copy over, and with that loaded, I had network.
Eventually, I did managed to make WiFi work; the problem was more on
the side of "I forgot how to configure a WPA network by hand from the
commandline" than anything else. NetworkManager worked fine and got
WiFi working correctly.
Note that this is with Debian bookworm, which has the 5.19 Linux
kernel, and with the firmware-nonfree (firmware-iwlwifi,
specifically) package.
Battery life
I was having between about 7 hours of battery on the Purism Librem
13v4, and that's after a year or two of battery life. Now, I still
have about 7 hours of battery life, which is nicer than my old
ThinkPad X220 (20 minutes!) but really, it's not that good for a new
generation laptop. The 12th generation Intel chipset probably improved
things compared to the previous one Framework laptop, but I don't have
a 11th gen Framework to compare with).
(Note that those are estimates from my status bar, not wall clock
measurements. They should still be comparable between the Purism and
Framework, that said.)
The battery life doesn't seem up to, say, Dell XPS 13, ThinkPad X1, and
of course not the Apple M1, where I would expect 10+ hours of battery
life out of the box.
That said, I do get those kind estimates when the machine is fully
charged and idle. In fact, when everything is quiet and nothing is
plugged in, I get dozens of hours of battery life estimated (I've
seen 25h!). So power usage fluctuates quite a bit depending on usage,
which I guess is expected.
Concretely, so far, light web browsing, reading emails and writing
notes in Emacs (e.g. this file) takes about 8W of power:
Expansion cards matter a lot in the battery life (see below for a
thorough discussion), my normal setup is 2xUSB-C and 1xUSB-A (yes,
with an empty slot, and yes, to save power).
Interestingly, playing a video in a (720p) window in a window takes up
more power (10.5W) than in full screen (9.5W) but I blame that on my
desktop setup (i3 + compton)... Not sure if mpv hits the
VA-API, maybe not in windowed mode. Similar results with 1080p,
interestingly, except the window struggles to keep up altogether. Full
screen playback takes a relatively comfortable 9.5W, which means a
solid 5h+ of playback, which is fine by me.
Fooling around the web, small edits, youtube-dl, and I'm at around 80%
battery after about an hour, with an estimated 5h left, which is a
little disappointing. I had a 7h remaining estimate before I started
goofing around Discourse, so I suspect the website is a pretty
big battery drain, actually. I see about 10-12 W, while I was probably at
half that (6-8W) just playing music with mpv in the background...
In other words, it looks like editing posts in Discourse with Firefox
takes a solid 4-6W of power. Amazing and gross.
(When writing about abusive power usage generates more power usage, is
that an heisenbug? Or schr dinbug?)
Power management
Compared to the Purism Librem 13v4, the ongoing power usage seems to
be slightly better. An anecdotal metric is that the Purism would take
800mA idle, while the more powerful Framework manages a little over
500mA as I'm typing this, fluctuating between 450 and 600mA. That is
without any active expansion card, except the storage. Those numbers
come from the output of tlp-stat -b and, unfortunately, the "ampere"
unit makes it quite hard to compare those, because voltage is not
necessarily the same between the two platforms.
TODO: i915 driver has a lot of parameters, including some about
power saving, see, again, the arch wiki, and particularly
enable_fbc=1
TL:DR; power management on the laptop is an issue, but there's various
tweaks you can make to improve it. Try:
powertop --auto-tune
apt install tlp && systemctl enable tlp
nvme.noacpi=1 mem_sleep_default=deep on the kernel command line
may help with standby power usage
keep only USB-C expansion cards plugged in, all others suck power
even when idle
consider upgrading the BIOS to latest beta (3.06 at the time of
writing), unverified power savings
latest Linux kernels (6.2) promise power savings as well
(unverified)
Update: also try to follow the official optimization guide. It
was made for Ubuntu but will probably also work for your distribution
of choice with a few tweaks. They recommend using tlpui but it's
not packaged in Debian. There is, however, a Flatpak
release. In my case, it resulted in the following diff to
tlp.conf: tlp.patch.
Background on CPU architecture
There were power problems in the 11th gen Framework laptop, according
to this report from Linux After Dark, so the issues with power
management on the Framework are not new.
The 12th generation Intel CPU (AKA "Alder Lake") is a big-little
architecture with "power-saving" and "performance" cores. There
used to be performance problems introduced by the scheduler in Linux
5.16 but those were eventually fixed in 5.18, which uses
Intel's hardware as an "intelligent, low-latency hardware-assisted
scheduler". According to Phoronix, the 5.19 release improved the
power saving, at the cost of some penalty cost. There were also patch
series to make the scheduler configurable, but it doesn't look
those have been merged as of 5.19. There was also a session about this
at the 2022 Linux Plumbers, but they stopped short of
talking more about the specific problems Linux is facing in Alder
lake:
Specifically, the kernel's energy-aware scheduling heuristics don't
work well on those CPUs. A number of features present there
complicate the energy picture; these include SMT, Intel's "turbo
boost" mode, and the CPU's internal power-management mechanisms. For
many workloads, running on an ostensibly more power-hungry Pcore can
be more efficient than using an Ecore. Time for discussion of the
problem was lacking, though, and the session came to a close.
All this to say that the 12gen Intel line shipped with this Framework
series should have better power management thanks to its
power-saving cores. And Linux has had the scheduler changes to make
use of this (but maybe is still having trouble). In any case, this
might not be the source of power management problems on my laptop,
quite the opposite.
Also note that the firmware updates for various chipsets are
supposed to improve things eventually.
On the other hand, The Verge simply declared the whole P-series
a mistake...
Attempts at improving power usage
I did try to follow some of the tips in this forum post. The
tricks powertop --auto-tune and tlp's
PCIE_ASPM_ON_BAT=powersupersave basically did nothing: I was stuck
at 10W power usage in powertop (600+mA in tlp-stat).
Apparently, I should be able to reach the C8 CPU power state (or
even C9, C10) in powertop, but I seem to be stock at
C7. (Although I'm not sure how to read that tab in powertop: in the
Core(HW) column there's only C3/C6/C7 states, and most cores are 85%
in C7 or maybe C6. But the next column over does show many CPUs in
C10 states...
As it turns out, the graphics card actually takes up a good chunk of
power unless proper power management is enabled (see below). After
tweaking this, I did manage to get down to around 7W power usage in
powertop.
Expansion cards actually do take up power, and so does the screen,
obviously. The fully-lit screen takes a solid 2-3W of power compared
to the fully dimmed screen. When removing all expansion cards and
making the laptop idle, I can spin it down to 4 watts power usage at
the moment, and an amazing 2 watts when the screen turned off.
Caveats
Abusive (10W+) power usage that I initially found could be a problem
with my desktop configuration: I have this silly status bar that
updates every second and probably causes redraws... The CPU certainly
doesn't seem to spin down below 1GHz. Also note that this is with an
actual desktop running with everything: it could very well be that
some things (I'm looking at you Signal Desktop) take up unreasonable
amount of power on their own (hello, 1W/electron, sheesh). Syncthing
and containerd (Docker!) also seem to take a good 500mW just sitting
there.
Beyond my desktop configuration, this could, of course, be a
Debian-specific problem; your favorite distribution might be better at
power management.
Idle power usage tests
Some expansion cards waste energy, even when unused. Here is a summary
of the findings from the powerstat page. I also include other
devices tested in this page for completeness:
Device
Minimum
Average
Max
Stdev
Note
Screen, 100%
2.4W
2.6W
2.8W
N/A
Screen, 1%
30mW
140mW
250mW
N/A
Backlight 1
290mW
?
?
?
fairly small, all things considered
Backlight 2
890mW
1.2W
3W?
460mW?
geometric progression
Backlight 3
1.69W
1.5W
1.8W?
390mW?
significant power use
Radios
100mW
250mW
N/A
N/A
USB-C
N/A
N/A
N/A
N/A
negligible power drain
USB-A
10mW
10mW
?
10mW
almost negligible
DisplayPort
300mW
390mW
600mW
N/A
not passive
HDMI
380mW
440mW
1W?
20mW
not passive
1TB SSD
1.65W
1.79W
2W
12mW
significant, probably higher when busy
MicroSD
1.6W
3W
6W
1.93W
highest power usage, possibly even higher when busy
Ethernet
1.69W
1.64W
1.76W
N/A
comparable to the SSD card
So it looks like all expansion cards but the USB-C ones are active,
i.e. they draw power with idle. The USB-A cards are the least concern,
sucking out 10mW, pretty much within the margin of error. But both the
DisplayPort and HDMI do take a few hundred miliwatts. It looks like
USB-A connectors have this fundamental flaw that they necessarily draw
some powers because they lack the power negotiation features of
USB-C. At least according to this post:
It seems the USB A must have power going to it all the time, that
the old USB 2 and 3 protocols, the USB C only provides power when
there is a connection. Old versus new.
Apparently, this is a problem specific to the USB-C to USB-A
adapter that ships with the Framework. Some people have actually
changed their orders to all USB-C because of this problem, but I'm
not sure the problem is as serious as claimed in the forums. I
couldn't reproduce the "one watt" power drains suggested elsewhere,
at least not repeatedly. (A previous version of this post did show
such a power drain, but it was in a less controlled test
environment than the series of more rigorous tests above.)
The worst offenders are the storage cards: the SSD drive takes at
least one watt of power and the MicroSD card seems to want to take all
the way up to 6 watts of power, both just sitting there doing
nothing. This confirms claims of 1.4W for the SSD (but not
5W) power usage found elsewhere. The former post has
instructions on how to disable the card in software. The MicroSD card
has been reported as using 2 watts, but I've seen it as high as 6
watts, which is pretty damning.
The Framework team has a beta update for the DisplayPort adapter
but currently only for Windows (LVFS technically possible, "under
investigation"). A USB-A firmware update is alsounder
investigation. It is therefore likely at least some of those power
management issues will eventually be fixed.
Note that the upcoming Ethernet card has a reported 2-8W power usage,
depending on traffic. I did my own power usage tests in
powerstat-wayland and they seem lower than 2W.
The upcoming 6.2 Linux kernel might also improve battery usage when
idle, see this Phoronix article for details, likely in early
2023.
Idle power usage tests under Wayland
Update: I redid those tests under Wayland, see powerstat-wayland
for details. The TL;DR: is that power consumption is either smaller or
similar.
Idle power usage tests, 3.06 beta BIOS
I redid the idle tests after the 3.06 beta BIOS update and ended
up with this results:
Device
Minimum
Average
Max
Stdev
Note
Baseline
1.96W
2.01W
2.11W
30mW
1 USB-C, screen off, backlight off, no radios
2 USB-C
1.95W
2.16W
3.69W
430mW
USB-C confirmed as mostly passive...
3 USB-C
1.95W
2.16W
3.69W
430mW
... although with extra stdev
1TB SSD
3.72W
3.85W
4.62W
200mW
unchanged from before upgrade
1 USB-A
1.97W
2.18W
4.02W
530mW
unchanged
2 USB-A
1.97W
2.00W
2.08W
30mW
unchanged
3 USB-A
1.94W
1.99W
2.03W
20mW
unchanged
MicroSD w/o card
3.54W
3.58W
3.71W
40mW
significant improvement! 2-3W power saving!
MicroSD w/ card
3.53W
3.72W
5.23W
370mW
new measurement! increased deviation
DisplayPort
2.28W
2.31W
2.37W
20mW
unchanged
1 HDMI
2.43W
2.69W
4.53W
460mW
unchanged
2 HDMI
2.53W
2.59W
2.67W
30mW
unchanged
External USB
3.85W
3.89W
3.94W
30mW
new result
Ethernet
3.60W
3.70W
4.91W
230mW
unchanged
Note that the table summary is different than the previous table: here
we show the absolute numbers while the previous table was doing a
confusing attempt at showing relative (to the baseline) numbers.
Conclusion: the 3.06 BIOS update did not significantly change idle
power usage stats except for the MicroSD card which has
significantly improved.
The new "external USB" test is also interesting: it shows how the
provided 1TB SSD card performs (admirably) compared to existing
devices. The other new result is the MicroSD card with a card which,
interestingly, uses less power than the 1TB SSD drive.
That's 8mAh per 10 minutes (and 2 seconds), or 48mA, or, with this
battery, about 127 hours or roughly 5 days of standby. Not bad!
In comparison, here is my really old x220, before:
sep 29 22:13:54 emma systemd-sleep[176315]: /sys/class/power_supply/BAT0/energy_now = 5070 [mWh]
... after:
sep 29 22:23:54 emma systemd-sleep[176486]: /sys/class/power_supply/BAT0/energy_now = 4980 [mWh]
... which is 90 mwH in 10 minutes, or a whopping 540mA, which was
possibly okay when this battery was new (62000 mAh, so about 100
hours, or about 5 days), but this battery is almost dead and has
only 5210 mAh when full, so only 10 hours standby.
And here is the Framework performing a similar test, before:
... which is 49mAh in a little over 10 minutes (and 4 seconds), or
292mA, much more than the Purism, but half of the X220. At this rate,
the battery would last on standby only 12 hours!! That is pretty
bad.
Note that this was done with the following expansion cards:
2 USB-C
1 1TB SSD drive
1 USB-A with a hub connected to it, with keyboard and LAN
Preliminary tests without the hub (over one minute) show that it
doesn't significantly affect this power consumption (300mA).
This guide also suggests booting with nvme.noacpi=1 but this
still gives me about 5mAh/min (or 300mA).
Adding mem_sleep_default=deep to the kernel command line does make a
difference. Before:
... which is 2mAh in 74 seconds, which is 97mA, brings us to a more
reasonable 36 hours, or a day and a half. It's still above the x220
power usage, and more than an order of magnitude more than the Purism
laptop. It's also far from the 0.4% promised by upstream, which
would be 14mA for the 3500mAh battery.
It should also be noted that this "deep" sleep mode is a little more
disruptive than regular sleep. As you can see by the timing, it took
more than 10 seconds for the laptop to resume, which feels a little
alarming as your banging the keyboard to bring it back to life.
You can confirm the current sleep mode with:
# cat /sys/power/mem_sleep
s2idle [deep]
In the above, deep is selected. You can change it on the fly with:
... better! 6 mAh in about 6 minutes, works out to 63.5mA, so more
than two days standby.
A longer test:
oct 01 09:22:56 angela systemd-sleep[62978]: /sys/class/power_supply/BAT1/charge_now                     =   3327 [mAh]
oct 01 12:47:35 angela systemd-sleep[63219]: /sys/class/power_supply/BAT1/charge_now                     =   3147 [mAh]
That's 180mAh in about 3.5h, 52mA! Now at 66h, or almost 3 days.
I wasn't sure why I was seeing such fluctuations in those tests, but
as it turns out, expansion card power tests show that they do
significantly affect power usage, especially the SSD drive, which can
take up to two full watts of power even when idle. I didn't control
for expansion cards in the above tests running them with whatever
card I had plugged in without paying attention so it's likely the
cause of the high power usage and fluctuations.
It might be possible to work around this problem by disabling USB
devices before suspend. TODO. See also this post.
In the meantime, I have been able to get much better suspend
performance by unplugging all modules. Then I get this result:
oct 04 11:15:38 angela systemd-sleep[257571]: /sys/class/power_supply/BAT1/charge_now                     =   3203 [mAh]
oct 04 15:09:32 angela systemd-sleep[257866]: /sys/class/power_supply/BAT1/charge_now                     =   3145 [mAh]
Which is 14.8mA! Almost exactly the number promised by Framework! With
a full battery, that means a 10 days suspend time. This is actually
pretty good, and far beyond what I was expecting when starting down
this journey.
So, once the expansion cards are unplugged, suspend power usage is
actually quite reasonable. More detailed standby tests are available
in the standby-tests page, with a summary below.
There is also some hope that the Chromebook edition
specifically designed with a specification of 14 days standby
time could bring some firmware improvements back down to the
normal line. Some of those issues were reported upstream in April
2022, but there doesn't seem to have been any progress there
since.
TODO: one final solution here is suspend-then-hibernate, which
Windows uses for this
TODO: consider implementing the S0ix sleep states , see also troubleshooting
TODO: consider https://github.com/intel/pm-graph
Standby expansion cards test results
This table is a summary of the more extensive standby-tests I have performed:
Device
Wattage
Amperage
Days
Note
baseline
0.25W
16mA
9
sleep=deep nvme.noacpi=1
s2idle
0.29W
18.9mA
~7
sleep=s2idle nvme.noacpi=1
normal nvme
0.31W
20mA
~7
sleep=s2idle without nvme.noacpi=1
1 USB-C
0.23W
15mA
~10
2 USB-C
0.23W
14.9mA
same as above
1 USB-A
0.75W
48.7mA
3
+500mW (!!) for the first USB-A card!
2 USB-A
1.11W
72mA
2
+360mW
3 USB-A
1.48W
96mA
<2
+370mW
1TB SSD
0.49W
32mA
<5
+260mW
MicroSD
0.52W
34mA
~4
+290mW
DisplayPort
0.85W
55mA
<3
+620mW (!!)
1 HDMI
0.58W
38mA
~4
+250mW
2 HDMI
0.65W
42mA
<4
+70mW
Conclusions:
USB-C cards take no extra power on suspend, possibly less
than empty slots, more testing required
USB-A cards take a lot more power on suspend
(300-500mW) than on regular idle (~10mW, almost negligible)
1TB SSD and MicroSD cards seem to take a reasonable
amount of power (260-290mW), compared to their runtime
equivalents (1-6W!)
DisplayPort takes a surprising lot of power (620mW), almost
double its average runtime usage (390mW)
HDMI cards take, surprisingly, less power (250mW) in
standby than the DP card (620mW)
and oddly, a second card adds less power usage (70mW?!) than the
first, maybe a circuit is used by both?
Standby expansion cards test results, 3.06 beta BIOS
Framework recently (2022-11-07) announced that they will publish
a firmware upgrade to address some of the USB-C issues, including
power management. This could positively affect the above result,
improving both standby and runtime power usage.
The update came out in December 2022 and I redid my analysis with
the following results:
Device
Wattage
Amperage
Days
Note
baseline
0.25W
16mA
9
no cards, same as before upgrade
1 USB-C
0.25W
16mA
9
same as before
2 USB-C
0.25W
16mA
9
same
1 USB-A
0.80W
62mA
3
+550mW!! worse than before
2 USB-A
1.12W
73mA
<2
+320mW, on top of the above, bad!
Ethernet
0.62W
40mA
3-4
new result, decent
1TB SSD
0.52W
34mA
4
a bit worse than before (+2mA)
MicroSD
0.51W
22mA
4
same
DisplayPort
0.52W
34mA
4+
upgrade improved by 300mW
1 HDMI
?
38mA
?
same
2 HDMI
?
45mA
?
a bit worse than before (+3mA)
Normal
1.08W
70mA
~2
Ethernet, 2 USB-C, USB-A
Full results in standby-tests-306. The big takeaway for me is that
the update did not improve power usage on the USB-A ports which is a
big problem for my use case. There is a notable improvement on the
DisplayPort power consumption which brings it more in line with the
HDMI connector, but it still doesn't properly turn off on suspend
either.
Even worse, the USB-A ports now sometimes fails to resume after
suspend, which is pretty annoying. This is a known problem
that will hopefully get fixed in the final release.
I looked at building this myself but failed to run it. I opened a
RFP in Debian so that we can ship this in Debian, and also documented
my work there.
Note that there is now a counter that tracks charge/discharge
cycles. It's visible in tlp-stat -b, which is a nice
improvement:
Ethernet expansion card
The Framework ethernet expansion card is a fancy little doodle:
"2.5Gbit/s and 10/100/1000Mbit/s Ethernet", the "clear housing lets
you peek at the RTL8156 controller that powers it". Which is another
way to say "we didn't completely finish prod on this one, so it kind
of looks like we 3D-printed this in the shop"....
The card is a little bulky, but I guess that's inevitable considering
the RJ-45 form factor when compared to the thin Framework laptop.
I have had a serious issue when trying it at first: the link LEDs
just wouldn't come up. I made a full bug report in the forum and
with upstream support, but eventually figured it out on my own. It's
(of course) a power saving issue: if you reboot the machine, the links
come up when the laptop is running the BIOS POST check and even when
the Linux kernel boots.
I first thought that the problem is likely related to the
powertop service which I run at boot time to tweak some power saving
settings.
It seems like this:
By default, USB power saving is active in the kernel, but not
force-enabled for incompatible drivers. That is, devices that
support suspension will suspend, drivers that do not, will not.
So the fix is actually to uninstall tlp or disable that setting by
adding this to /etc/tlp.conf:
USB_AUTOSUSPEND=0
... but that disables auto-suspend on all USB devices, which may
hurt other power usage performance. I have found that a a
combination of:
USB_AUTOSUSPEND=1
USB_DENYLIST="0bda:8156"
and this on the kernel commandline:
usbcore.quirks=0bda:8156:k
... actually does work correctly. I now have this in my
/etc/default/grub.d/framework-tweaks.cfg file:
# net.ifnames=0: normal interface names ffs (e.g. eth0, wlan0, not wlp166
s0)
# nvme.noacpi=1: reduce SSD disk power usage (not working)
# mem_sleep_default=deep: reduce power usage during sleep (not working)
# usbcore.quirk is a workaround for the ethernet card suspend bug: https:
//guides.frame.work/Guide/Fedora+37+Installation+on+the+Framework+Laptop/
108?lang=en
GRUB_CMDLINE_LINUX="net.ifnames=0 nvme.noacpi=1 mem_sleep_default=deep usbcore.quirks=0bda:8156:k"
# fix the resolution in grub for fonts to not be tiny
GRUB_GFXMODE=1024x768
Other than that, I haven't been able to max out the card because I
don't have other 2.5Gbit/s equipment at home, which is strangely
satisfying. But running against my Turris Omnia
router, I could pretty much max a gigabit fairly easily:
The card doesn't require any proprietary firmware blobs which is
surprising. Other than the power saving issues, it just works.
In my power tests (see powerstat-wayland), the Ethernet card seems
to use about 1.6W of power idle, without link, in the above "quirky"
configuration where the card is functional but without autosuspend.
Proprietary firmware blobs
The framework does need proprietary firmware to operate. Specifically:
the WiFi network card shipped with the DIY kit is a AX210 card that
requires a 5.19 kernel or later, and the firmware-iwlwifi non-free firmware package
the Bluetooth adapter also loads the firmware-iwlwifi
package (untested)
the graphics work out of the box without firmware, but certain
power management features come only with special proprietary
firmware, normally shipped in the firmware-misc-nonfree
but currently missing from the package
Note that, at the time of writing, the latest i915 firmware from
linux-firmware has a serious bug where loading all the
accessible firmware results in noticeable I estimate 200-500ms lag
between the keyboard (not the mouse!) and the display. Symptoms also
include tearing and shearing of windows, it's pretty nasty.
One workaround is to delete the two affected firmware files:
cd /lib/firmware && rm adlp_guc_70.1.1.bin adlp_guc_69.0.3.bin
update-initramfs -u
You will get the following warning during build, which is good as
it means the problematic firmware is disabled:
W: Possible missing firmware /lib/firmware/i915/adlp_guc_69.0.3.bin for module i915
W: Possible missing firmware /lib/firmware/i915/adlp_guc_70.1.1.bin for module i915
But then it also means that critical firmware isn't loaded, which
means, among other things, a higher battery drain. I was able to move
from 8.5-10W down to the 7W range after making the firmware work
properly. This is also after turning the backlight all the way down,
as that takes a solid 2-3W in full blast.
The proper fix is to use some compositing manager. I ended up using
compton with the following systemd unit:
compton is orphaned however, so you might be tempted to use
picom instead, but in my experience the latter uses much
more power (1-2W extra, similar experience). I also tried
compiz but it would just crash with:
anarcat@angela:~$ compiz --replace
compiz (core) - Warn: No XI2 extension
compiz (core) - Error: Another composite manager is already running on screen: 0
compiz (core) - Fatal: No manageable screens found on display :0
When running from the base session, I would get this instead:
Also note that the iwlwifi firmware also looks incomplete. Even with
the package installed, I get those errors in dmesg:
[   19.534429] Intel(R) Wireless WiFi driver for Linux
[   19.534691] iwlwifi 0000:a6:00.0: enabling device (0000 -> 0002)
[   19.541867] iwlwifi 0000:a6:00.0: firmware: failed to load iwlwifi-ty-a0-gf-a0-72.ucode (-2)
[   19.541881] iwlwifi 0000:a6:00.0: firmware: failed to load iwlwifi-ty-a0-gf-a0-72.ucode (-2)
[   19.541882] iwlwifi 0000:a6:00.0: Direct firmware load for iwlwifi-ty-a0-gf-a0-72.ucode failed with error -2
[   19.541890] iwlwifi 0000:a6:00.0: firmware: failed to load iwlwifi-ty-a0-gf-a0-71.ucode (-2)
[   19.541895] iwlwifi 0000:a6:00.0: firmware: failed to load iwlwifi-ty-a0-gf-a0-71.ucode (-2)
[   19.541896] iwlwifi 0000:a6:00.0: Direct firmware load for iwlwifi-ty-a0-gf-a0-71.ucode failed with error -2
[   19.541903] iwlwifi 0000:a6:00.0: firmware: failed to load iwlwifi-ty-a0-gf-a0-70.ucode (-2)
[   19.541907] iwlwifi 0000:a6:00.0: firmware: failed to load iwlwifi-ty-a0-gf-a0-70.ucode (-2)
[   19.541908] iwlwifi 0000:a6:00.0: Direct firmware load for iwlwifi-ty-a0-gf-a0-70.ucode failed with error -2
[   19.541913] iwlwifi 0000:a6:00.0: firmware: failed to load iwlwifi-ty-a0-gf-a0-69.ucode (-2)
[   19.541916] iwlwifi 0000:a6:00.0: firmware: failed to load iwlwifi-ty-a0-gf-a0-69.ucode (-2)
[   19.541917] iwlwifi 0000:a6:00.0: Direct firmware load for iwlwifi-ty-a0-gf-a0-69.ucode failed with error -2
[   19.541922] iwlwifi 0000:a6:00.0: firmware: failed to load iwlwifi-ty-a0-gf-a0-68.ucode (-2)
[   19.541926] iwlwifi 0000:a6:00.0: firmware: failed to load iwlwifi-ty-a0-gf-a0-68.ucode (-2)
[   19.541927] iwlwifi 0000:a6:00.0: Direct firmware load for iwlwifi-ty-a0-gf-a0-68.ucode failed with error -2
[   19.541933] iwlwifi 0000:a6:00.0: firmware: failed to load iwlwifi-ty-a0-gf-a0-67.ucode (-2)
[   19.541937] iwlwifi 0000:a6:00.0: firmware: failed to load iwlwifi-ty-a0-gf-a0-67.ucode (-2)
[   19.541937] iwlwifi 0000:a6:00.0: Direct firmware load for iwlwifi-ty-a0-gf-a0-67.ucode failed with error -2
[   19.544244] iwlwifi 0000:a6:00.0: firmware: direct-loading firmware iwlwifi-ty-a0-gf-a0-66.ucode
[   19.544257] iwlwifi 0000:a6:00.0: api flags index 2 larger than supported by driver
[   19.544270] iwlwifi 0000:a6:00.0: TLV_FW_FSEQ_VERSION: FSEQ Version: 0.63.2.1
[   19.544523] iwlwifi 0000:a6:00.0: firmware: failed to load iwl-debug-yoyo.bin (-2)
[   19.544528] iwlwifi 0000:a6:00.0: firmware: failed to load iwl-debug-yoyo.bin (-2)
[   19.544530] iwlwifi 0000:a6:00.0: loaded firmware version 66.55c64978.0 ty-a0-gf-a0-66.ucode op_mode iwlmvm
Some of those are available in the latest upstream firmware package
(iwlwifi-ty-a0-gf-a0-71.ucode, -68, and -67), but not all
(e.g. iwlwifi-ty-a0-gf-a0-72.ucode is missing) . It's unclear what
those do or don't, as the WiFi seems to work well without them.
I still copied them in from the latest linux-firmware package in the
hope they would help with power management, but I did not notice a
change after loading them.
There are also multiple knobs on the iwlwifi and iwlmvm
drivers. The latter has a power_schmeme setting which defaults to
2 (balanced), setting it to 3 (low power) could improve
battery usage as well, in theory. The iwlwifi driver also has
power_save (defaults to disabled) and power_level (1-5, defaults
to 1) settings. See also the output of modinfo iwlwifi and
modinfo iwlmvm for other driver options.
Graphics acceleration
After loading the latest upstream firmware and setting up a
compositing manager (compton, above), I tested the classic
glxgears.
Running in a window gives me odd results, as the gears basically grind
to a halt:
Running synchronized to the vertical refresh.  The framerate should be
approximately the same as the monitor refresh rate.
137 frames in 5.1 seconds = 26.984 FPS
27 frames in 5.4 seconds =  5.022 FPS
Ouch. 5FPS!
But interestingly, once the window is in full screen, it does hit the
monitor refresh rate:
300 frames in 5.0 seconds = 60.000 FPS
I'm not really a gamer and I'm not normally using any of that fancy
graphics acceleration stuff (except maybe my browser does?).
I installed intel-gpu-tools for the intel_gpu_top
command to confirm the GPU was engaged when doing those simulations. A
nice find. Other useful diagnostic tools include glxgears and
glxinfo (in mesa-utils) and (vainfo in vainfo).
Following to this post, I also made sure to have those settings
in my about:config in Firefox, or, in user.js:
user_pref("media.ffmpeg.vaapi.enabled", true);
Note that the guide suggests many other settings to tweak, but those
might actually be overkill, see this comment and its parents. I
did try forcing hardware acceleration by setting gfx.webrender.all
to true, but everything became choppy and weird.
The guide also mentions installing the intel-media-driver package,
but I could not find that in Debian.
The Arch wiki has, as usual, an excellent reference on hardware
acceleration in Firefox.
Chromium / Signal desktop bugs
It looks like both Chromium and Signal Desktop misbehave with my
compositor setup (compton + i3). The fix is to add a persistent
flag to Chromium. In Arch, it's conveniently in
~/.config/chromium-flags.conf but that doesn't actually work in
Debian. I had to put the flag in
/etc/chromium.d/disable-compositing, like this:
It's possible another one of the hundreds of flags might fix this
issue better, but I don't really have time to go through this entire,
incomplete, and unofficial list (!?!).
Signal Desktop is a similar problem, and doesn't reuse those flags
(because of course it doesn't). Instead I had to rewrite the wrapper
script in /usr/local/bin/signal-desktop to use this instead:
exec /usr/bin/flatpak run --branch=stable --arch=x86_64 org.signal.Signal --disable-gpu-compositing "$@"
This was mostly done in this Puppet commit.
I haven't figured out the root of this problem. I did try using
picom and xcompmgr; they both suffer from the same issue. Another
Debian testing user on Wayland told me they haven't seen this problem,
so hopefully this can be fixed by switching to
wayland.
Graphics card hangs
I believe I might have this bug which results in a total
graphical hang for 15-30 seconds. It's fairly rare so it's not too
disruptive, but when it does happen, it's pretty alarming.
The comments on that bug report are encouraging though: it seems this
is a bug in either mesa or the Intel graphics driver, which means many
people have this problem so it's likely to be fixed. There's actually
a merge request on mesa already (2022-12-29).
It could also be that bug because the error message I get is
actually:
Jan 20 12:49:10 angela kernel: Asynchronous wait on fence 0000:00:02.0:sway[104431]:cb0ae timed out (hint:intel_atomic_commit_ready [i915])
Jan 20 12:49:15 angela kernel: i915 0000:00:02.0: [drm] GPU HANG: ecode 12:0:00000000
Jan 20 12:49:15 angela kernel: i915 0000:00:02.0: [drm] Resetting chip for stopped heartbeat on rcs0
Jan 20 12:49:15 angela kernel: i915 0000:00:02.0: [drm] GuC firmware i915/adlp_guc_70.1.1.bin version 70.1
Jan 20 12:49:15 angela kernel: i915 0000:00:02.0: [drm] HuC firmware i915/tgl_huc_7.9.3.bin version 7.9
Jan 20 12:49:15 angela kernel: i915 0000:00:02.0: [drm] HuC authenticated
Jan 20 12:49:15 angela kernel: i915 0000:00:02.0: [drm] GuC submission enabled
Jan 20 12:49:15 angela kernel: i915 0000:00:02.0: [drm] GuC SLPC enabled
It's a solid 30 seconds graphical hang. Maybe the keyboard and
everything else keeps working. The latter bug report is quite long,
with many comments, but this one from January 2023 seems to say
that Sway 1.8 fixed the problem. There's also an earlier patch to
add an extra kernel parameter that supposedly fixes that too. There's
all sorts of other workarounds in there, for example this:
from this comment... So that one is unsolved, as far as the
upstream drivers are concerned, but maybe could be fixed through Sway.
Weird USB hangs / graphical glitches
I have had weird connectivity glitches better described in this
post, but basically: my USB keyboard and mice (connected over a
USB hub) drop keys, lag a lot or hang, and I get visual glitches.
The fix was to tighten the screws around the CPU on the motherboard
(!), which is, thankfully, a rather simple repair.
USB docks are hell
Note that the monitors are hooked up to angela through a USB-C /
Thunderbolt dock from Cable Matters, with the lovely name of
201053-SIL. It has issues, see this blog
post for an in-depth discussion.
Shipping details
I ordered the Framework in August 2022 and received it about a month
later, which is sooner than expected because the August batch was
late.
People (including me) expected this to have an impact on the September
batch, but it seems Framework have been able to fix the delivery
problems and keep up with the demand.
As of early 2023, their website announces that laptops ship "within 5
days". I have myself ordered a few expansion cards in November 2022,
and they shipped on the same day, arriving 3-4 days later.
The supply pipeline
There are basically 6 steps in the Framework shipping pipeline, each
(except the last) accompanied with an email notification:
pre-order
preparing batch
preparing order
payment complete
shipping
(received)
This comes from the crowdsourced spreadsheet, which should be
updated when the status changes here.
I was part of the "third batch" of the 12th generation laptop, which
was supposed to ship in September. It ended up arriving on my door
step on September 27th, about 33 days after ordering.
It seems current orders are not processed in "batches", but in real
time, see this blog post for details on shipping.
Shipping trivia
I don't know about the others, but my laptop shipped through no less
than four different airplane flights. Here are the hops it took:
I can't quite figure out how to calculate exactly how much mileage
that is, but it's huge. The ride through Alaska is surprising enough
but the bounce back through Winnipeg is especially weird. I guess
the route happens that way because of Fedex shipping hubs.
There was a related oddity when I had my Purism laptop shipped: it
left from the west coast and seemed to enter on an endless, two week
long road trip across the continental US.
If you know the Amazon Web Services or Azure portfolio, and you are interested in OpenShift or the OKD OpenShift community distribution, this is a table of corresponding technologies.
OpenShift is Red Hat s Kubernetes distribution: it is basically the upstream Kubernetes delivered with monitoring, logging, CI/CD, underlying OS, tested upgrade paths not found with a manual kubernetes.io kubeadm install.
After passing the two correspondingcertifications, my opinion on cloud operators is that it is very much a step back in the direction of proprietary software. You can rebuild their cloud stack with opensource components, but it is also a lot of integration work, similar to using the Linux from scratch distribution instead of something like Debian. A good middle point are the OpenShift and OKD Kubernetes distributions, who integrate the most common cloud components, but allow an installation on your own hardware or cloud provider of your choice.
AWS
Azure
OpenShift
*OpenShift upstream project&
Cloud Trail
Kubernetes API Server audit log
Kubernetes
Cloud Watch
Azure Monitor, Azure Log Analytics
OpenShift Monitoring
Prometheus, Kubernetes Metrics
AWS Artifact
Compliance Operator
OpenSCAP
AWS Trusted Advisor
Azure Advisor
Insights
AWS Marketplace
Red Hat Market place
Operator Hub
AWS Identity and Access Management (IAM)
Azure Active Directory, Azure AD DS
Red Hat SSO
Keycloack
AWS Elastisc Beanstalk
Azure App Services
OpenShift Source2Image (S2I)
Source2Image (S2I)
AWS S3
Azure Blob Storage**
ODF Rados Gateway
Rook RGW
AWS Elastic Block Storage
Azure Disk Storage
ODF Rados Block Device
Rook RBD
AWS Elastic File System
Azure Files
ODF Ceph FS
Rook CephFS
AWS ELB Classic
Azure Load Balancer
MetalLB Operator
MetalLB
AWS ELB Application Load Balancer
Azure Application Gateway
OpenShift Router
HAProxy
Amazon Simple Notification Service
OpenShift Streams for Apache Kafka
Apache Kafka
Amazon Guard Duty
Microsoft Defender for Cloud
API Server audit log review, ACS Runtime detection
NGINX Ingress Controller Operator with ModSecurity
NGINX ModSecurity
Amazon Elasticache
Redis Enterprise Operator
Redis, memcached as alternative
AWS Relational Database Service
Azure SQL
Crunchy Data Operator
PostgreSQL
Azure Arc
OpenShift ACM
Open Cluster Management
AWS Scaling Group
Azure Scale Set
OpenShift Autoscaler
OKD Autoscaler
*OpenShift Serverless requires the application to be packaged as a container, something AWS Lambda does not require.**Azure Blob Storage covers the object storage use case of S3, but is itself not S3 compatible
In May 2014 I bought a Samsung Galaxy Note 10.1 2014 edition tablet (wikipedia page [1]) with 32G of RAM. It s display is 2560 1600 resolution which still compares well to the latest tablets. The Galaxy Tab S8 [2] is the latest high-end tablet series from Samsung and the 11 inch tablet in that series also has a 2560 1600 giving it a slightly lower DPI! The latest series also has 12.4 and 14.6 tablets with resolutions of 2800 1752 and 2960 1848 respectively. Obviously if you want a 14 tablet then the latest offerings are good, but if you want a 10 or 11 tablet then Samsung hasn t improved much. The Note 10.1 has 3G of RAM and a choice of 16G, 32G, or 64G of storage. The latest Tab S8 tablets have 8G to 16G of RAM and 128G to 512G of internal storage, which are great if you need such things. For many tasks 3G of RAM is quite adequate and as I chose the 32G model I haven t had a problem with storage. The s-pen is a feature of this tablet which is also on the latest high-end Samsung tablets, it is useful for accessing small elements in web sites designed for desktop use and for graphics editing.
One noteworthy feature of this tablet is the fact that when in landscape orientation it has speakers on each side, which is the correct layout as the vast majority of video with stereo sound is in a landscape orientation.
After using that tablet for about 4 years I bought myself a newer tablet and gave it to my wife. She has since passed it on to another relative who is using it regularly. That tablet seems to have lasted well still being quite usable when it s almost 9 years old. The price including delivery was $579, that works out to about $1.30 per week (disregarding interest and inflation). According to the Reserve Bank of Australia inflation calculator [3] $579 in 2014 is equivalent to $652 in 2021, they don t have results for later than 2021 so I ll assume it would be $675 in 2023.
Currently the main problems with this tablet are lack of USB-C support (which means it s difficult to connect to an external display among other things) and lack of a recent version of Android, 4.4.2 was the latest OTA update available. The XDA Developers forum has a section for this tablet [4] which includes discussion of updates to Android 5.x for devices which didn t get it automatically and for upgrading to very recent Android versions in LineageOS. I m idly considering one of those options, but for the current user the Google Play store is a requirement.
Newer Samsung Tablets
The current equivalent Samsung tablet is the Galaxy Tab S8 which is currently being sold for $1055 which is 56% higher than the inflation adjusted price of my tablet. I don t think this is reasonable given that I bought it 7 months after release and it s now 11 months since the release of the Tab S8. The Tab S8 has more RAM, more storage, and a faster CPU due to improvements over the entire computer industry replacing old parts with newer versions of the same things (including changing to USB-C) doesn t justify a price rise. Increasing RAM size by a factor of 3-5 and increasing storage by a factor of 8 over the last 9 years doesn t match the industry trends for PCs, also as an aside my latest laptop only has 8G of RAM and works well for much more demanding tasks. The Tab S8 series also has significantly better cameras, but I don t think that s a big deal, the 2Mp front camera in my tablet can provide adequate quality for video conferencing and usually saturate the upload bandwidth and again that s an issue of the entire industry moving to newer hardware. I don t think it s bad to take a form factor and display that works well and put newer versions of the CPU, RAM, storage, cameras, and OS on it. But asking for 56% more money for the updated tablet seems unreasonable.
The current S8 Ultra is going for $1760 and the S8+ is $1479. I think those are ridiculous prices for tablets as there is a decent range of new laptops that are cheaper. I believe that the purpose of a tablet is to be easy to carry and quick to start using (no waiting for a laptop to connect to wifi after leaving suspend). The largest of the S8 Tabs is about the same length and width as a Thinkpad X1 Carbon with the benefits being that it s thinner and lighter, but if you got a tablet case with keyboard then it would be thicker and heavier. The S8 seems like bad value for money and the S8+ and S8 Ultra don t seem to compare well to laptops and Chromebooks with touch screens unless you have a specific need for Android tablet apps.
If Samsung are going to just make new tablets without any significant improvements other than refreshing to the latest CPU, RAM, storage, and Camera technology and force users to upgrade via a lack of new OS support then they shouldn t charge so much. Stick well below $1000 and people will be more inclined to replace items, expensive items are expected to last.
Conclusion
Buying this tablet was definitely a good choice. It has performed well for many years and after a couple of years of light use it s back in daily use again. The value for money it offered was significantly greater than newer tablets, when it was new it was really high-end, the current S8 Tab series of tablets aren t anything special when compared to other tablets.
Hi friends!
I haven t written in a while. I ve been caught up in work. But between working, I ve put together some new equipment in a couple of new racks. I bought an audio dampened 15U rack a couple of years ago or so, and into it I ve placed the RAID array and an HP desktop form-factor ML110 server to drive the disks. The disk array controller is a two-port Broadcom / LSI SAS3008 PCI-Express Fusion-MPT SAS-3. I ve been thinking about getting the four-port variant, since I like this one and I ve got another 7 drive bays in the chassis that don t have disks in them.
In the next rack over, which was gifted to me by one of my colleagues (Thank you Nahuel!), I have six qotom mini computers and a couple of 48-port Dell 6248 switches with two 6200-XGSF 10GE SFP+ modules. The mini computers are a sort of proto-cluster, and all have a whole bunch of network interfaces. The smallest of the group is a celeron with four gigabit ethernet ports, and the two fastest ones have i7 processors with 6x GE ports. Each of the mini computers is configured with all of their ethernet interfaces in a single LACP port-channel, thanks to the bonding Linux kernel module.
On my desk, I have a Mikrotik CRS305. It is populated with three LR SMF transceivers. One attaches to my work desktop via a QLogic Corp. cLOM8214 PCIe card, one attaches via a thunderbolt 3 NIC to my work laptop, and the other is connected to the aforementioned Dell switch.
My internet provider has installed a Optical Network Transceiver (ONT) device in my home which terminates the incoming Gigabit Passive Optical Network (GPON) services from the CO and delivers 940Mbit symmetric PPP over Ethernet via 8-pin copper out of the ONT. I connect the ONT to a Mikrotik CRS309-1G-8S+ router. That router is connected via LR SMF to the dell switch in the rack full of qotom hardware.
This afternoon, I tested the throughput between my work desktop and my storage server and came up with these numbers:
$ iperf -c 100.64.79.102
------------------------------------------------------------
Client connecting to 100.64.79.102, TCP port 5001
TCP window size: 16.0 KByte (default)
------------------------------------------------------------
[  1] local 100.64.79.46 port 55216 connected with 100.64.79.102 port 5001 (icwnd/mss/irtt=14/1448/547)
[ ID] Interval       Transfer     Bandwidth
[  1] 0.0000-10.0129 sec  10.4 GBytes  8.95 Gbits/sec
That seems pretty good to me! The traffic hopped through my desk router and the dell switch to get to the Proliant server, and still nearly reached 9Gbit/s. That s a lot of blinkenlights.
I m migrating some self-hosted virtual machines to Trisquel, and noticed that Trisquel does not offer cloud-images similar to the Debian Cloud and Ubuntu Cloud images. Thus my earlier approach based on virt-install --cloud-init and cloud-localds does not work with Trisquel. While I hope that Trisquel will eventually publish cloud-compatible images, I wanted to document an alternative approach for Trisquel based on preseeding. This is how I used to install Debian and Ubuntu in the old days, and the automated preseed method is best documented in the Debian installation manual. I was hoping to forget about the preseed format, but maybe it will become one of those legacy technologies that never really disappears? Like FAT16 and 8-bit microcontrollers.
Below I assume you have a virtual machine host server up that runs libvirt and has virt-install and similar tools; install them with the following command. I run a pre-release version of Trisquel 11 aramo on my VM-host, but I believe any recent dpkg-based distribution like Trisquel 9/10, PureOS 10, Debian 11 or Ubuntu 20.04/22.04 would work.
The approach can install Trisquel 9 (etiona), Trisquel 10 (nabia) and the pre-release of Trisquel 11. First download and verify the integrity of the netinst images that we will need. Unfortunately the Trisquel 11 netinst beta image does not have any checksum or signature available.
I have developed the following fairly minimal preseed file that works with all three Trisquel releases. Compare it against the official Trisquel 11 preseed skeleton and the Debian 11 example preseed file. You should modify obvious things like SSH key, host/IP settings, partition layout and decide for yourself how to deal with passwords. While Ubuntu/Trisquel usually wants to setup a user account, I prefer to login as root hence setting passwd/root-login to true and passwd/make-user to false.
Use the file above as a skeleton for preparing a VM-specific preseed file as follows. The environment variables HOST and IPS will be used later on too.
The following script is used to prepare the ISO images with the preseed file that we will need. This script is inspired by the Debian Wiki Preseed EditIso page and the Trisquel ISO customization wiki page. There are a couple of variations based on earlier works. Paths are updated to match the Trisquel netinst ISO layout, which differ slightly from Debian. We modify isolinux.cfg to boot the auto label without a timeout. On Trisquel 11 the auto boot label exists, but on Trisquel 9 and Trisquel 10 it does not exist so we add it in order to be able to start the automated preseed installation.
root@trana:~# cat gen-preseed-iso
#!/bin/sh
# Copyright (C) 2018-2022 Simon Josefsson -- GPLv3+
# https://wiki.debian.org/DebianInstaller/Preseed/EditIso
# https://trisquel.info/en/wiki/customizing-trisquel-iso
set -e
set -x
ISO="$1"
PRESEED="$2"
OUTISO="$3"
LASTPWD="$PWD"
test -f "$ISO"
test -f "$PRESEED"
test ! -f "$OUTISO"
TMPDIR=$(mktemp -d)
mkdir "$TMPDIR/mnt"
mkdir "$TMPDIR/tmp"
cp "$PRESEED" "$TMPDIR"/preseed.cfg
cd "$TMPDIR"
mount "$ISO" mnt/
cp -rT mnt/ tmp/
umount mnt/
chmod +w -R tmp/
gunzip tmp/initrd.gz
echo preseed.cfg   cpio -H newc -o -A -F tmp/initrd
gzip tmp/initrd
chmod -w -R tmp/
sed -i "s/timeout 0/timeout 1/" tmp/isolinux.cfg
sed -i "s/default vesamenu.c32/default auto/" tmp/isolinux.cfg
if ! grep -q auto tmp/adtxt.cfg; then
    cat<<EOF >> tmp/adtxt.cfg
label auto
	menu label ^Automated install
	kernel linux
	append auto=true priority=critical vga=788 initrd=initrd.gz --- quiet
EOF
fi
cd tmp/
find -follow -type f   xargs md5sum  > md5sum.txt
cd ..
cd "$LASTPWD"
genisoimage -r -J -b isolinux.bin -c boot.cat \
            -no-emul-boot -boot-load-size 4 -boot-info-table \
            -o "$OUTISO" "$TMPDIR/tmp/"
rm -rf "$TMPDIR"
exit 0
^D
root@trana:~# chmod +x gen-preseed-iso
root@trana:~#
Next run the command on one of the downloaded ISO image and the generated preseed file.
root@trana:~# ./gen-preseed-iso /root/iso/trisquel-netinst_10.0.1_amd64.iso vm-$HOST.preseed vm-$HOST.iso
+ ISO=/root/iso/trisquel-netinst_10.0.1_amd64.iso
+ PRESEED=vm-foo.preseed
+ OUTISO=vm-foo.iso
+ LASTPWD=/root
+ test -f /root/iso/trisquel-netinst_10.0.1_amd64.iso
+ test -f vm-foo.preseed
+ test ! -f vm-foo.iso
+ mktemp -d
+ TMPDIR=/tmp/tmp.mNEprT4Tx9
+ mkdir /tmp/tmp.mNEprT4Tx9/mnt
+ mkdir /tmp/tmp.mNEprT4Tx9/tmp
+ cp vm-foo.preseed /tmp/tmp.mNEprT4Tx9/preseed.cfg
+ cd /tmp/tmp.mNEprT4Tx9
+ mount /root/iso/trisquel-netinst_10.0.1_amd64.iso mnt/
mount: /tmp/tmp.mNEprT4Tx9/mnt: WARNING: source write-protected, mounted read-only.
+ cp -rT mnt/ tmp/
+ umount mnt/
+ chmod +w -R tmp/
+ gunzip tmp/initrd.gz
+ echo preseed.cfg
+ cpio -H newc -o -A -F tmp/initrd
5 blocks
+ gzip tmp/initrd
+ chmod -w -R tmp/
+ sed -i s/timeout 0/timeout 1/ tmp/isolinux.cfg
+ sed -i s/default vesamenu.c32/default auto/ tmp/isolinux.cfg
+ grep -q auto tmp/adtxt.cfg
+ cat
+ cd tmp/
+ find -follow -type f
+ xargs md5sum
+ cd ..
+ cd /root
+ genisoimage -r -J -b isolinux.bin -c boot.cat -no-emul-boot -boot-load-size 4 -boot-info-table -o vm-foo.iso /tmp/tmp.mNEprT4Tx9/tmp/
I: -input-charset not specified, using utf-8 (detected in locale settings)
Using GCRY_000.MOD;1 for  /tmp/tmp.mNEprT4Tx9/tmp/boot/grub/x86_64-efi/gcry_sha512.mod (gcry_sha256.mod)
Using XNU_U000.MOD;1 for  /tmp/tmp.mNEprT4Tx9/tmp/boot/grub/x86_64-efi/xnu_uuid.mod (xnu_uuid_test.mod)
Using PASSW000.MOD;1 for  /tmp/tmp.mNEprT4Tx9/tmp/boot/grub/x86_64-efi/password_pbkdf2.mod (password.mod)
Using PART_000.MOD;1 for  /tmp/tmp.mNEprT4Tx9/tmp/boot/grub/x86_64-efi/part_sunpc.mod (part_sun.mod)
Using USBSE000.MOD;1 for  /tmp/tmp.mNEprT4Tx9/tmp/boot/grub/x86_64-efi/usbserial_pl2303.mod (usbserial_ftdi.mod)
Using USBSE001.MOD;1 for  /tmp/tmp.mNEprT4Tx9/tmp/boot/grub/x86_64-efi/usbserial_ftdi.mod (usbserial_usbdebug.mod)
Using VIDEO000.MOD;1 for  /tmp/tmp.mNEprT4Tx9/tmp/boot/grub/x86_64-efi/videotest.mod (videotest_checksum.mod)
Using GFXTE000.MOD;1 for  /tmp/tmp.mNEprT4Tx9/tmp/boot/grub/x86_64-efi/gfxterm_background.mod (gfxterm_menu.mod)
Using GCRY_001.MOD;1 for  /tmp/tmp.mNEprT4Tx9/tmp/boot/grub/x86_64-efi/gcry_sha256.mod (gcry_sha1.mod)
Using MULTI000.MOD;1 for  /tmp/tmp.mNEprT4Tx9/tmp/boot/grub/x86_64-efi/multiboot2.mod (multiboot.mod)
Using USBSE002.MOD;1 for  /tmp/tmp.mNEprT4Tx9/tmp/boot/grub/x86_64-efi/usbserial_usbdebug.mod (usbserial_common.mod)
Using MDRAI000.MOD;1 for  /tmp/tmp.mNEprT4Tx9/tmp/boot/grub/x86_64-efi/mdraid09.mod (mdraid09_be.mod)
Size of boot image is 4 sectors -> No emulation
 22.89% done, estimate finish Thu Dec 29 23:36:18 2022
 45.70% done, estimate finish Thu Dec 29 23:36:18 2022
 68.56% done, estimate finish Thu Dec 29 23:36:18 2022
 91.45% done, estimate finish Thu Dec 29 23:36:18 2022
Total translation table size: 2048
Total rockridge attributes bytes: 24816
Total directory bytes: 40960
Path table size(bytes): 64
Max brk space used 46000
21885 extents written (42 MB)
+ rm -rf /tmp/tmp.mNEprT4Tx9
+ exit 0
root@trana:~#
Now the image is ready for installation, so invoke virt-install as follows. The machine will start directly, launching the preseed automatic installation. At this point, I usually click on the virtual machine in virt-manager to follow screen output until the installation has finished. If everything works OK the machines comes up and I can ssh into it.
root@trana:~# virt-install --name $HOST --disk vm-$HOST.img,size=5 --cdrom vm-$HOST.iso --osinfo linux2020 --autostart --noautoconsole --wait
Using linux2020 default --memory 4096
Starting install...
Allocating 'vm-foo.img'                                                                                                                                     0 B  00:00:00 ...
Creating domain...                                                                                                                                          0 B  00:00:00
Domain is still running. Installation may be in progress.
Waiting for the installation to complete.
Domain has shutdown. Continuing.
Domain creation completed.
Restarting guest.
root@trana:~#
There are some problems that I have noticed that would be nice to fix, but are easy to work around. The first is that at the end of the installation of Trisquel 9 and Trisquel 10, the VM hangs after displaying Sent SIGKILL to all processes followed by Requesting system reboot. I kill the VM manually using virsh destroy foo and start it up again using virsh start foo. For production use I expect to be running Trisquel 11, where the problem doesn t happen, so this does not bother me enough to debug further. The remaining issue that once booted, a Trisquel 11 VM has lost its DNS nameserver configuration, presumably due to poor integration with systemd-resolved. Both Trisquel 9 and Trisquel 10 uses systemd-resolved where DNS works after first boot, so this appears to be a Trisquel 11 bug. You can work around it with rm -f /etc/resolv.conf && echo 'nameserver A.B.C.D' > /etc/resolv.conf or drink the systemd Kool-Aid. If you want to clean up and re-start the process, here is how you wipe out what you did. After this, you may run the sed, ./gen-preseed-iso and virt-install commands again. Remember, use virsh shutdown foo to gracefully shutdown a VM.
A few years ago, I downsized my personal infrastructure. Until 2018, there were
a dozen containers running on a single Hetzner server.1 I migrated
my emails to Fastmail and my DNS zones to Gandi. It left me with only my
blog to self-host. As of today, my low-scale infrastructure is composed of 4
virtual machines running NixOS on Hetzner Cloud and Vultr, a handful
of DNS zones on Gandi and Route 53, and a couple of Cloudfront
distributions. It is managed by CDK for Terraform (CDKTF), while NixOS
deployments are handled by NixOps.
In this article, I provide a brief introduction to Terraform, CDKTF, and the
Nix ecosystem. I also explain how to use Nix to access these tools within
your shell, so you can quickly start using them.
CDKTF: infrastructure as codeTerraform is an infrastructure-as-code tool. You can define your
infrastructure by declaring resources with the HCL language. This language
has some additional features like loops to declare several resources from a
list, built-in functions you can call in expressions, and string templates.
Terraform relies on a large set of providers to manage resources.
Managing servers
Here is a short example using the Hetzner Cloud provider to spawn a virtual
machine:
HCL expressiveness is quite limited and I find a general-purpose language more
convenient to describe all the resources. This is where CDK for Terraform
comes in: you can manage your infrastructure using your preferred programming
language, including TypeScript, Go, and Python. Here is the previous example
using CDKTF and TypeScript:
Running cdktf synth generates a configuration file for Terraform, terraform
plan previews the changes, and terraform apply applies them. Now that you
have a general-purpose language, you can use functions.
Managing DNS records
While using CDKTF for 4 web servers may seem a tad overkill, this is quite
different when it comes to managing a few DNS zones. With DNSControl, which
is using JavaScript as a domain-specific language, I was able to define the
bernat.ch zone with this snippet of code:
All the magic is in the code that I did not show you. You can check the
dns.ts file in the cdktf-take1 repository to see how it works. Here is a
quick explanation:
Route53Zone() creates a new zone hosted by Route 53,
sign() signs the zone with the provided master key,
registrar() registers the zone to the registrar of the domain and sets up DNSSEC,
www() creates A and AAAA records for the provided name pointing to the web servers,
fastmailMX() creates the MX records and other support records to direct emails to Fastmail.
Here is the content of the fastmailMX() function. It generates a few records
and returns the current zone for chaining:
I encourage you to browse the repository if you need more
information.
About Pulumi
My first tentative around Terraform was to use Pulumi. You can find this
attempt on GitHub. This is quite similar to what I currently do
with CDKTF. The main difference is that I am using Python instead of TypeScript
because I was not familiar with TypeScript at the time.2Pulumi predates CDKTF and it uses a slightly different approach. CDKTF
generates a Terraform configuration (in JSON format instead of HCL), delegating
planning, state management, and deployment to Terraform. It is therefore bound
to the limitations of what can be expressed by Terraform, notably when you
need to transform data obtained from one resource to another.3Pulumi needs specific providers for each resource. Many Pulumi providers are
thin wrappers encapsulating Terraform providers.
While Pulumi provides a good user experience, I switched to CDKTF because
writing providers for Pulumi is a chore. CDKTF does not require such a step.
Outside the big players (AWS, Azure and Google Cloud), the existence, quality,
and freshness of the Pulumi providers are inconsistent. Most providers rely on
a Terraform provider and they may lag a few versions behind, miss a few
resources, or have a few bugs of their own.
When a provider does not exist, you can write one with the help of the
pulumi-terraform-bridge library. The Pulumi project provides a
boilerplate for this purpose. I had a bad experience with it when writing
providers for Gandi and Vultr: the
Makefileautomatically installs Pulumi using a curl sh
pattern and does not work with /bin/sh. There is a lack of
interest for community-based contributions4 or even for providers for
smaller players.
NixOS & NixOpsNix is a functional, purely-functional programming language.
Nix is also the name of the package manager that is built on top of
the Nix language. It allows users to declaratively install packages.
nixpkgs is a repository of packages. You can install Nix on
top of a regular Linux distribution. If you want more details, a good resource
is the official website, and notably the learn section. There is a steep learning curve, but the reward is tremendous.
NixOS: declarative Linux distributionNixOS is a Linux distribution built on top of the Nix package manager.
Here is a configuration snippet to add some packages:
It is possible to alter an existing derivation5 to use a different version, enable a
specific feature, or apply a patch. Here is how I enable and configure Nginx
to disable the stream module, add the Brotli compression module, and add the
IP address anonymizer module. Moreover, instead of using OpenSSL 3, I keep
using OpenSSL 1.1.6
If you need to add some patches, it is also possible. Here are the patches I
added in 2019 to circumvent the DoS vulnerabilities in Nginx
until they were fixed in NixOS:7
services.nginx.package = pkgs.nginxStable.overrideAttrs (old:patches = oldAttrs.patches ++[# HTTP/2: reject zero length headers with PROTOCOL_ERROR.(pkgs.fetchpatch url =https://github.com/nginx/nginx/commit/dbdd[].patch;sha256 ="a48190[ ]"; )# HTTP/2: limited number of DATA frames.(pkgs.fetchpatch url =https://github.com/nginx/nginx/commit/94c5[].patch;sha256 ="af591a[ ]"; )# HTTP/2: limited number of PRIORITY frames.(pkgs.fetchpatch url =https://github.com/nginx/nginx/commit/39bb[].patch;sha256 ="1ad8fe[ ]"; )]; );
If you are interested, have a look at my relatively small configuration:
common.nix contains the configuration to be applied to any host
(SSH, users, common software packages), web.nix contains the
configuration for the web servers, isso.nix runs Isso into a
systemd container.
NixOps: NixOS deployment tool
On a single node, NixOS configuration is in the /etc/nixos/configuration.nix
file. After modifying it, you have to run nixos-rebuild switch. Nix fetches
all possible dependencies from the binary cache and builds the remaining
packages. It creates a new entry in the boot loader menu and activates the new
configuration.
To manage several nodes, there exists several options, including NixOps,
deploy-rs, Colmena, and morph. I do not know all of them, but from
my point of view, the differences are not that important. It is also possible to
build such a tool yourself as Nix provides the most important building blocks:
nix build and nix copy. NixOps is one of the first tools available but I
encourage you to explore the alternatives.
NixOps configuration is written in Nix. Here is a simplified configuration
to deploy znc01.luffy.cx, web01.luffy.cx, and web02.luffy.cx, with the
help of the server and web functions:
Tying everything together with Nix
The Nix ecosystem is a unified solution to the various problems around
software and configuration management. A very interesting feature is the
declarative and reproducible developer environments. This is similar to
Python virtual environments, except it is not language-specific.
Brief introduction to Nix flakes
I am using flakes, a new Nix feature improving reproducibility by pinning
all dependencies and making the build hermetic. While the feature is marked as
experimental,8 it is widely used and you may see flake.nix and
flake.lock at the root of some repositories.
As a short example, here is the flake.nix content shipped with Snimpy, an
interactive SNMP tool for Python relying on libsmi, a C library:
Nix and CDKTF
At the root of the repository I use for CDKTF, there is a
flake.nix file to set up a shell with Terraform and
CDKTF installed and with the appropriate environment variables to automate my
infrastructure.
Terraform is already packaged in nixpkgs. However, I need to apply a patch
on top of the Gandi provider. Not a problem with Nix!
CDKTF is written in TypeScript. I have a
package.json file with all the dependencies
needed, including the ones to use TypeScript as the language to define
infrastructure:
The next step is to generate the CDKTF providers from the Terraform providers
and turn them into a derivation:
cdktfProviders = pkgs.stdenvNoCC.mkDerivation name ="cdktf-providers";nativeBuildInputs =[
pkgs.nodejs
terraform
];src = nix-filter root =./.;include =[./cdktf.json./tsconfig.json]; ;buildPhase ='' export HOME=$(mktemp -d) export CHECKPOINT_DISABLE=1 export DISABLE_VERSION_CHECK=1 export PATH=$ nodeEnv/node_modules/.bin:$PATH ln -nsf $ nodeEnv/node_modules node_modules # Build all providers we have in terraform for provider in $(cd $ terraform/libexec/terraform-providers; echo */*/*/*); do version=''$ provider##*/ provider=''$ provider%/* echo "Build $provider@$version" cdktf provider add --force-local $provider@$version cat done echo "Compile TS JS" tsc '';installPhase ='' mv .gen $out ln -nsf $ nodeEnv/node_modules $out/node_modules ''; ;
Finally, we can define the development environment:
devShells.default = pkgs.mkShell name ="cdktf-take1";buildInputs =[
pkgs.nodejs
pkgs.yarn
terraform
];shellHook ='' # No telemetry export CHECKPOINT_DISABLE=1 # No autoinstall of plugins export CDKTF_DISABLE_PLUGIN_CACHE_ENV=1 # Do not check version export DISABLE_VERSION_CHECK=1 # Access to node modules export PATH=$PWD/node_modules/.bin:$PATH ln -nsf $ nodeEnv/node_modules node_modules ln -nsf $ cdktfProviders .gen # Credentials for p in \ njf.nznmba.pbz/Nqzvavfgengbe \ urgmare.pbz/ivaprag@oreang.pu \ ihyge.pbz/ihyge@ivaprag.oreang.pu; do eval $(pass show $(echo $p tr 'A-Za-z' 'N-ZA-Mn-za-m') grep '^export') done eval $(pass show personal/cdktf/secrets grep '^export') export TF_VAR_hcloudToken="$HCLOUD_TOKEN" export TF_VAR_vultrApiKey="$VULTR_API_KEY" unset VULTR_API_KEY HCLOUD_TOKEN ''; ;
The derivations listed in buildInputs are available in the provided shell.
The content of shellHook is sourced when starting the shell. It sets up some
symbolic links to make the JavaScript environment built at an earlier step
available, as well as the generated CDKTF providers. It also exports all the
credentials.10
I am also using direnv with an .envrc to
automatically load the development environment. This also enables the
environment to be available from inside Emacs, notably when using lsp-mode
to get TypeScript completions. Without direnv, nix develop . can activate
the environment.
I use the following commands to deploy the infrastructure:11
As for CDKTF, at the root of the repository I use for NixOps,
there is a flake.nix file to set up a shell with
NixOps configured. Because NixOps do not support rollouts, I usually use the
following commands to deploy on a single server:12
nixops deploy rolls out all servers in parallel and therefore could cause a
short outage where all Nginx are down at the same time.
This post has been a work-in-progress for the past three years, with the content
being updated and refined as I experimented with different solutions. There is
still much to explore13 but I feel there is enough content to publish now.
It was an AMD Athlon 64 X2 5600+ with 2 GB of RAM and 2 400 GB disks
with software RAID. I was paying something around 59 per month for it.
While it was a good deal in 2008, by 2018 it was no longer cost-effective.
It was running on Debian Wheezy with Linux-VServer for isolation, both
of which were outdated in 2018.
I also did not use Python because Poetry support in Nix was a bit
broken around the time I started hacking around CDKTF.
Pulumi can apply arbitrary functions with the apply()
method on an output. It makes it easy to transform data that are not known
during the planning stage. Terraform has functions to
serve a similar purpose, but they are more limited.
The two mentioned pull requests are not merged yet. The second one is
superseded by PR #61, submitted two months later, which
enforces the use of /bin/bash. I also submitted PR #56,
which was merged 4 months later and quickly reverted without
an explanation.
You may consider packages and derivations to be synonyms in the
Nix ecosystem.
NixOS can be a bit slow to integrate patches since they need to
rebuild parts of the binary cache before releasing the fixes. In this
specific case, they were fast: the vulnerability and patches were released
on August 13th 2019 and available in NixOS on August 15th. As a
comparison, Debian only released the fixed version on August 22nd, which is unusually late.
Because flakes are experimental, many documentations do not
use them and it is an additional aspect to learn.
It is possible to replace . with github:vincentbernat/snimpy,
like in the other commands, but having Snimpy dependencies without
Snimpy source code is less interesting.
I am using pass as a password manager. The password names are
only obfuscated to avoid spam.
The cdktf command can wrap the terraform commands, but I
prefer to use them directly as they are more flexible.
If the change is risky, I disable the server with CDKTF. This
removes it from the web service DNS records.
I would like to replace NixOps with an alternative handling
progressive rollouts and checks. I am also considering switching to
Nomad or Kubernetes to deploy workloads.
I use GnuPG to compute cryptographic signatures for my emails, git commits/tags, and software release artifacts (tarballs). Part of GnuPG is gpg-agent which talks to OpenSSH, which I login to remote servers and to clone git repositories. I dislike storing cryptographic keys on general-purpose machines, and have used hardware-backed OpenPGP keys since around 2006 when I got a FSFE Fellowship Card. GnuPG via gpg-agent handles this well, and the private key never leaves the hardware. The ZeitControl cards were (to my knowledge) proprietary hardware running some non-free operating system and OpenPGP implementation. By late 2012 the YubiKey NEO supported OpenPGP, and while the hardware and operating system on it was not free, at least it ran a free software OpenPGP implementation and eventually I setup my primary RSA key on it. This worked well for a couple of years, and when I in 2019 wished to migrate to a new key, the FST-01G device with open hardware running free software that supported Ed25519 had become available. I created a key and have been using the FST-01G on my main laptop since then. This little device has been working, the signature counter on it is around 14501 which means around 10 signatures/day since then!
Currently I am in the process of migrating towards a new laptop, and moving the FST-01G device between them is cumbersome, especially if I want to use both laptops in parallel. That s why I need to setup a new hardware device to hold my OpenPGP key, which can go with my new laptop. This is a good time to re-visit alternatives. I quickly decided that I did not want to create a new key, only to import my current one to keep everything working. My requirements on the device to chose hasn t changed since 2019, see my summary at the end of the earlier blog post. Unfortunately the FST-01G is out of stock and the newer FST-01SZ has also out of stock. While Tillitis looks promising (and I have one to play with), it does not support OpenPGP (yet). What to do? Fortunately, I found some FST-01SZ device in my drawer, and decided to use it pending a more satisfactory answer. Hopefully once I get around to generate a new OpenPGP key in a year or so, I will do a better survey of options that are available on the market then. What are your (freedom-respecting) OpenPGP hardware recommendations?
FST-01SZ circuit board
Similar to setting up the FST-01G, the FST-01SZ needs to be setup before use. I m doing the following from Trisquel 11 but any GNU/Linux system would work. When the device is inserted at first time, some kernel messages are shown (see /var/log/syslog or use the dmesg command):
usb 3-3: new full-speed USB device number 39 using xhci_hcd
usb 3-3: New USB device found, idVendor=234b, idProduct=0004, bcdDevice= 2.00
usb 3-3: New USB device strings: Mfr=1, Product=2, SerialNumber=3
usb 3-3: Product: Fraucheky
usb 3-3: Manufacturer: Free Software Initiative of Japan
usb 3-3: SerialNumber: FSIJ-0.0
usb-storage 3-3:1.0: USB Mass Storage device detected
scsi host1: usb-storage 3-3:1.0
scsi 1:0:0:0: Direct-Access     FSIJ     Fraucheky        1.0  PQ: 0 ANSI: 0
sd 1:0:0:0: Attached scsi generic sg2 type 0
sd 1:0:0:0: [sdc] 128 512-byte logical blocks: (65.5 kB/64.0 KiB)
sd 1:0:0:0: [sdc] Write Protect is off
sd 1:0:0:0: [sdc] Mode Sense: 03 00 00 00
sd 1:0:0:0: [sdc] No Caching mode page found
sd 1:0:0:0: [sdc] Assuming drive cache: write through
 sdc:
sd 1:0:0:0: [sdc] Attached SCSI removable disk
Interestingly, the NeuG software installed on the device I got appears to be version 1.0.9:
jas@kaka:~$ head /media/jas/Fraucheky/README
NeuG - a true random number generator implementation
						  Version 1.0.9
						     2018-11-20
					           Niibe Yutaka
			      Free Software Initiative of Japan
What's NeuG?
============
jas@kaka:~$
I could not find version 1.0.9 published anywhere, but the device came with a SD-card that contain a copy of the source, so I uploaded it until a more canonical place is located. Putting the device in the serial mode can be done using a sudo eject /dev/sdc command which results in the following syslog output.
usb 3-3: reset full-speed USB device number 39 using xhci_hcd
usb 3-3: device firmware changed
usb 3-3: USB disconnect, device number 39
sdc: detected capacity change from 128 to 0
usb 3-3: new full-speed USB device number 40 using xhci_hcd
usb 3-3: New USB device found, idVendor=234b, idProduct=0001, bcdDevice= 2.00
usb 3-3: New USB device strings: Mfr=1, Product=2, SerialNumber=3
usb 3-3: Product: NeuG True RNG
usb 3-3: Manufacturer: Free Software Initiative of Japan
usb 3-3: SerialNumber: FSIJ-1.0.9-42315277
cdc_acm 3-3:1.0: ttyACM0: USB ACM device
Now download Gnuk, verify its integrity and build it. You may need some additional packages installed, try apt-get install gcc-arm-none-eabi openocd python3-usb. As you can see, I m using the stable 1.2 branch of Gnuk, currently on version 1.2.20. The ./configure parameters deserve some explanation. The kdf_do=required sets up the device to require KDF usage. The --enable-factory-reset allows me to use the command factory-reset (with admin PIN) inside gpg --card-edit to completely wipe the card. Some may consider that too dangerous, but my view is that if someone has your admin PIN it is game over anyway. The --vidpid=234b:0000 is specifies the USB VID/PID to use, and --target=FST_01SZ is critical to set the platform (you ll may brick the device if you pick the wrong --target setting).
jas@kaka:~/src$ rm -rf gnuk neug
jas@kaka:~/src$ git clone https://gitlab.com/jas/neug.git
Cloning into 'neug'...
remote: Enumerating objects: 2034, done.
remote: Counting objects: 100% (2034/2034), done.
remote: Compressing objects: 100% (603/603), done.
remote: Total 2034 (delta 1405), reused 2013 (delta 1405), pack-reused 0
Receiving objects: 100% (2034/2034), 910.34 KiB   3.50 MiB/s, done.
Resolving deltas: 100% (1405/1405), done.
jas@kaka:~/src$ git clone https://salsa.debian.org/gnuk-team/gnuk/gnuk.git
Cloning into 'gnuk'...
remote: Enumerating objects: 13765, done.
remote: Counting objects: 100% (959/959), done.
remote: Compressing objects: 100% (337/337), done.
remote: Total 13765 (delta 629), reused 907 (delta 599), pack-reused 12806
Receiving objects: 100% (13765/13765), 12.59 MiB   3.05 MiB/s, done.
Resolving deltas: 100% (10077/10077), done.
jas@kaka:~/src$ cd neug
jas@kaka:~/src/neug$ git describe
release/1.0.9
jas@kaka:~/src/neug$ git tag -v  git describe
object 5d51022a97a5b7358d0ea62bbbc00628c6cec06a
type commit
tag release/1.0.9
tagger NIIBE Yutaka <gniibe@fsij.org> 1542701768 +0900
Version 1.0.9.
gpg: Signature made Tue Nov 20 09:16:08 2018 CET
gpg:                using EDDSA key 249CB3771750745D5CDD323CE267B052364F028D
gpg:                issuer "gniibe@fsij.org"
gpg: Good signature from "NIIBE Yutaka <gniibe@fsij.org>" [unknown]
gpg:                 aka "NIIBE Yutaka <gniibe@debian.org>" [unknown]
gpg: WARNING: This key is not certified with a trusted signature!
gpg:          There is no indication that the signature belongs to the owner.
Primary key fingerprint: 249C B377 1750 745D 5CDD  323C E267 B052 364F 028D
jas@kaka:~/src/neug$ cd ../gnuk/
jas@kaka:~/src/gnuk$ git checkout STABLE-BRANCH-1-2
Branch 'STABLE-BRANCH-1-2' set up to track remote branch 'STABLE-BRANCH-1-2' from 'origin'.
Switched to a new branch 'STABLE-BRANCH-1-2'
jas@kaka:~/src/gnuk$ git describe
release/1.2.20
jas@kaka:~/src/gnuk$ git tag -v  git describe
object 9d3c08bd2beb73ce942b016d4328f0a596096c02
type commit
tag release/1.2.20
tagger NIIBE Yutaka <gniibe@fsij.org> 1650594032 +0900
Gnuk: Version 1.2.20
gpg: Signature made Fri Apr 22 04:20:32 2022 CEST
gpg:                using EDDSA key 249CB3771750745D5CDD323CE267B052364F028D
gpg: Good signature from "NIIBE Yutaka <gniibe@fsij.org>" [unknown]
gpg:                 aka "NIIBE Yutaka <gniibe@debian.org>" [unknown]
gpg: WARNING: This key is not certified with a trusted signature!
gpg:          There is no indication that the signature belongs to the owner.
Primary key fingerprint: 249C B377 1750 745D 5CDD  323C E267 B052 364F 028D
jas@kaka:~/src/gnuk/src$ git submodule update --init
Submodule 'chopstx' (https://salsa.debian.org/gnuk-team/chopstx/chopstx.git) registered for path '../chopstx'
Cloning into '/home/jas/src/gnuk/chopstx'...
Submodule path '../chopstx': checked out 'e12a7e0bb3f004c7bca41cfdb24c8b66daf3db89'
jas@kaka:~/src/gnuk$ cd chopstx
jas@kaka:~/src/gnuk/chopstx$ git describe
release/1.21
jas@kaka:~/src/gnuk/chopstx$ git tag -v  git describe
object e12a7e0bb3f004c7bca41cfdb24c8b66daf3db89
type commit
tag release/1.21
tagger NIIBE Yutaka <gniibe@fsij.org> 1650593697 +0900
Chopstx: Version 1.21
gpg: Signature made Fri Apr 22 04:14:57 2022 CEST
gpg:                using EDDSA key 249CB3771750745D5CDD323CE267B052364F028D
gpg: Good signature from "NIIBE Yutaka <gniibe@fsij.org>" [unknown]
gpg:                 aka "NIIBE Yutaka <gniibe@debian.org>" [unknown]
gpg: WARNING: This key is not certified with a trusted signature!
gpg:          There is no indication that the signature belongs to the owner.
Primary key fingerprint: 249C B377 1750 745D 5CDD  323C E267 B052 364F 028D
jas@kaka:~/src/gnuk/chopstx$ cd ../src
jas@kaka:~/src/gnuk/src$ kdf_do=required ./configure --enable-factory-reset --vidpid=234b:0000 --target=FST_01SZ
Header file is: board-fst-01sz.h
Debug option disabled
Configured for bare system (no-DFU)
PIN pad option disabled
CERT.3 Data Object is NOT supported
Card insert/removal by HID device is NOT supported
Life cycle management is supported
Acknowledge button is supported
KDF DO is required before key import/generation
jas@kaka:~/src/gnuk/src$ make   less
jas@kaka:~/src/gnuk/src$ cd ../regnual/
jas@kaka:~/src/gnuk/regnual$ make   less
jas@kaka:~/src/gnuk/regnual$ cd ../../
jas@kaka:~/src$ sudo python3 neug/tool/neug_upgrade.py -f gnuk/regnual/regnual.bin gnuk/src/build/gnuk.bin
gnuk/regnual/regnual.bin: 4608
gnuk/src/build/gnuk.bin: 109568
CRC32: b93ca829
Device:
Configuration: 1
Interface: 1
20000e00:20005000
Downloading flash upgrade program...
start 20000e00
end   20002000
# 20002000: 32 : 4
Run flash upgrade program...
Wait 1 second...
Wait 1 second...
Device:
08001000:08020000
Downloading the program
start 08001000
end   0801ac00
jas@kaka:~/src$
The kernel log will contain the following, and the card is ready to use as an OpenPGP card. You may unplug it and re-insert it as you wish.
usb 3-3: reset full-speed USB device number 41 using xhci_hcd
usb 3-3: device firmware changed
usb 3-3: USB disconnect, device number 41
usb 3-3: new full-speed USB device number 42 using xhci_hcd
usb 3-3: New USB device found, idVendor=234b, idProduct=0000, bcdDevice= 2.00
usb 3-3: New USB device strings: Mfr=1, Product=2, SerialNumber=3
usb 3-3: Product: Gnuk Token
usb 3-3: Manufacturer: Free Software Initiative of Japan
usb 3-3: SerialNumber: FSIJ-1.2.20-42315277
Setting up the card is the next step, and there are many tutorials around for this, eventually I settled with the following sequence. Let s start with setting the admin PIN. First make sure that pcscd nor scdaemon is running, which is good hygien since those processes cache some information and with a stale connection this easily leads to confusion. Cache invalidation sigh.
jas@kaka:~$ gpg-connect-agent "SCD KILLSCD" "SCD BYE" /bye
jas@kaka:~$ ps auxww grep -e pcsc -e scd
jas        30221  0.0  0.0   3468  1692 pts/3    R+   11:49   0:00 grep --color=auto -e pcsc -e scd
jas@kaka:~$ gpg --card-edit
Reader ...........: 234B:0000:FSIJ-1.2.20-42315277:0
Application ID ...: D276000124010200FFFE423152770000
Application type .: OpenPGP
Version ..........: 2.0
Manufacturer .....: unmanaged S/N range
Serial number ....: 42315277
Name of cardholder: [not set]
Language prefs ...: [not set]
Salutation .......:
URL of public key : [not set]
Login data .......: [not set]
Signature PIN ....: forced
Key attributes ...: rsa2048 rsa2048 rsa2048
Max. PIN lengths .: 127 127 127
PIN retry counter : 3 3 3
Signature counter : 0
KDF setting ......: off
Signature key ....: [none]
Encryption key....: [none]
Authentication key: [none]
General key info..: [none]
gpg/card> admin
Admin commands are allowed
gpg/card> kdf-setup
gpg/card> passwd
gpg: OpenPGP card no. D276000124010200FFFE423152770000 detected
1 - change PIN
2 - unblock PIN
3 - change Admin PIN
4 - set the Reset Code
Q - quit
Your selection? 3
PIN changed.
1 - change PIN
2 - unblock PIN
3 - change Admin PIN
4 - set the Reset Code
Q - quit
Your selection?
Now it would be natural to setup the PIN and reset code. However the Gnuk software is configured to not allow this until the keys are imported. You would get the following somewhat cryptical error messages if you try. This took me a while to understand, since this is device-specific, and some other OpenPGP implementations allows you to configure a PIN and reset code before key import.
Your selection? 4
Error setting the Reset Code: Card error
1 - change PIN
2 - unblock PIN
3 - change Admin PIN
4 - set the Reset Code
Q - quit
Your selection? 1
Error changing the PIN: Conditions of use not satisfied
1 - change PIN
2 - unblock PIN
3 - change Admin PIN
4 - set the Reset Code
Q - quit
Your selection? q
Continue to configure the card and make it ready for key import. Some settings deserve comments. The lang field may be used to setup the language, but I have rarely seen it use, and I set it to sv (Swedish) mostly to be able to experiment if any software adhears to it. The URL is important to point to somewhere where your public key is stored, the fetch command of gpg --card-edit downloads it and sets up GnuPG with it when you are on a clean new laptop. The forcesig command changes the default so that a PIN code is not required for every digital signature operation, remember that I averaged 10 signatures per day for the past 2-3 years? Think of the wasted energy typing those PIN codes every time! Changing the cryptographic key type is required when I import 25519-based keys.
gpg/card> name
Cardholder's surname: Josefsson
Cardholder's given name: Simon
gpg/card> lang
Language preferences: sv
gpg/card> sex
Salutation (M = Mr., F = Ms., or space): m
gpg/card> login
Login data (account name): jas
gpg/card> url
URL to retrieve public key: https://josefsson.org/key-20190320.txt
gpg/card> forcesig
gpg/card> key-attr
Changing card key attribute for: Signature key
Please select what kind of key you want:
   (1) RSA
   (2) ECC
Your selection? 2
Please select which elliptic curve you want:
   (1) Curve 25519
   (4) NIST P-384
Your selection? 1
The card will now be re-configured to generate a key of type: ed25519
Note: There is no guarantee that the card supports the requested size.
      If the key generation does not succeed, please check the
      documentation of your card to see what sizes are allowed.
Changing card key attribute for: Encryption key
Please select what kind of key you want:
   (1) RSA
   (2) ECC
Your selection? 2
Please select which elliptic curve you want:
   (1) Curve 25519
   (4) NIST P-384
Your selection? 1
The card will now be re-configured to generate a key of type: cv25519
Changing card key attribute for: Authentication key
Please select what kind of key you want:
   (1) RSA
   (2) ECC
Your selection? 2
Please select which elliptic curve you want:
   (1) Curve 25519
   (4) NIST P-384
Your selection? 1
The card will now be re-configured to generate a key of type: ed25519
gpg/card>
Reader ...........: 234B:0000:FSIJ-1.2.20-42315277:0
Application ID ...: D276000124010200FFFE423152770000
Application type .: OpenPGP
Version ..........: 2.0
Manufacturer .....: unmanaged S/N range
Serial number ....: 42315277
Name of cardholder: Simon Josefsson
Language prefs ...: sv
Salutation .......: Mr.
URL of public key : https://josefsson.org/key-20190320.txt
Login data .......: jas
Signature PIN ....: not forced
Key attributes ...: ed25519 cv25519 ed25519
Max. PIN lengths .: 127 127 127
PIN retry counter : 3 3 3
Signature counter : 0
KDF setting ......: on
Signature key ....: [none]
Encryption key....: [none]
Authentication key: [none]
General key info..: [none]
gpg/card>
The device is now ready for key import! Bring out your offline laptop and boot it and use the keytocard command on the subkeys to import them. This assumes you saved a copy of the GnuPG home directory after generating the master and subkeys before, which I did in my own previous tutorial when I generated the keys. This may be a bit unusual, and there are simpler ways to do this (e.g., import a copy of the secret keys into a fresh GnuPG home directory).
$ cp -a gnupghome-backup-mastersubkeys gnupghome-import-fst01sz-42315277-2022-12-24
$ ps auxww grep -e pcsc -e scd
$ gpg --homedir $PWD/gnupghome-import-fst01sz-42315277-2022-12-24 --edit-key B1D2BD1375BECB784CF4F8C4D73CF638C53C06BE
...
Secret key is available.
gpg: checking the trustdb
gpg: marginals needed: 3  completes needed: 1  trust model: pgp
gpg: depth: 0  valid:   1  signed:   0  trust: 0-, 0q, 0n, 0m, 0f, 1u
sec  ed25519/D73CF638C53C06BE
     created: 2019-03-20  expired: 2019-10-22  usage: SC
     trust: ultimate      validity: expired
ssb  cv25519/02923D7EE76EBD60
     created: 2019-03-20  expired: 2019-10-22  usage: E
ssb  ed25519/80260EE8A9B92B2B
     created: 2019-03-20  expired: 2019-10-22  usage: A
ssb  ed25519/51722B08FE4745A2
     created: 2019-03-20  expired: 2019-10-22  usage: S
[ expired] (1). Simon Josefsson <simon@josefsson.org>
gpg> key 1
sec  ed25519/D73CF638C53C06BE
     created: 2019-03-20  expired: 2019-10-22  usage: SC
     trust: ultimate      validity: expired
ssb* cv25519/02923D7EE76EBD60
     created: 2019-03-20  expired: 2019-10-22  usage: E
ssb  ed25519/80260EE8A9B92B2B
     created: 2019-03-20  expired: 2019-10-22  usage: A
ssb  ed25519/51722B08FE4745A2
     created: 2019-03-20  expired: 2019-10-22  usage: S
[ expired] (1). Simon Josefsson <simon@josefsson.org>
gpg> keytocard
Please select where to store the key:
   (2) Encryption key
Your selection? 2
sec  ed25519/D73CF638C53C06BE
     created: 2019-03-20  expired: 2019-10-22  usage: SC
     trust: ultimate      validity: expired
ssb* cv25519/02923D7EE76EBD60
     created: 2019-03-20  expired: 2019-10-22  usage: E
ssb  ed25519/80260EE8A9B92B2B
     created: 2019-03-20  expired: 2019-10-22  usage: A
ssb  ed25519/51722B08FE4745A2
     created: 2019-03-20  expired: 2019-10-22  usage: S
[ expired] (1). Simon Josefsson <simon@josefsson.org>
gpg> key 1
sec  ed25519/D73CF638C53C06BE
     created: 2019-03-20  expired: 2019-10-22  usage: SC
     trust: ultimate      validity: expired
ssb  cv25519/02923D7EE76EBD60
     created: 2019-03-20  expired: 2019-10-22  usage: E
ssb  ed25519/80260EE8A9B92B2B
     created: 2019-03-20  expired: 2019-10-22  usage: A
ssb  ed25519/51722B08FE4745A2
     created: 2019-03-20  expired: 2019-10-22  usage: S
[ expired] (1). Simon Josefsson <simon@josefsson.org>
gpg> key 2

sec  ed25519/D73CF638C53C06BE
     created: 2019-03-20  expired: 2019-10-22  usage: SC
     trust: ultimate      validity: expired
ssb  cv25519/02923D7EE76EBD60
     created: 2019-03-20  expired: 2019-10-22  usage: E
ssb* ed25519/80260EE8A9B92B2B
     created: 2019-03-20  expired: 2019-10-22  usage: A
ssb  ed25519/51722B08FE4745A2
     created: 2019-03-20  expired: 2019-10-22  usage: S
[ expired] (1). Simon Josefsson <simon@josefsson.org>
gpg> keytocard
Please select where to store the key:
   (3) Authentication key
Your selection? 3
sec  ed25519/D73CF638C53C06BE
     created: 2019-03-20  expired: 2019-10-22  usage: SC
     trust: ultimate      validity: expired
ssb  cv25519/02923D7EE76EBD60
     created: 2019-03-20  expired: 2019-10-22  usage: E
ssb* ed25519/80260EE8A9B92B2B
     created: 2019-03-20  expired: 2019-10-22  usage: A
ssb  ed25519/51722B08FE4745A2
     created: 2019-03-20  expired: 2019-10-22  usage: S
[ expired] (1). Simon Josefsson <simon@josefsson.org>
gpg> key 2
sec  ed25519/D73CF638C53C06BE
     created: 2019-03-20  expired: 2019-10-22  usage: SC
     trust: ultimate      validity: expired
ssb  cv25519/02923D7EE76EBD60
     created: 2019-03-20  expired: 2019-10-22  usage: E
ssb  ed25519/80260EE8A9B92B2B
     created: 2019-03-20  expired: 2019-10-22  usage: A
ssb  ed25519/51722B08FE4745A2
     created: 2019-03-20  expired: 2019-10-22  usage: S
[ expired] (1). Simon Josefsson <simon@josefsson.org>
gpg> key 3
sec  ed25519/D73CF638C53C06BE
     created: 2019-03-20  expired: 2019-10-22  usage: SC
     trust: ultimate      validity: expired
ssb  cv25519/02923D7EE76EBD60
     created: 2019-03-20  expired: 2019-10-22  usage: E
ssb  ed25519/80260EE8A9B92B2B
     created: 2019-03-20  expired: 2019-10-22  usage: A
ssb* ed25519/51722B08FE4745A2
     created: 2019-03-20  expired: 2019-10-22  usage: S
[ expired] (1). Simon Josefsson <simon@josefsson.org>
gpg> keytocard
Please select where to store the key:
   (1) Signature key
   (3) Authentication key
Your selection? 1
sec  ed25519/D73CF638C53C06BE
     created: 2019-03-20  expired: 2019-10-22  usage: SC
     trust: ultimate      validity: expired
ssb  cv25519/02923D7EE76EBD60
     created: 2019-03-20  expired: 2019-10-22  usage: E
ssb  ed25519/80260EE8A9B92B2B
     created: 2019-03-20  expired: 2019-10-22  usage: A
ssb* ed25519/51722B08FE4745A2
     created: 2019-03-20  expired: 2019-10-22  usage: S
[ expired] (1). Simon Josefsson <simon@josefsson.org>
gpg> quit
Save changes? (y/N) y
$
Now insert it into your daily laptop and have GnuPG and learn about the new private keys and forget about any earlier locally available card bindings this usually manifests itself by GnuPG asking you to insert a OpenPGP card with another serial number. Earlier I did rm -rf ~/.gnupg/private-keys-v1.d/ but the scd serialno followed by learn --force is nicer. I also sets up trust setting for my own key.
jas@kaka:~$ gpg-connect-agent "scd serialno" "learn --force" /bye
...
jas@kaka:~$ echo "B1D2BD1375BECB784CF4F8C4D73CF638C53C06BE:6:"   gpg --import-ownertrust
jas@kaka:~$ gpg --card-status
Reader ...........: 234B:0000:FSIJ-1.2.20-42315277:0
Application ID ...: D276000124010200FFFE423152770000
Application type .: OpenPGP
Version ..........: 2.0
Manufacturer .....: unmanaged S/N range
Serial number ....: 42315277
Name of cardholder: Simon Josefsson
Language prefs ...: sv
Salutation .......: Mr.
URL of public key : https://josefsson.org/key-20190320.txt
Login data .......: jas
Signature PIN ....: not forced
Key attributes ...: ed25519 cv25519 ed25519
Max. PIN lengths .: 127 127 127
PIN retry counter : 5 5 5
Signature counter : 3
KDF setting ......: on
Signature key ....: A3CC 9C87 0B9D 310A BAD4  CF2F 5172 2B08 FE47 45A2
      created ....: 2019-03-20 23:40:49
Encryption key....: A9EC 8F4D 7F1E 50ED 3DEF  49A9 0292 3D7E E76E BD60
      created ....: 2019-03-20 23:40:26
Authentication key: CA7E 3716 4342 DF31 33DF  3497 8026 0EE8 A9B9 2B2B
      created ....: 2019-03-20 23:40:37
General key info..: sub  ed25519/51722B08FE4745A2 2019-03-20 Simon Josefsson <simon@josefsson.org>
sec#  ed25519/D73CF638C53C06BE  created: 2019-03-20  expires: 2023-09-19
ssb>  ed25519/80260EE8A9B92B2B  created: 2019-03-20  expires: 2023-09-19
                                card-no: FFFE 42315277
ssb>  ed25519/51722B08FE4745A2  created: 2019-03-20  expires: 2023-09-19
                                card-no: FFFE 42315277
ssb>  cv25519/02923D7EE76EBD60  created: 2019-03-20  expires: 2023-09-19
                                card-no: FFFE 42315277
jas@kaka:~$
Verify that you can digitally sign and authenticate using the key and you are done!
jas@kaka:~$ echo foo gpg -a --sign gpg --verify
gpg: Signature made Sat Dec 24 13:49:59 2022 CET
gpg:                using EDDSA key A3CC9C870B9D310ABAD4CF2F51722B08FE4745A2
gpg: Good signature from "Simon Josefsson <simon@josefsson.org>" [ultimate]
jas@kaka:~$ ssh-add -L
ssh-ed25519 AAAAC3NzaC1lZDI1NTE5AAAAILzCFcHHrKzVSPDDarZPYqn89H5TPaxwcORgRg+4DagE cardno:FFFE42315277
jas@kaka:~$
So time to relax and celebrate christmas? Hold on not so fast! Astute readers will have noticed that the output said PIN retry counter: 5 5 5 . That s not the default PIN retry counter for Gnuk! How did that happen? Indeed, good catch and great question, my dear reader. I wanted to include how you can modify the Gnuk source code, re-build it and re-flash the Gnuk as well. This method is different than flashing Gnuk onto a device that is running NeuG so the commands I used to flash the firmware in the start of this blog post no longer works in a device running Gnuk. Fortunately modern Gnuk supports updating firmware by specifying the Admin PIN code only, and provides a simple script to achieve this as well. The PIN retry counter setting is hard coded in the openpgp-do.c file, and we run a a perl command to modify the file, rebuild Gnuk and upgrade the FST-01SZ. This of course wipes all your settings, so you will have the opportunity to practice all the commands earlier in this post once again!
jas@kaka:~/src/gnuk/src$ perl -pi -e 's/PASSWORD_ERRORS_MAX 3/PASSWORD_ERRORS_MAX 5/' openpgp-do.c
jas@kaka:~/src/gnuk/src$ make   less
jas@kaka:~/src/gnuk/src$ cd ../tool/
jas@kaka:~/src/gnuk/tool$ ./upgrade_by_passwd.py
Admin password:
Device:
Configuration: 1
Interface: 0
../regnual/regnual.bin: 4608
../src/build/gnuk.bin: 110592
CRC32: b93ca829
Device:
Configuration: 1
Interface: 0
20002a00:20005000
Downloading flash upgrade program...
start 20002a00
end   20003c00
Run flash upgrade program...
Waiting for device to appear:
  Wait 1 second...
  Wait 1 second...
Device:
08001000:08020000
Downloading the program
start 08001000
end   0801b000
Protecting device
Finish flashing
Resetting device
Update procedure finished
jas@kaka:~/src/gnuk/tool$
Now finally, I wish you all a Merry Christmas and Happy Hacking!
Artifact Space is a military (mostly) science fiction novel, the
first of an expected trilogy. Christian Cameron is a prolific author of
historical fiction under that name, thrillers under the name Gordon Kent,
and historical fantasy under the name Miles Cameron. This is his first
science fiction novel.
Marca Nbaro is descended from one of the great spacefaring mercantile
families, but it's not doing her much good. She is a ward of the
Orphanage, the boarding school for orphaned children of the DHC, generous
in theory and a hellhole in practice. Her dream to serve on one of the
Greatships, the enormous interstellar vessels that form the backbone of
the human trading network, has been blocked by the school authorities, a
consequence of the low-grade war she's been fighting with them throughout
her teenage years. But Marca is not a person to take no for an answer.
Pawning her family crest gets her just enough money to hire a hacker to
doctor her school records, adding the graduation she was denied and
getting her aboard the Greatship Athens as a new Midshipper.
I don't read a lot of military science fiction, but there is one type of
story that I love that military SF is uniquely well-suited to tell. It's
not the combat or the tactics or the often-trite politics. It's the
experience of the military as a system, a collective human endeavor.
One ideal of the military is that people come to it from all sorts of
backgrounds, races, and social classes, and the military incorporates them
all into a system built for a purpose. It doesn't matter who you are or
what you did before: if you follow the rules, do your job, and become part
of a collaboration larger than yourself, you have a place and people to
watch your back whether or not they know you or like you. Obviously, like
any ideal, many militaries don't live up to this, and there are many
stories about those failures. But the story of that ideal, told well, is
a genre I like a great deal and is hard to find elsewhere.
This sort of military story shares some features with found family, and
it's not a coincidence that I also like found family stories. But found
family still assumes that these people love you, or at least like you.
For some protagonists, that's a tricky barrier both to cross and to
believe one has crossed. The (admittedly idealized) military doesn't
assume anyone likes you. It doesn't expect that you or anyone around you
have the right feelings. It just expects you to do your job and work with
other people who are doing their job. The requirements are more concrete,
and thus in a way easier to believe in.
Artifact Space is one of those military science fiction stories. I
was entirely unsurprised to see that the author is a former US Navy career
officer.
The Greatships here are, technically, more of a merchant marine than a
full-blown military. (The author noted in an interview that he based
them on the merchant ships of Venice.) The weapons are used primarily for
defense; the purpose of the Greatships is trade, and every crew member has
a storage allotment in the immense cargo area that they're encouraged to
use. The setting is in the far future, after a partial collapse and
reconstruction of human society, in which humans have spread through
interstellar space, settled habitable planets, and built immense orbital
cities. The Athens is trading between multiple human settlements,
but its true destination is far into the deep black: Tradepoint, where it
can trade with the mysterious alien Starfish for xenoglas, a material that
humans have tried and failed to reproduce and on which much of human
construction now depends.
This is, to warn, one of those stories where the scrappy underdog of noble
birth makes friends with everyone and is far more competent than anyone
expects. The story shape is not going to surprise you, and you have to
have considerable tolerance for it to enjoy this book. Marca is
ridiculously, absurdly central to the plot for a new Middie. Sometimes
this makes sense given her history; other times, she is in the middle of
improbable accidents that felt forced by the author. Cameron doesn't
entirely break normal career progression, but Marca is very special in a
way that you only get to be as the protagonist of a novel.
That said, Cameron does some things with that story shape that I liked.
Marca's hard-won survival skills are not weirdly well-suited for
her new life aboard ship. To the contrary, she has to unlearn a lot of
bad habits and let go of a lot of anxiety. I particularly liked her
relationship with her more-privileged cabin mate, which at first seemed to
only be a contrast between Thea's privilege and Marca's background, but
turned into both of them learning from each other. There's a great mix of
supporting characters, with a wide variety of interactions with Marca and
a solid sense that all of the characters have their own lives and their
own concerns that don't revolve around her.
There is, of course, a plot to go with this. I haven't talked about it
much because I think the summaries of this book are a bit of a spoiler,
but there are several layers of political intrigue, threats to the ship,
an interesting AI, and a good hook in the alien xenoglas trade. Cameron
does a deft job balancing the plot with Marca's training and her
slow-developing sense of place in the ship (and fear about discovery of
her background and hacking). The pacing is excellent, showing all the
skill I'd expect from someone with a thriller background and over forty
prior novels under his belt. Cameron portrays the tedious work of
learning a role on a ship without boring the reader, which is a tricky
balancing act.
I also like the setting: a richly multicultural future that felt like it
included people from all of Earth, not just the white western parts. That
includes a normalized androgyne third gender, which is the sort of thing
you rarely see in military SF. Faster-than-light travel involves typical
physics hand-waving, but the shape of the hand-waving is one I've not seen
before and is a great excuse for copying the well-known property of
oceangoing navies that longer ships can go faster.
(One tech grumble, though: while Cameron does eventually say that this is
a known tactic and Marca didn't come up with anything novel, deploying
spread sensors for greater resolution is sufficiently obvious it should be
standard procedure, and shouldn't have warranted the character reactions
it got.)
I thoroughly enjoyed this. Artifact Space is the best military SF
that I've read in quite a while, at least back to John G. Hemry's
JAG in space novels and probably better than
those. It's going to strike some readers, with justification, as cliched,
but the cliches are handled so well that I had only minor grumbling at a
few absurd coincidences. Marca is a great character who is easy to care
about. The plot was tense and satisfying, and the feeling of military
structure, tradition, jargon, and ship pride was handled well. I had a
very hard time putting this down and was sad when it ended.
If you're in the mood for that class of "learning how to be part of a
collaborative structure" style of military SF, recommended.
Artifact Space reaches a somewhat satisfying conclusion, but leaves
major plot elements unresolved. Followed by Deep Black, which
doesn't have a release date at the time of this writing.
Rating: 9 out of 10
Earlier this year, we released Akvorado, a flow collector, enricher, and
visualizer. It receives network flows from your routers using either NetFlow
v9, IPFIX, or sFlow. Several pieces of information are added, like
GeoIP and interface names. The flows are exported to Apache Kafka, a
distributed queue, then stored inside ClickHouse, a column-oriented
database. A web frontend is provided to run queries. A live version is
available for you to play.
Akvorado s web frontend
Several alternatives exist:
Akvorado differentiates itself from these solutions because:
it is open source (licensed under the AGPLv3 license), and
it bundles flow collection, storage, and a web interface into a single
product.
The proposed deployment solution relies on Docker Compose to set up
Akvorado, Zookeeper, Kafka, and ClickHouse. I hope it should be enough
for anyone to get started quickly. Akvorado is performant enough to handle
100 000 flows per second with 64 GB of RAM and 24 vCPU. With 2 TB of disk, you
should expect to keep data for a few years.
I spent some time writing a fairly complete documentation. It
seems redundant to repeat its content in this blog post. There is also a section
about its internal design if you are interested in how it is built. I also
did a FRnOG presentation earlier this year, and a ClickHouse meetup
presentation, which focuses more on how ClickHouse is used. I plan to write
more detailed articles on specific aspects of Akvorado. Stay tuned!
While the collector could write directly to the database, the queue
buffers flows if the database is unavailable. It also enables you to process
flows with another piece of software (like an anti-DDoS system).
My NovaCustom NV41PZ laptop arrived a couple of days ago, and today I had some time to install it. You may want to read about my purchasing decision process first. I expected a rough ride to get it to work, given the number of people claiming that modern laptops can t run fully free operating systems. I first tried the Trisquel 10 live DVD and it booted fine including network, but the mouse trackpad did not work. Before investigating it, I noticed a forum thread about Trisquel 11 beta3 images, and being based on Ubuntu 22.04 LTS and has Linux-libre 5.15 it seemed better to start with more modern software. After installing through the live DVD successfully, I realized I didn t like MATE but wanted to keep using GNOME. I reverted back to installing a minimal environment through the netinst image, and manually installed GNOME (apt-get install gnome) since I prefer that over MATE, together with a bunch of other packages. I ve been running it for a couple of hours now, and here is a brief summary of the hardware components that works.
Connected to Dell 27 2560 1440 via Wavlink port extender
Webcam
Builtin 1MP Camera
Microphone
Intel Alder Lake
Keyboard
ISO layout, all function keys working
Mouse
Trackpad, tap clicking and gestures
Ethernet RJ45
Realtek RTL8111/8168/8411 with r8169 driver
Memory card
O2 Micro comes up as /dev/mmcblk0
Docking station
Wavlink 4xUSB, 2xHDMI, DP, RJ45,
Connectivity
USB-A, USB-C
Audio
Intel Alder Lake
Hardware components and status
So what s not working? Unfortunately, NovaCustom does not offer any WiFi or Bluetooth module that is compatible with Trisquel, so the AX211 (1675x) Wifi/Bluetooth card in it is just dead weight. I imagine it would be possible to get the card to work if non-free firmware is loaded. I don t need Bluetooth right now, and use the Technoetic N-150 USB WiFi dongle when I m not connected to wired network.
Compared against my X201, the following factors have improved.
Faster CPU benchmark suggests it is 8 times faster than my old i7-620M. While it feels snappier it is not a huge difference. While NVMe should improve SSD performance, benchmark wise the NVMe 980Pro only seems around 2-3 faster than the SATA-based 860 Evo. Going from 6GB to 64GB is 10 times more memory, which is useful for disk caching.
I m still unhappy about the following properties with both the NV41PZ and the X201.
CPU microcode is not available under free license.
Intel Mangement Engine is still present in the CPU.
No builtin WiFi/Bluetooth that works with free software.
Some other secondary processors (e.g., disk or screen) may be running non-free software but at least none requires non-free firmware.
Hopefully my next laptop will have improved on this further. I hope to be able to resolve the WiFi part by replacing the WiFi module, there appears to be options available but I have not tested them on this laptop yet. Does anyone know of a combined WiFi and Bluetooth M.2 module that would work on Trisquel?
While I haven t put the laptop to heavy testing yet, everything that I would expect a laptop to be able to do seems to work fine. Including writing this blog post!
(quoted from my other blog at since a new OS might be interesting for many and this is published in separate planets) ALP - The Adaptable Linux Platform is a new operating system from SUSE to run containerized and virtualized workloads. It is in early prototype phase, but the development is done completely openly so it s easy to jump in to try it.For this trying out, I used the latest encrypted build as of the writing, 22.1 from ALP images. I imported it in virt-manager as a Generic Linux 2022 image, using UEFI instead of BIOS, added a TPM device (which I m interested in otherwise) and referring to an Ignition JSON file in the XML config in virt-manager.The Ignition part is pretty much fully thanks to Paolo Stivanin who studied the secrets of it before me. But here it goes - and this is required for password login in Cockpit to work in addition to SSH key based login to the VM from host - first, create config.ign file:
where password SHA512 hash can be obtained using openssl passwd -6 and the ssh key is your public ssh key.That file is put to eg /tmp and referred in the virt-manager s XML like follows:
Now we can boot up the VM and ssh in - or you could log in directly too but it s easier to copy-paste commands when using ssh.Inside the VM, we can follow the ALP documentation to install and start Cockpit:
Check your host s IP address with ip -a, and open IP:9090 in your host s browser:Login with root / your password and you shall get the front page: and many other pages where you can manage your ALP deployment via browser:All in all, ALP is in early phases but I m really happy there s up-to-date documentation provided and people can start experimenting it whenever they want. The images from the linked directory should be fairly good, and test automation with openQA has been started upon as well.You can try out the other example workloads that are available just as well.
Gen1
Since February 2018 I have been using a Thinkpad X1 Carbon Gen1 [1] as my main laptop. Generally I ve been very happy with it, it s small and light, has good performance for web browsing etc, and with my transition to doing all compiles etc on servers it works well. When I wrote my original review I was unhappy with the keyboard, but I got used to that and found it to be reasonably good.
The things that I have found as limits on it are the display resolution as 1600*900 isn t that great by modern standards (most phones are a lot higher resolution), the size (slightly too large for the pocket of my Scott e Vest [2] jacket), and the lack of USB-C. Modern laptops can charge via USB-C/Thunderbolt while also doing USB and DisplayPort video over the same cable. USB-C monitors which support charging a laptop over the same cable as used for video input are becoming common (last time I checked the Dell web site for many models of monitor there was a USB-C one that cost about $100 more). I work at a company with lots of USB-C monitors and docks so being able to use my personal laptop with the same displays when on breaks is really handy.
A final problem with the Gen1 is that it has a proprietary and unusual connector for the SSD which means that a replacement SSD costs about what I paid for the entire laptop. Ever since the SSD gave a BTRFS checksum error I ve been thinking of replacing it.
Choosing a Replacement
The Gen5 is the first Thinkpad X1 Carbon to have USB-C. For work I had used a Gen6 which was quite nice [3]. But it didn t seem to offer much over the Gen5.
So I started looking for cheap Thinkpad X1 Carbons of Gen5+.
A Cheap? Gen5
In July I saw an ebay advert for a Gen5 with FullHD display for $370 or nearest offer, with the downside being that the BIOS password had been lost. I offered $330 and the seller accepted, in retrospect that was unusually cheap and should have been a clue that I needed to do further investigation. It turned out that resetting the BIOS password is unusually difficult as it s in the TPM so the system would only boot Windows. When I learned that I should have sold the laptop to someone who wanted to run Windows and bought another. Instead I followed some instructions on the Internet about entering a wrong password multiple times to get to a password recovery screen, instead the machine locked up entirely and became unusable for windows (so don t do that).
Then I looked for ways of fixing the motherboard. The cheapest was $75.25 for a replacement BIOS flash chip that had a BIOS that didn t check the validity of passwords. The aim was to solder that on, set a new password (with any random text being accepted as the old password), then solder the old one back on for normal functionality. It turned out that I m not good at fine soldering, after I had hacked at it a friend diagnosed the chip and motherboard to probably both be damaged (he couldn t get it going).
The end solution was that my friend found a replacement motherboard for $170 from China. This gave a total cost of $575.25 for the laptop which is more than the usual price of a Gen6 and more than I expected to pay. In the past when advocating buying second hand or refurbished laptops people would say what happens if you get one that doesn t work properly , the answer to that question is that I paid a lot less than the new cost of $2700+ for a Thinkpad X1 Carbon and got a computer that does everything I need. One of the advantages of getting a cheap laptop is that I won t be so unhappy if I happen to drop it.
A Cheap Gen6
After the failed experiment with a replacement BIOS on the Gen5 I was considering selling it for scrap. So I bought a Gen6 from Australian Computer Traders via Amazon for $390 in August. The advert clearly stated that it was for a laptop with USB-C and Thunderbolt (Gen5+ features) but they shipped me a Gen4 that didn t even have USB-C. They eventually refunded me but I will try to avoid buying from them again.
Finally Working
The laptop I now have has a i5-6300U CPU that rates 3242 on cpubenchmark.net. My Gen1 thinkpad has a i7-3667U CPU that rates 2378 on cpubenchmark.net, note that the cpubenchmark.net people have rescaled their benchmark since my review of the Gen1 in 2018. So according to the benchmarks my latest laptop is about 36% faster for CPU operations. Not much of a difference when comparing systems manufactured in 2012 and 2017! According to the benchmarks a medium to high end recent CPU will be more than 10* faster than the one in my Gen5 laptop, but such a CPU would cost more than my laptop cost.
The storage is a 256G NVMe device that can do sustained reads at 900MB/s, that s not even twice as fast as the SSD in my Gen1 laptop although NVMe is designed to perform better for small IO.
It has 2*USB-C ports both of which can be used for charging, which is a significant benefit over the Gen6 I had for work in 2018 which only had one. I don t know why Lenovo made Gen6 machines that were lesser than Gen5 in such an important way.
It can power my Desklab portable 4K monitor [4] but won t send a DisplayPort signal over the same USB-C cable. I don t know if this is a USB-C cable issue or some problem with the laptop recognising displays. It works nicely with Dell USB-C monitors and docks that power the laptop over the same cable as used for DisplayPort. Also the HDMI port works with 4K monitors, so at worst I could connect my Desklab monitor via a USB-C cable for power and HDMI for data.
The inability to change the battery without disassembly is still a problem, but hopefully USB-C connected batteries capable of charging such a laptop will become affordable in the near future and I have had some practice at disassembling this laptop.
It still has the Ethernet dongle annoyance, and of course the seller didn t include that. But USB ethernet devices are quite good and I have a few of them.
In conclusion it s worth the $575.25 I paid for it and would have been even better value for money if I had been a bit smarter when buying. It meets the initial criteria of USB-C power and display and of fitting in my jacket pocket as well as being slightly better than my old laptop in every other way.
 The key decision I made mid-March was to commit to pursuing ventilation monitoring as my primary product development focus.
Prior to that decision, I hoped to use my writing plan to drive a breadth-first survey of the opportunities for each of my product ideas before deciding which had the best business potential to focus on first. Two factors changed my mind:
The key decision I made mid-March was to commit to pursuing ventilation monitoring as my primary product development focus.
Prior to that decision, I hoped to use my writing plan to drive a breadth-first survey of the opportunities for each of my product ideas before deciding which had the best business potential to focus on first. Two factors changed my mind:
 (TL;DR: I ve been trying out btrfs in some places instead of ext4, I ve hit absolutely zero issues and there are a few features that make me plan to use it more.)
Despite (or perhaps because of) working on storage products for a reasonable chunk of my career I have tended towards a conservative approach to my filesystems. By the time I came to Linux
(TL;DR: I ve been trying out btrfs in some places instead of ext4, I ve hit absolutely zero issues and there are a few features that make me plan to use it more.)
Despite (or perhaps because of) working on storage products for a reasonable chunk of my career I have tended towards a conservative approach to my filesystems. By the time I came to Linux 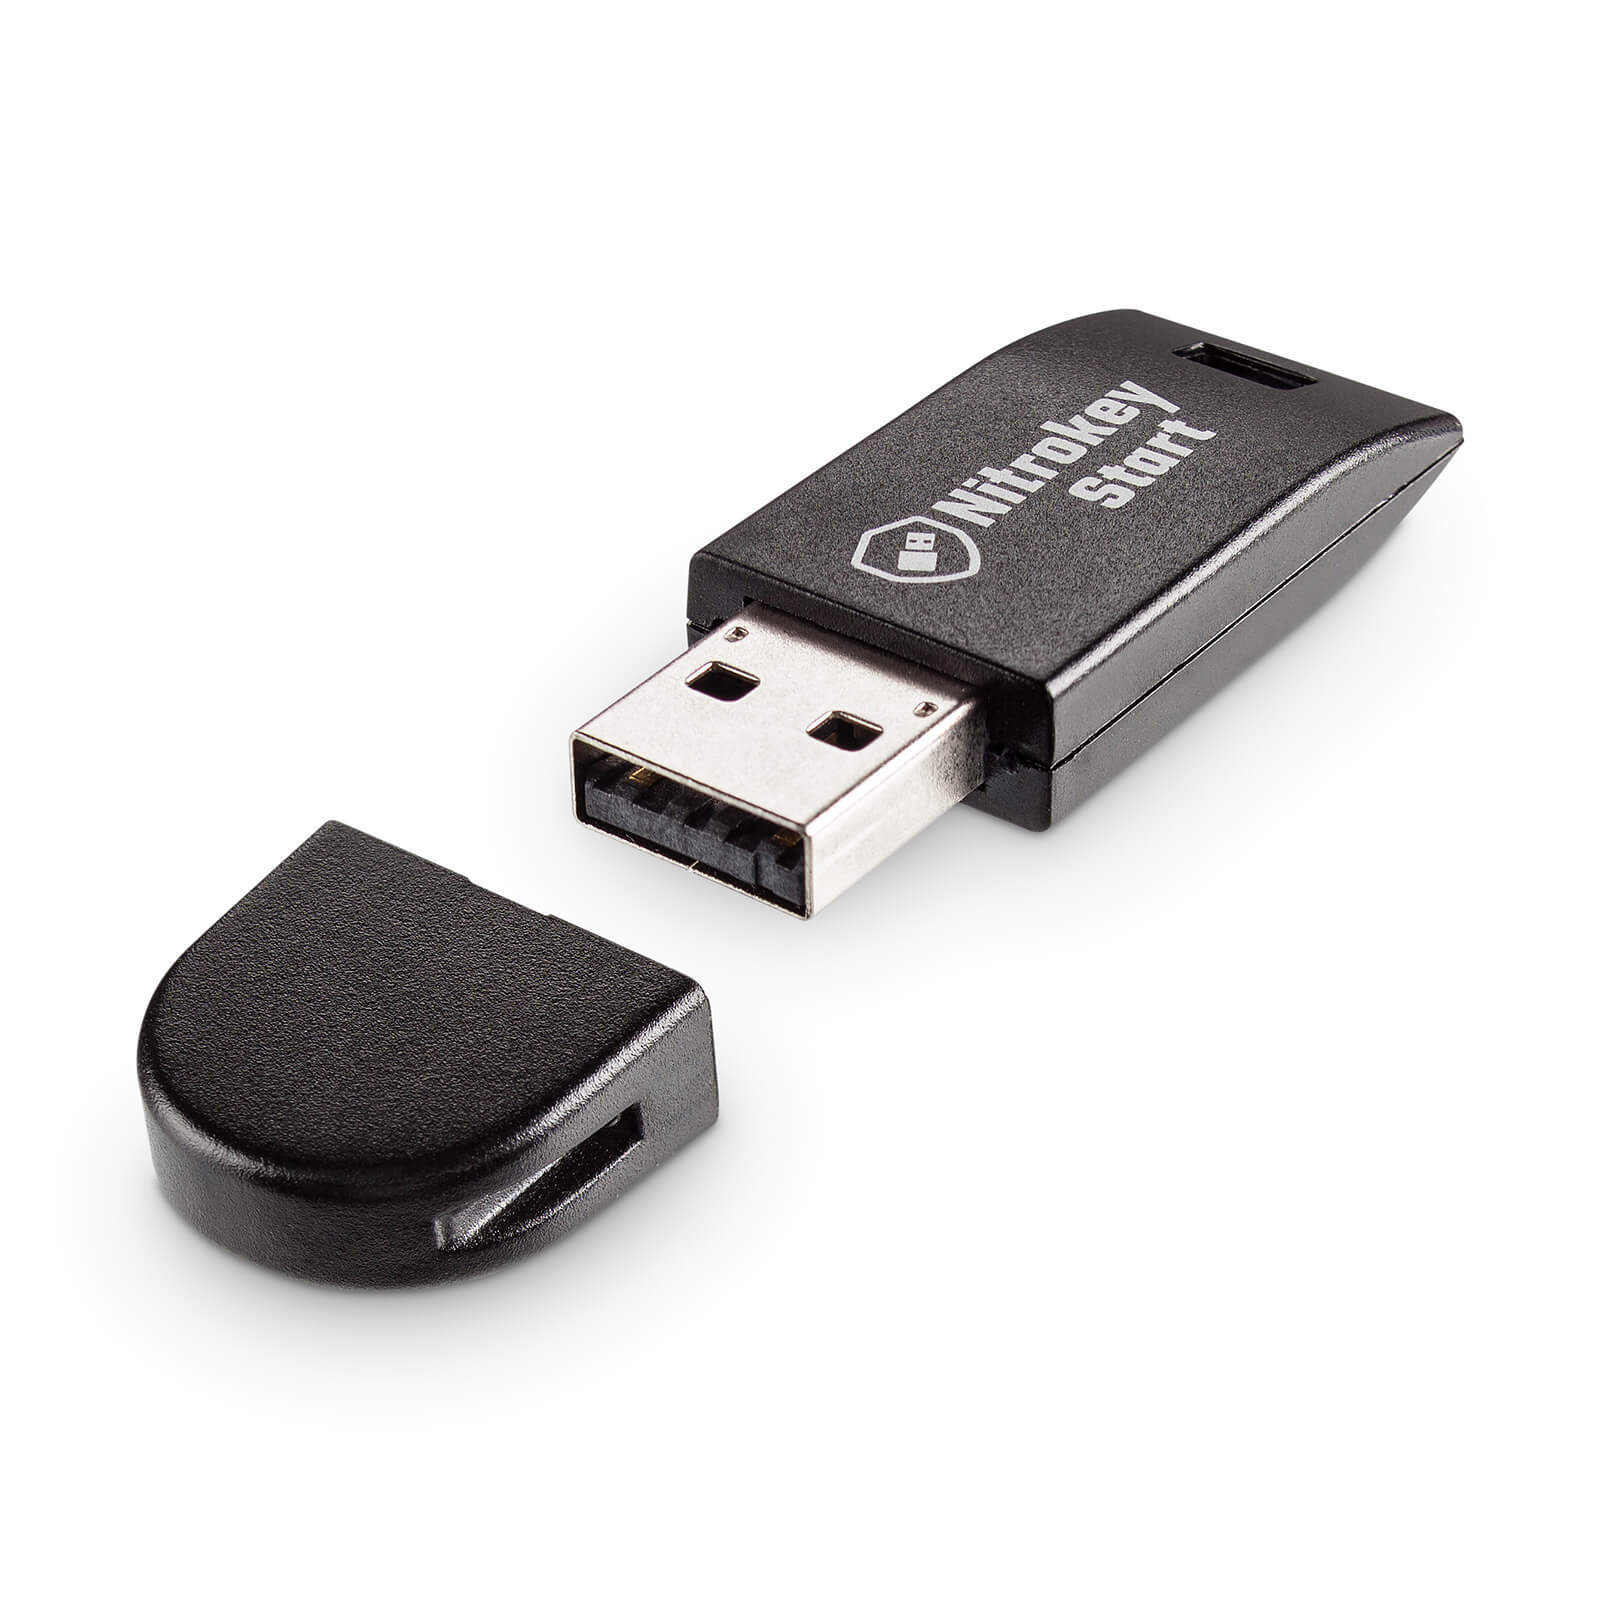 Nitrokey Start
 Too many years ago, I started (but did not finish) a
  After
After  (no site yet)
 in October 2021. they generally seem to keep up with
shipping. update (august 2022): they rolled out a second line of
laptops (12th gen), first batch shipped, second batch
in October 2021. they generally seem to keep up with
shipping. update (august 2022): they rolled out a second line of
laptops (12th gen), first batch shipped, second batch 
 Hi friends!
I haven t written in a while. I ve been caught up in work. But between working, I ve put together some new equipment in a couple of new racks. I bought an
Hi friends!
I haven t written in a while. I ve been caught up in work. But between working, I ve put together some new equipment in a couple of new racks. I bought an 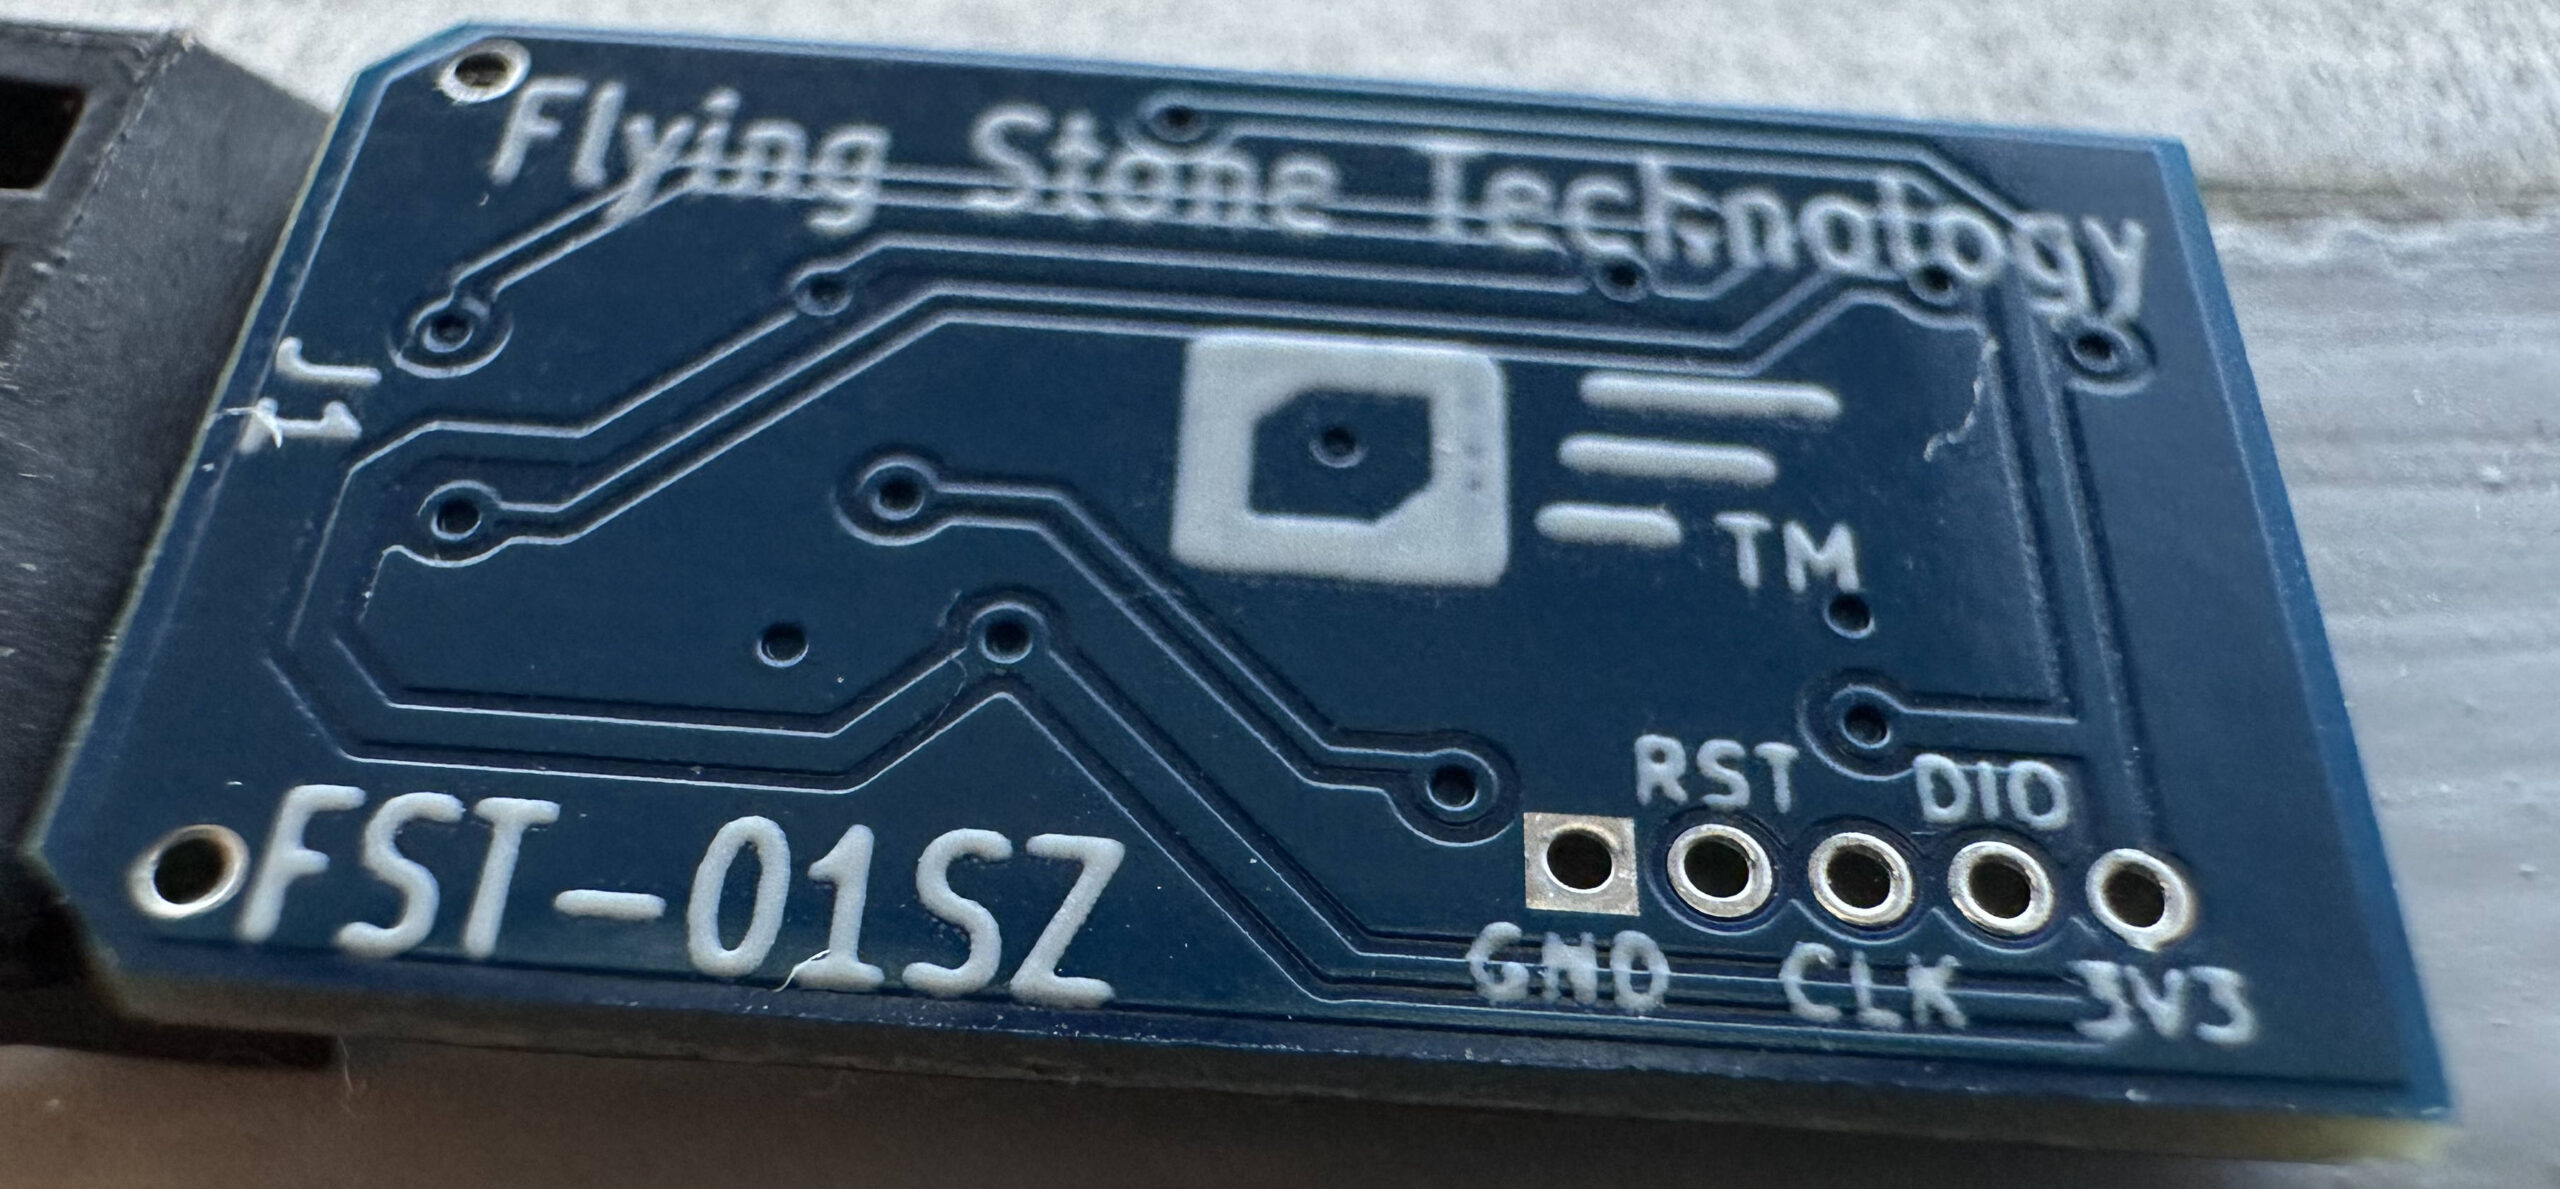

 Login with root / your password and you shall get the front page:
 and many other pages where you can manage your ALP deployment via browser:
 All in all, ALP is in early phases but I m really happy there s up-to-date documentation provided and people can start experimenting it whenever they want. The images from the linked directory should be fairly good, and